


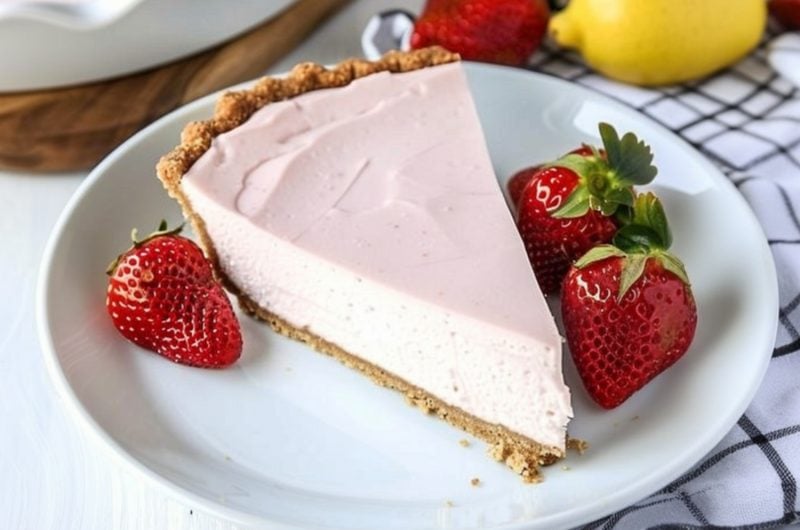
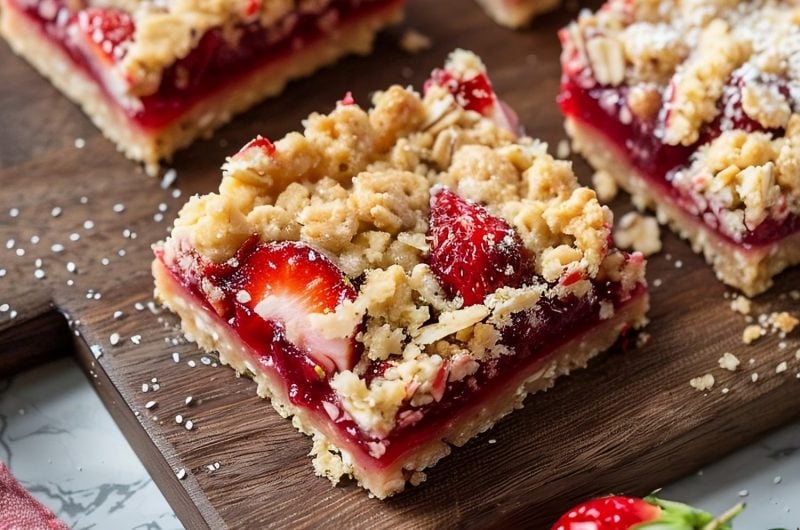
Nothing beats this homemade strawberry pie with frozen strawberries for dessert! Regardless of the season, it’s a perfect way to end a meal.
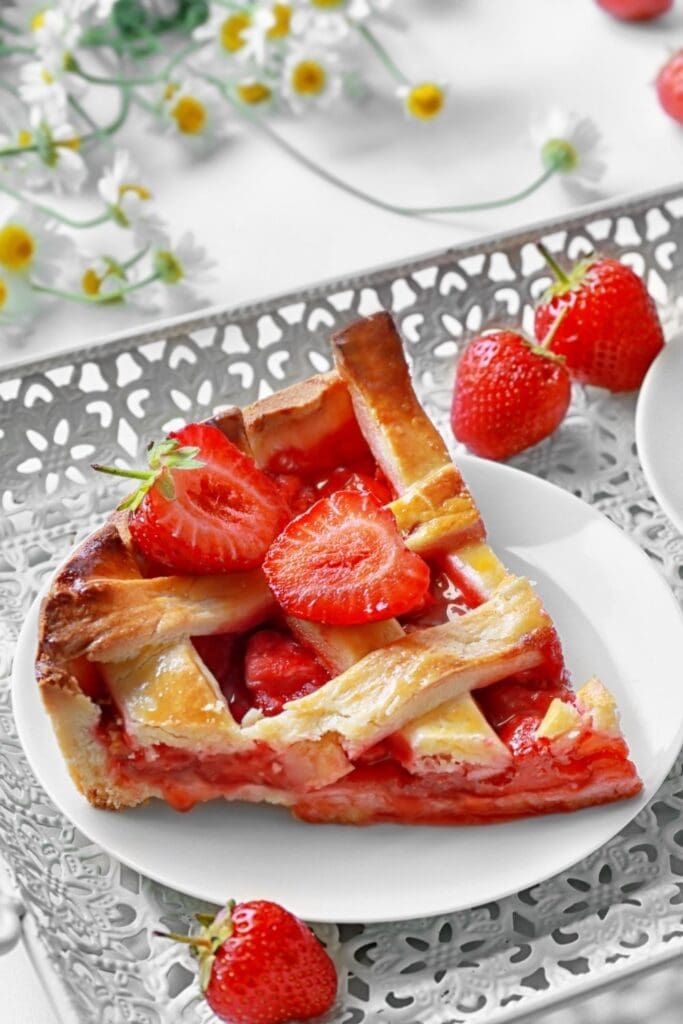
Strawberry pie is a timeless classic. A sweet, tart, and fruity strawberry filling is encased in a buttery flaky crust.
From the presentation to the flavor to the texture, this pie is pure perfection.
WANT TO SAVE THIS RECIPE?
Who says you need to wait for summer to get a slice of this culinary work of art, though?
Use frozen strawberries and you can enjoy your favorite strawberry pie any day of the year.
I bet you’re already drooling, so let’s get started!
Strawberry Pie With Frozen Strawberries
Fresh strawberries are the best option when making strawberry pie. There’s no doubt in my head about that.
But what if you have a sudden craving and they’re not in season? Is there really no choice but to let your tastebuds wait in vain?
Of course not! This is exactly what frozen strawberries are for.
While they won’t yield the same spectacular texture, there are ways to make it work, and I’m here to help you achieve pie success.
With my recipe, along with a handful of tips and tricks,
I guarantee you’ll be able to make delicious strawberry pie even when all you have are frozen strawberries.
Can You Bake With Frozen Strawberries?
For sure! With frozen strawberries, there’s no need to wait for summer to bake and enjoy a strawberry pie.
Just be sure to thaw the frozen berries completely before using them.
Dry them with paper towels to eliminate as much liquid as you can. Otherwise, your pie filling will be soupy.
Also, you’ll want to use a mixture of flour and cornstarch to help thicken the filling.
How to Make Strawberry Pie
If you plan to make the crust from scratch, do it now. If you're using a pre-made crust, preheat the oven to 425 degrees Fahrenheit.
Fit the first pie crust into a 9-inch pie pan. Set it aside.
Now, it's time to make the filling. Be sure to thaw the strawberries at least 30 minutes beforehand. Frozen berries will melt into a runny filling during baking.
Pat the strawberries dry with paper towels to get rid of the liquid. Cut them into thin, 1/4-inch slices.
In a large bowl, stir together the sugar, flour, cornstarch, and cinnamon. Add in the strawberries and toss to coat.
You’ll notice that the filling ingredients do not include water. This is because you’ll use frozen strawberries instead of fresh.
Adding water will only cause the filling to be runny.
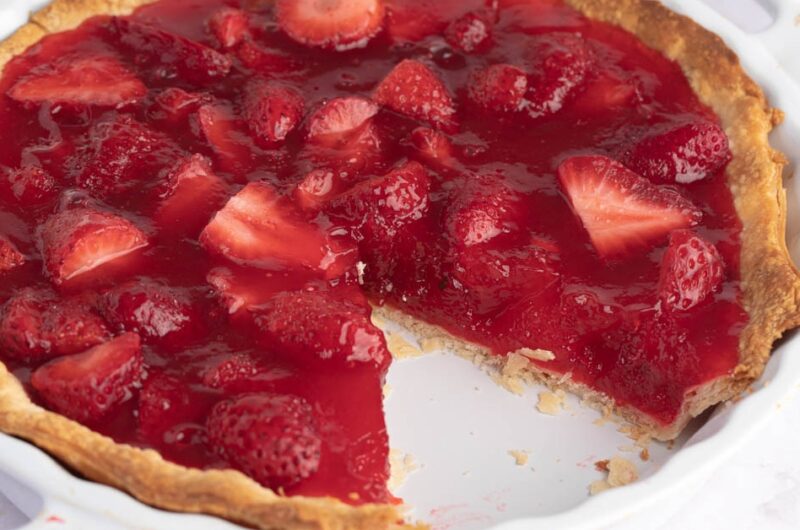
Pour the strawberry filling into the pie pan. Top the filling with cubes of butter. This will add richness to the pie.
Cover the filling with the second pie crust. Crimp the edges of the crust using your fingers.
Not only will this create pretty pie edges, but it will also seal in the filling.
This isn’t required, but it really gives the crust a nice golden finish. Beat together an egg and 1 tablespoon of milk or water.
Brush the top crust with the egg wash.
Using a knife, cut slits in the top crust. Apart from decorative purposes, it also allows steam from the filling to escape out of the pie.
Alternatively, you can also stick holes in the crust using a fork.
Bake the pie at 425 degrees Fahrenheit for the first 30 minutes.
Reduce the oven heat to 375 degrees Fahrenheit and bake for 20 more minutes. The crust should be golden brown at this point.
If the crust is turning brown too quickly, cover the pie loosely with aluminum foil.
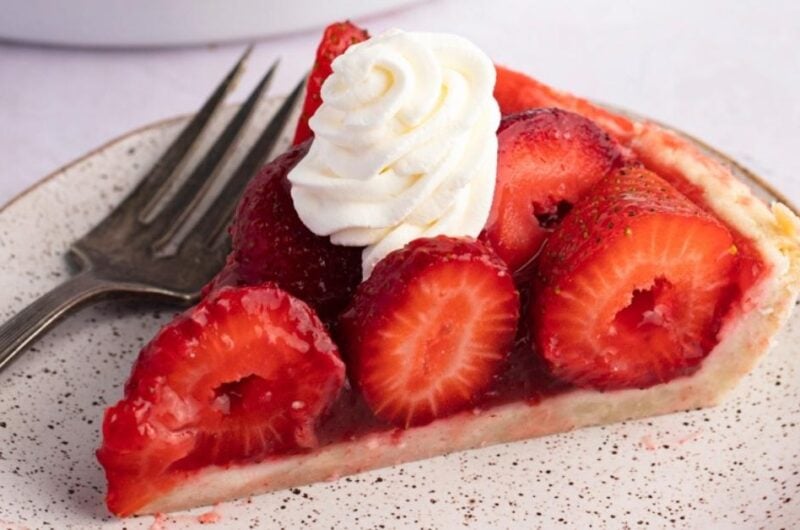
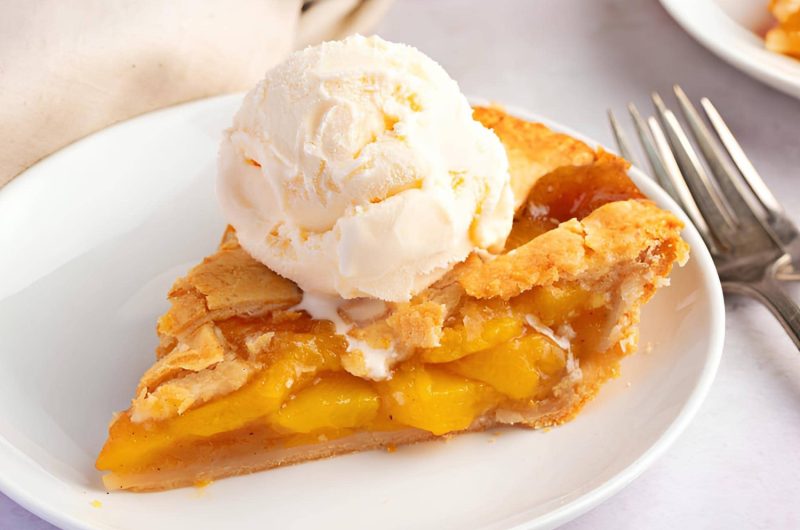
Let the pie cool to room temperature for about 2 hours. Slice and enjoy!
How Do You Thicken Strawberry Pie Filling?
Strawberries are among the juiciest fruits there are, so you’ll definitely need a thickener if you don’t want a soupy pie.
While the majority of strawberry pie recipes use gelatin to thicken the filling, I’m not a huge fan of the gelatinous texture it results in.
So for my pie recipe, I like using a combination of 1/3 cup flour and 3 tablespoons of cornstarch.
I’ve experimented with other thickeners before, and I find that this combo yields a perfectly thick and silky strawberry pie filling.
If you don’t have cornstarch, though, just add 3 tablespoons to the flour and your filling should be nice and thick.
I also find tapioca flour (6 tablespoons) to be very effective. It’s just I don’t usually have this ingredient on hand.
Tips for the Best Pie
- Let the frozen strawberries thaw completely to room temperature beforehand. Take them out of the freezer for 30 to 60 minutes before preparing. Pat them dry with paper towels to avoid a watery filling.
- Cut a V into the top of the strawberries to get rid of the stems. Slice them lengthwise into thin, 1/4-inch wide pieces.
- Are the strawberries too tart? Add more sugar to balance it out.
- The pie slits aren’t just for decoration, so don’t skip this step. The slits allow the steam from the pie filling to escape.
- Brush the top crust with a mixture of 1 beaten egg and 1 tablespoon of milk or water. This will give your pie a nice golden finish.
- Sprinkle the top crust with cinnamon sugar for a sweet and crunchy exterior.
- Pre-bake the bottom crust for 15 minutes at 350 degrees Fahrenheit to prevent it from being soggy. This process is called blind-baking.
- This recipe calls for baking the pie at a high temperature during the first half, and at a reduced temperature for the remainder of the time. This is to allow the filling to cook evenly without over-browning the crust.
If you don’t want to change the temperature of the oven, just cover the pie loosely with aluminum foil mid-way through baking.
This will prevent the crust from over-browning.
- Let the pie cool for at least 2 hours before slicing. The thought of warm, freshly baked pie sounds appetizing, but don’t let it tempt you into cutting it way too soon.
If you slice your pie right after baking, you’ll only get a soupy, runny filling. You'll want the pie to be at least at room temperature before you slice.
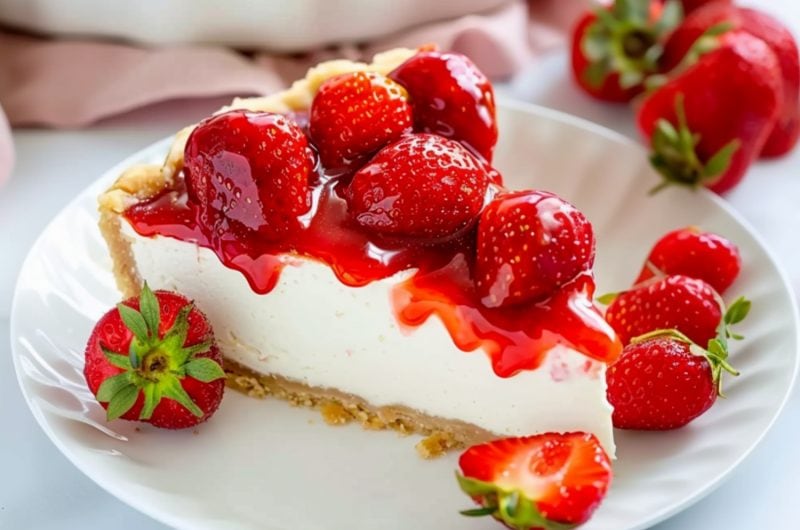
- Serve pie with a dollop of whipped cream or a scoop of vanilla ice cream. Garnish with fresh basil or mint for added flavor.
- Make the pie ahead of time by preparing the filling a day before.
- Have leftovers? Cover the pie plate with foil or plastic wrap and store it at room temperature for up to 2 days, or refrigerate it for up to 5 days.
- Want a longer shelf-life? Freeze the pie for 1 hour. Then, double wrap it tightly with plastic wrap and aluminum foil. Freeze it for up to 4 months.
Defrost the frozen pie in the fridge before serving.
Pie Variations
- Use more or other berries for more flavor. I like to add blueberries and raspberries with strawberries for a wonderful color combination.
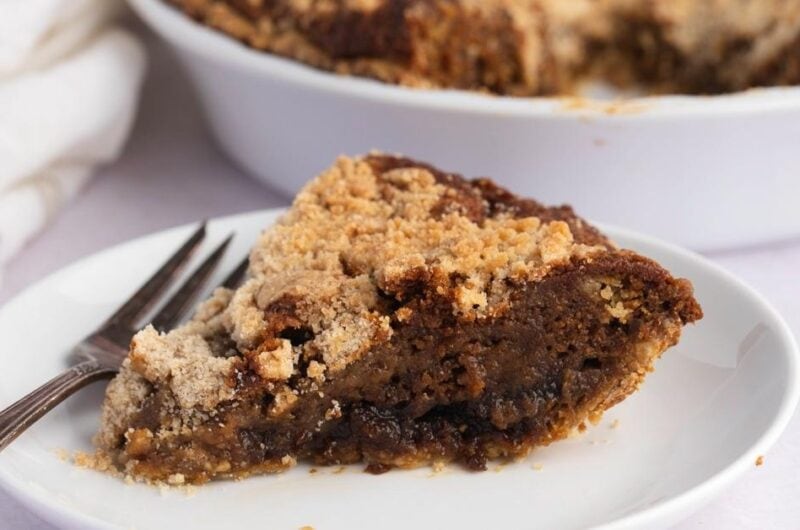
- Instead of a pie crust, use a crumble topping instead. Combine flour, granulated sugar, brown sugar, and cold butter until coarse and crumbly. Sprinkle the mixture on top and bake as instructed.
- Top the filling with small cubes of cream cheese for a cheesy twist.
How to Make Pie Crust from Scratch
This strawberry pie tastes phenomenal whether or not you make the crust from scratch.
The recipe doesn’t require it, but in case you’re interested, here’s how to make your very own pie crust.
Ingredients
- 2 cups all-purpose flour
- 2/3 cup cold butter, cubed
- 5-7 tbsps cold water
Directions
1. Preheat the oven to 425 degrees Fahrenheit.
2. In a food processor, add the flour and cubed butter. Mix them together until the mixture resembles coarse crumbs. Stir in the water until a moist dough is formed.
3. Divide the dough into 2 balls. Cover them with plastic wrap and chill for 30 minutes.
4. Take 1 dough and flatten it with a rolling pin to make a 9-inch round. Repeat the process with the remaining dough.
Pro-tips:
- Be sure to use cold butter and water. This will guarantee you a flaky crust.
- The food processor is the best equipment to use when making pie crusts. It helps the butter and water stay cold while mixing, which then makes the crusts tender and flaky.
- If you don’t own a food processor, use a pastry blender to combine the flour and butter. You can use your hands in a pinch, but you’ll have to work fast. Hands are naturally warm, so using them will cause the butter to soften and melt.
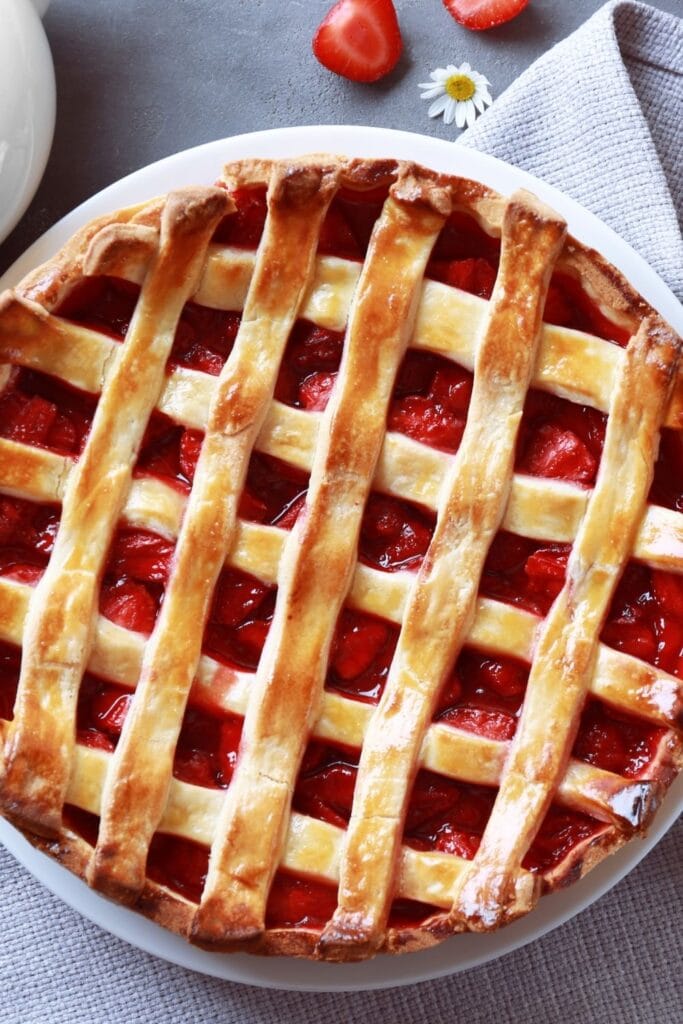
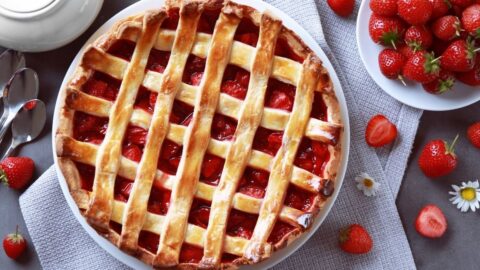
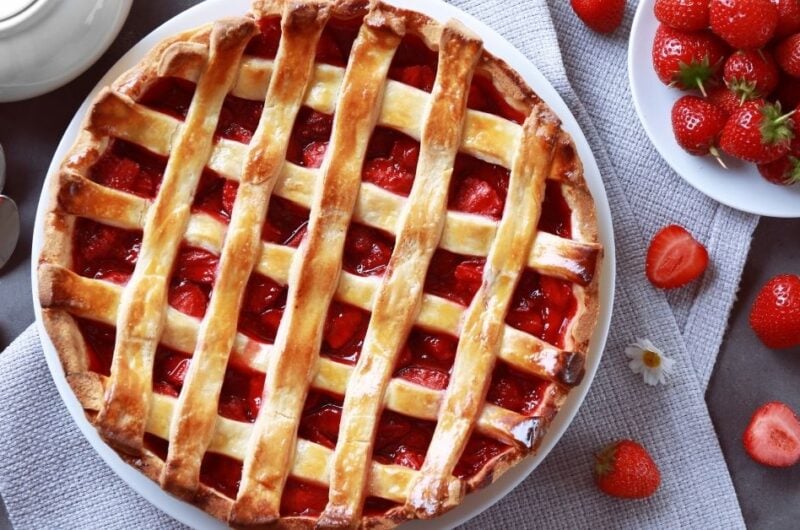
How to Make a Lattice Top Crust
Don’t you think the lattice pattern adds such a rustic feel to your pie? It’s not just for decorations, either.
Because certain parts of the filling are exposed, the better it’ll cook and the less likely it’ll turn out runny. It’ll also allow you to check if it’s cooking beautifully.
Plus, it’s not as complicated as you think! Here’s how:
1. Use a pizza cutter to slice the crust into thin, vertical strips.
2. Arrange the strips on top of the filling in alternating layers to form a criss-cross pattern.
3. Cut the excess with a knife and crimp the edges to seal the pie.
More Pie Recipes You’ll Love
- No-Bake Peanut Butter Pie
- Millionaire Pie
- Pumpkin Pie
- 10 Easy Pie Crust Desserts
- 30 Spring Pie Recipes for Pi Day
Strawberry Pie With Frozen Strawberries
8
servings10
minutes50
minutes412
kcalIngredients
2 (9-inch) unbaked pie crusts
1 1/4 cups granulated sugar
1/3 cup all-purpose flour
3 tablespoons cornstarch
1/2 teaspoon ground cinnamon
4 cups frozen strawberries, thawed
2 tablespoons butter, cubed
Instructions
- Preheat the oven to 425 degrees Fahrenheit. Fit a crust into the bottom of a 9-inch pie pan.
- In a large bowl, combine the sugar, flour, cornstarch, and cinnamon. Toss in the strawberries to coat.
- Pour the strawberry filling into the pastry-lined pie pan. Place cubes of butter over the filling.
- Cover the filling with the second pie crust, crimping the edges to seal the pie. Cut slits in the crust to allow steam to escape while baking.
- Bake the pie at 425 degrees Fahrenheit for 30 minutes. Reduce the heat to 375 degrees Fahrenheit and bake for an additional 20 minutes.
- Let the pie set for at least 2 hours before serving. Slice and enjoy!


1 Comments
Made this tonight. Turned out fantastic. Not soupy, pie held together. It got rave reviews from my guests! Wish I could post a pic