


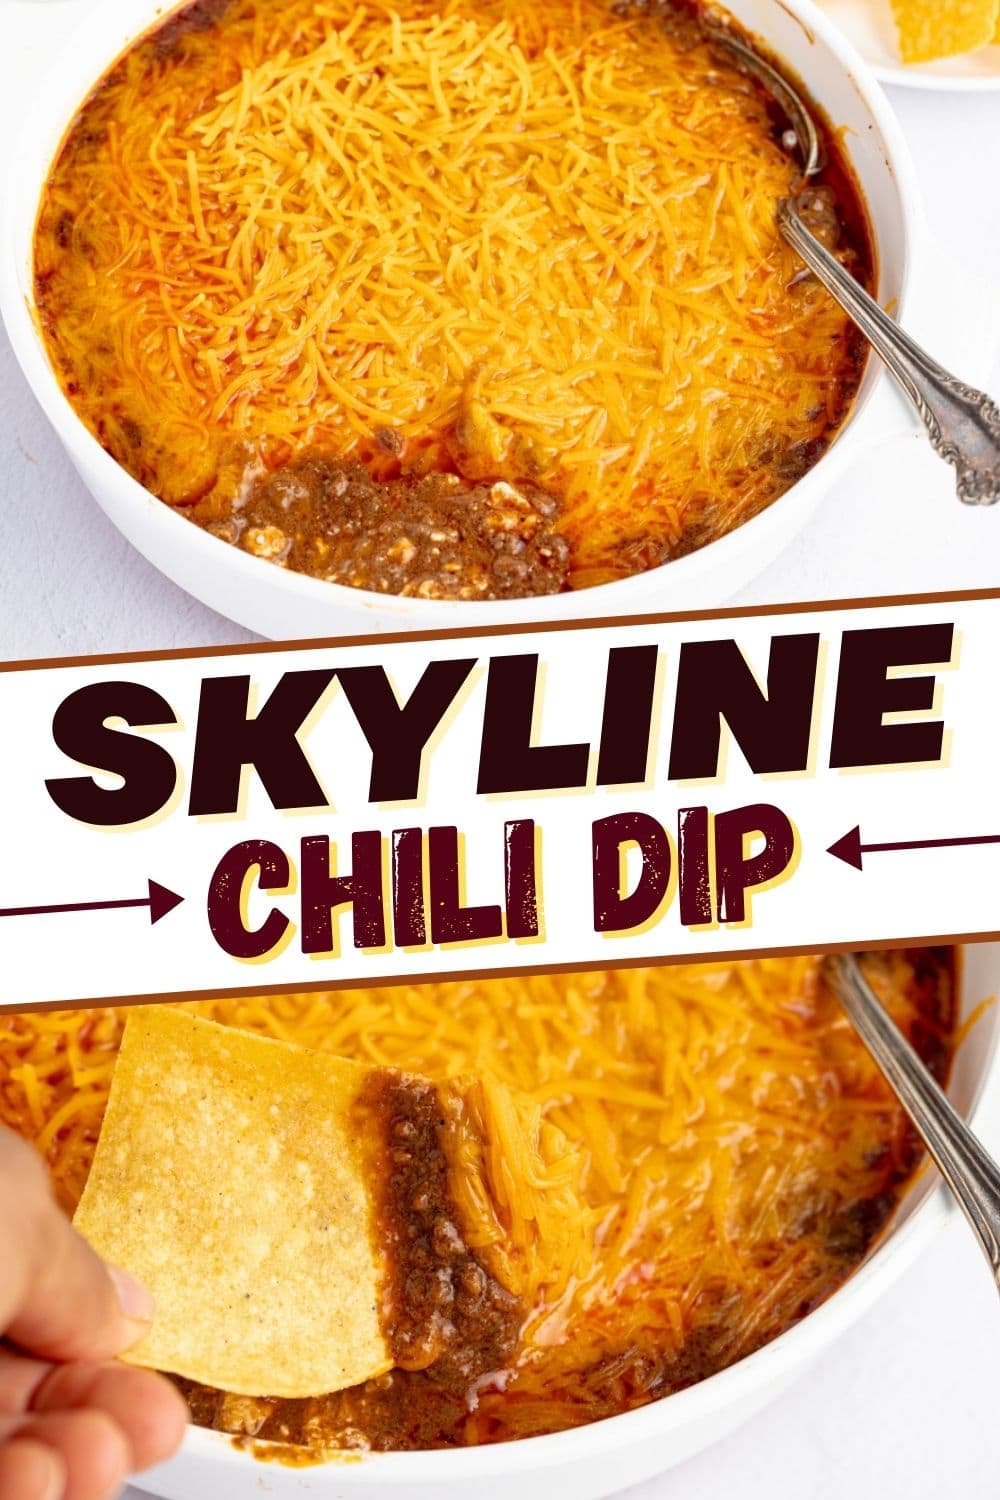
Whether it’s on game day, New Year’s Eve, or just a random weekday, this Skyline chili dip is a must-have. This fabulous dip will transform a simple get-together into an epic bash.
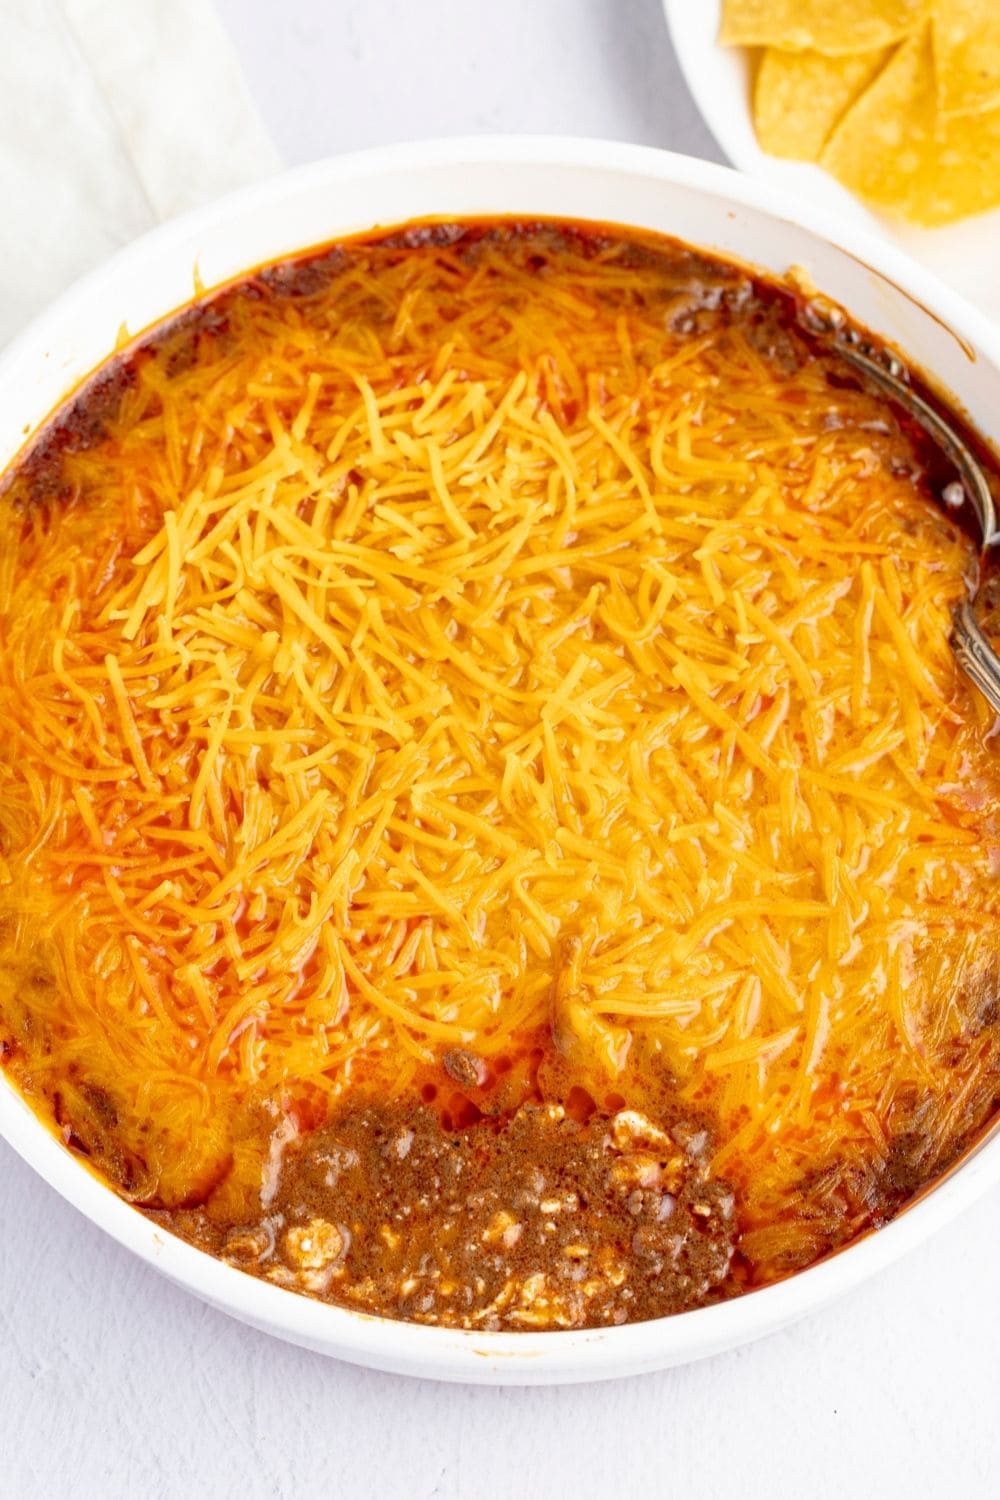
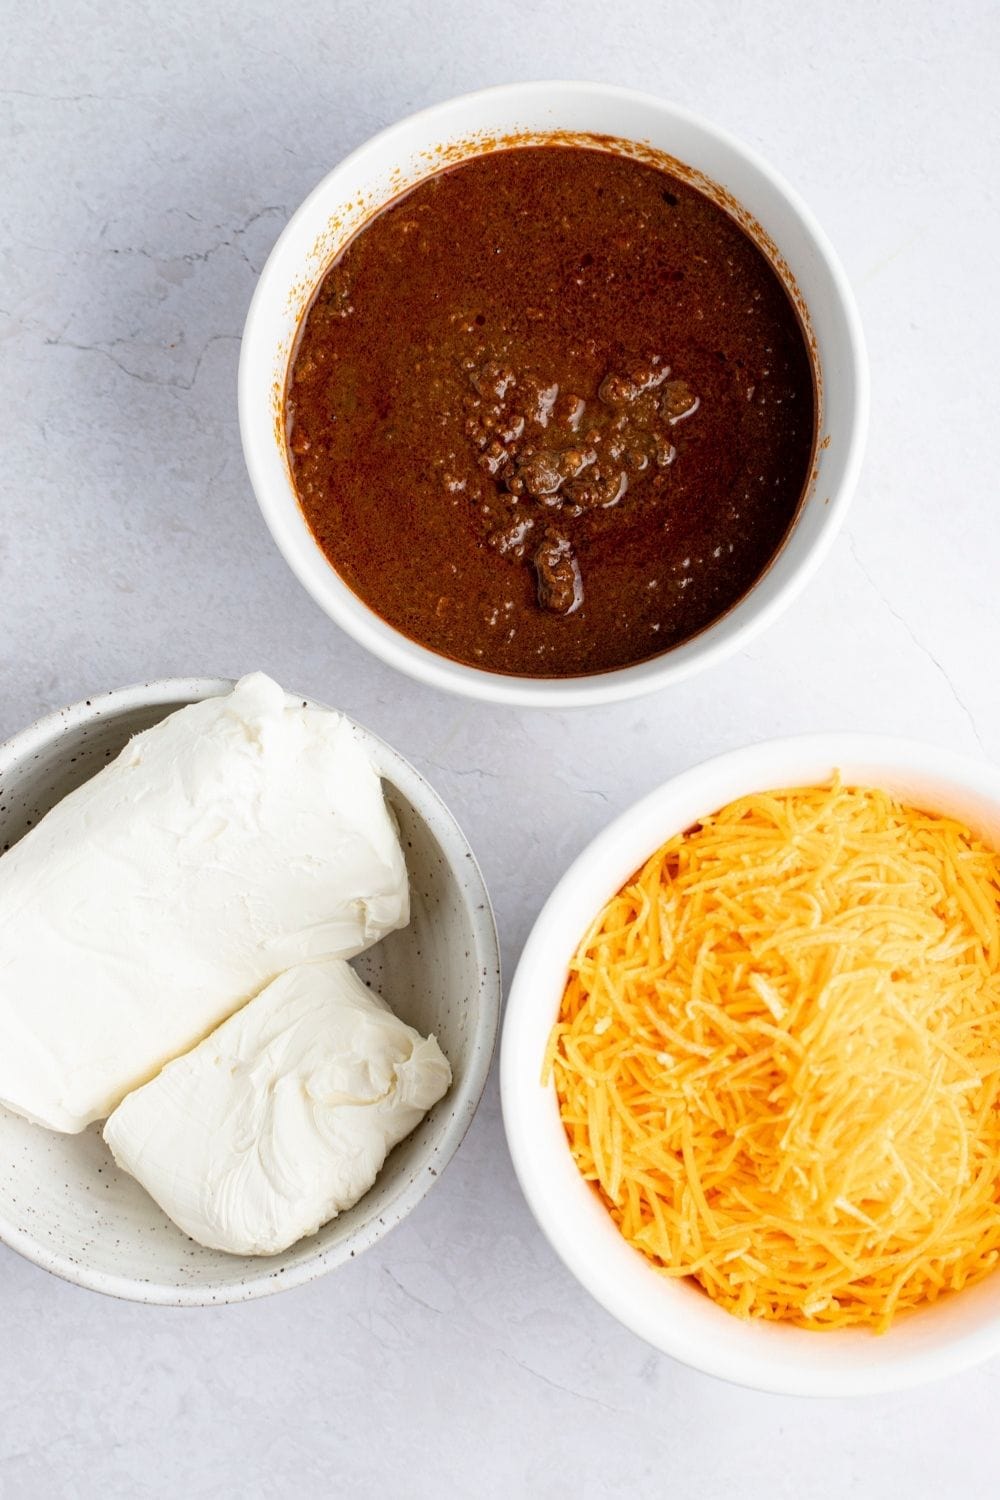
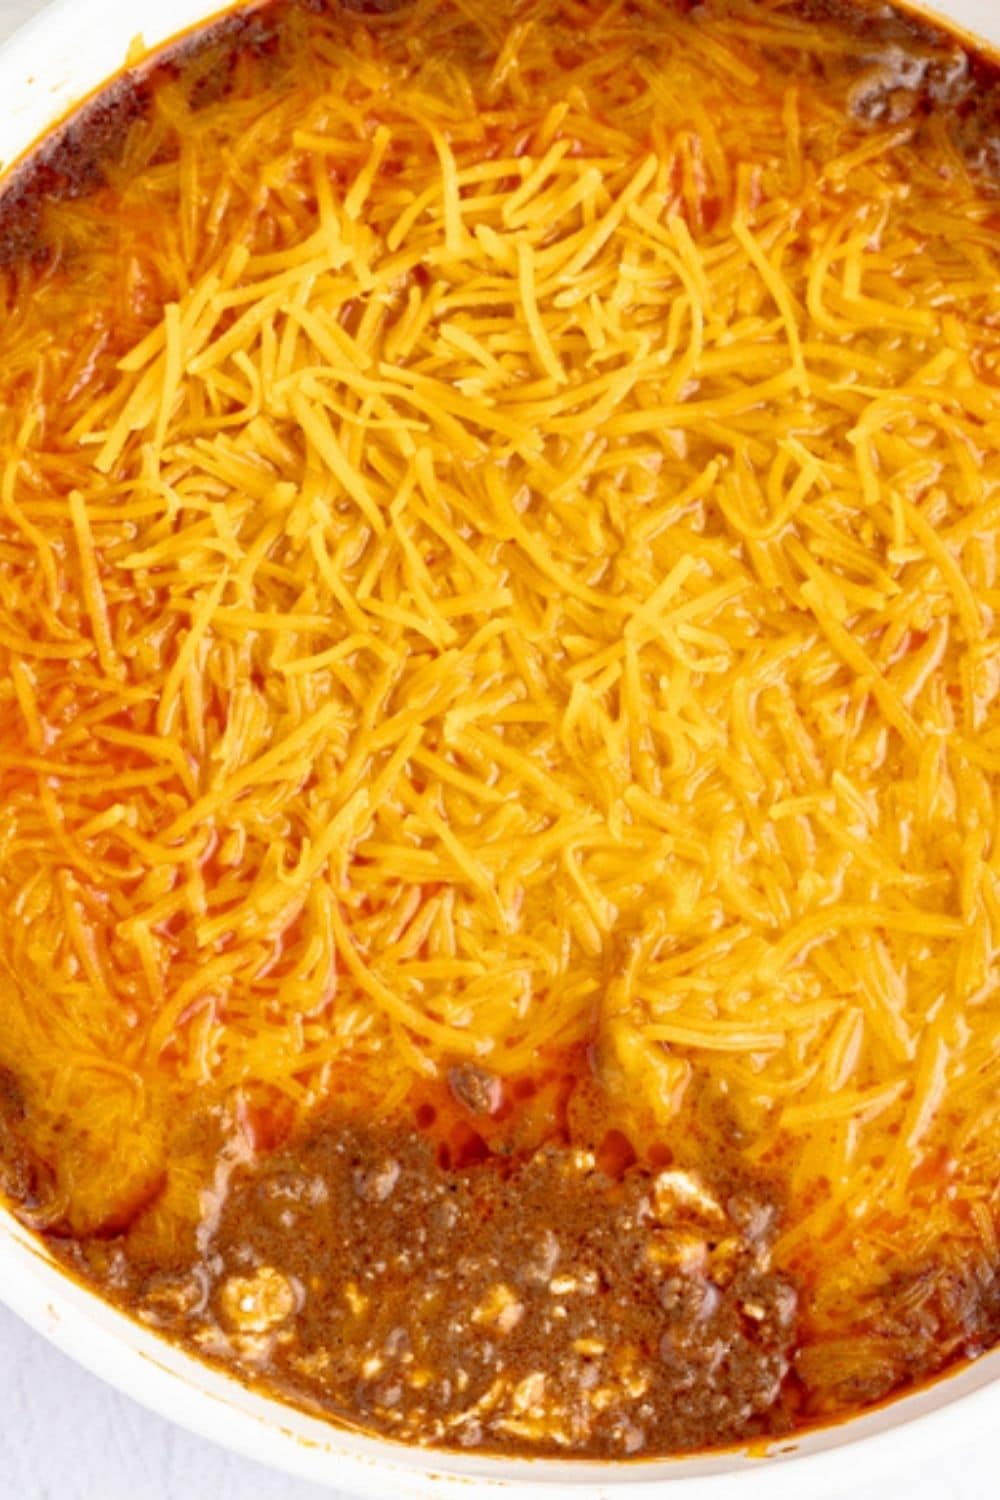
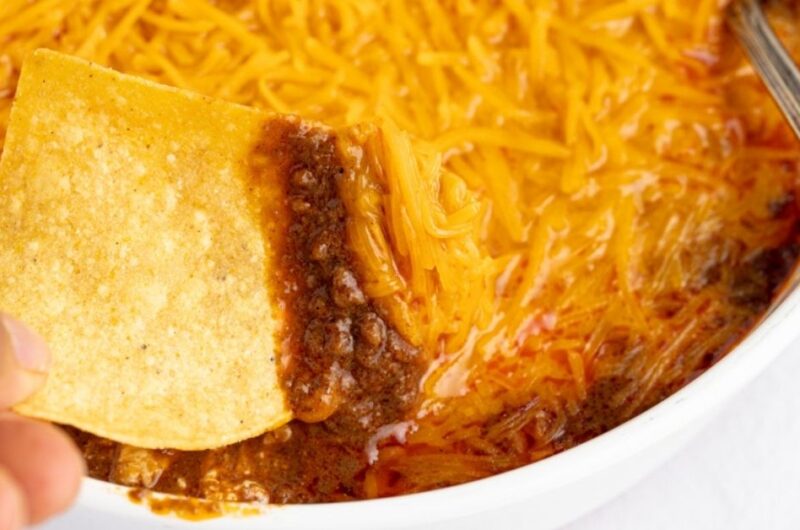
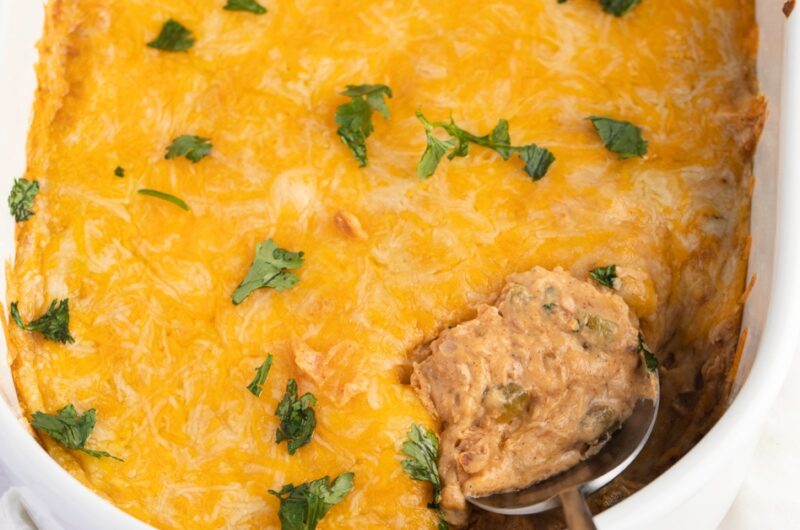
It has cream cheese at the bottom, Cincinnati-style chili in the middle, and melted cheddar cheese on top. This chili is the ultimate party pleaser.
WANT TO SAVE THIS RECIPE?
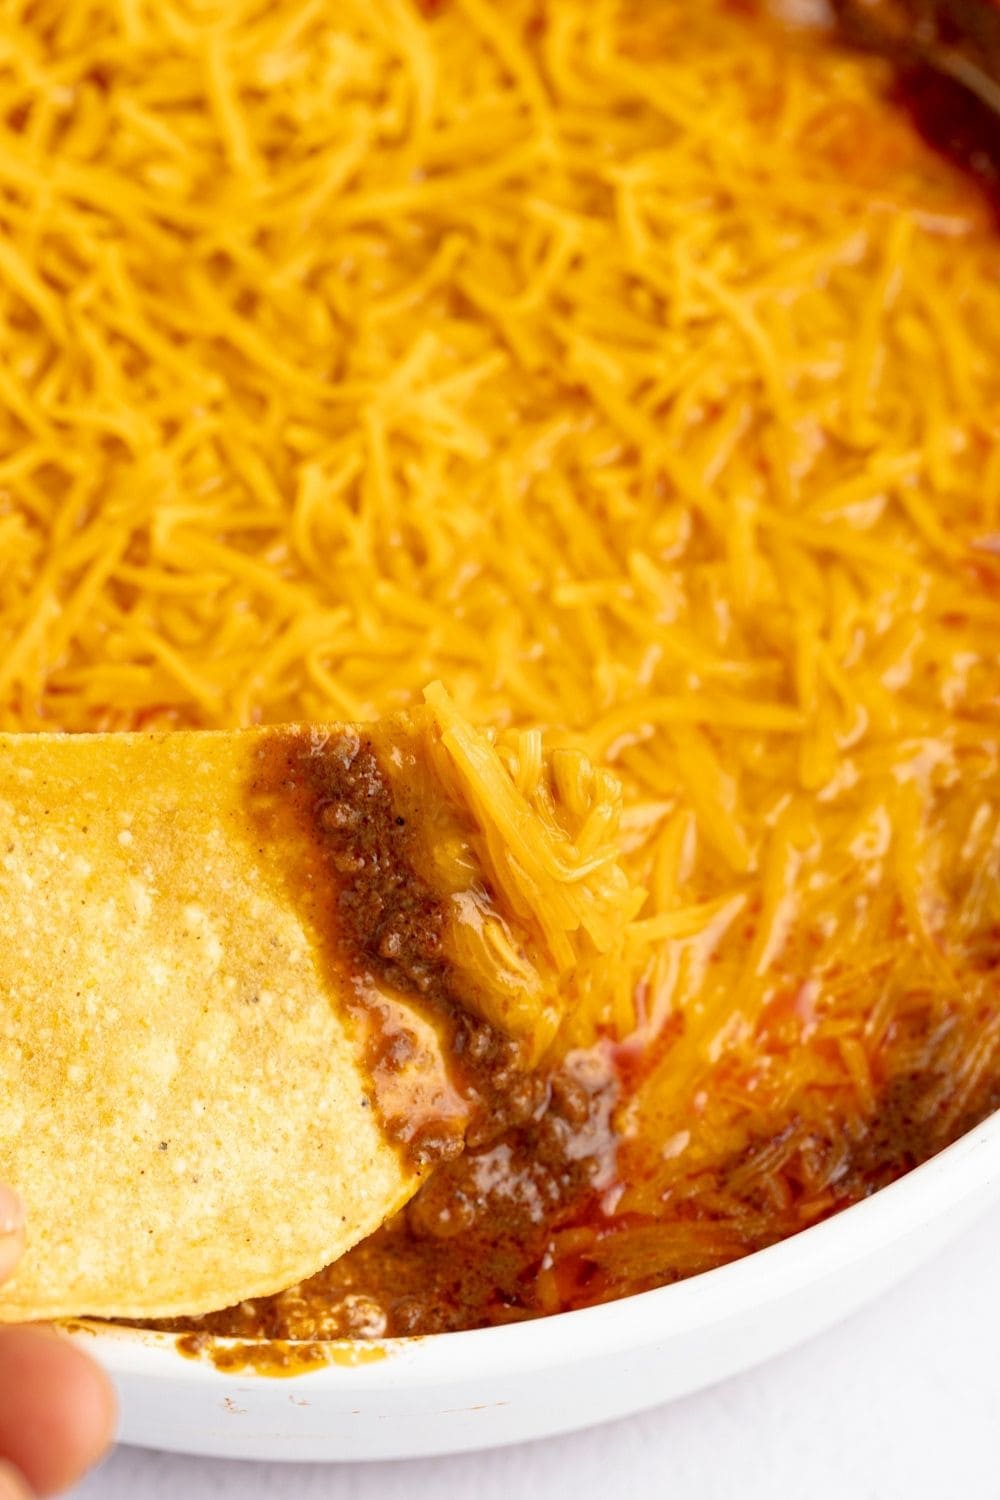
It’s perfect with chips, crackers, and crudites. But it’s also just as delicious on its own. I'm not ashamed to say I've eaten it with a spoon.
Best of all, it couldn’t be easier to make. With just three ingredients, this recipe is newbie-friendly and foolproof.
What is Skyline Chili Dip?
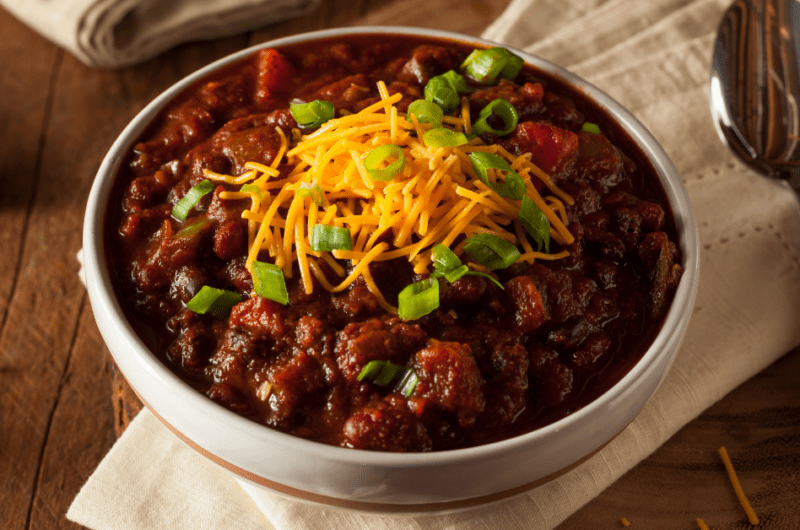
Before we dive into the dip, let’s talk about Cincinnati chili first.
Cincinnati-style chili is more than just your average chili. It's infused with chocolate and Mediterranean spices. It offers a complex flavor profile that'll leave your tastebuds wanting more.
Skyline Chili is one of the best restaurants serving the most iconic Cincinnati-style chili. They also sell bags of pre-made chili, which you can use to make this chili dip.
The layers of cream cheese, Skyline chili, and grated cheddar cheese are to die for. It's the perfect party appetizer.
It’s hot and bubbly, cheesy and meaty, and everything you can ask for in a dip.
How to Make Cream Cheese Chili Dip
It’s so scrumptious, it tastes like it requires a ton of work. But in reality, it takes little to no effort.
- Start by preheating the oven to 375 degrees. Then, spread the cream cheese into the bottom of a 9×13-inch baking dish. Use a baking dish that’s deep enough to fit all three layers.
Be sure to use softened cream cheese so it's easy to spread. If you forget to take it out of the fridge, microwave it in 10-second intervals. - Microwave the chili for 2 minutes on high. I use Skyline chili for this recipe for obvious reasons. But you can use other brands as well. If you have leftover homemade chili, use that!
- Spread the heated chili evenly on top of the cream cheese layer. Bake it for 10 minutes.
You can also bake the dip with the shredded cheddar cheese on top for 20 to 25 minutes. This will give you that melty, ooey-gooey topping.
If you choose the first method, top the chili layer with shredded cheddar cheese after 10 minutes of baking. Let it sit for 5 minutes, and voila! - Serve it with chips, crackers, or crudites. Anything you like to dip works!
Can You Make This Dip in the Crockpot?
Absolutely. Expect it to have a looser consistency compared to a baked dip, but it’ll still be super scrumptious.
- Spread the cream cheese into the bottom of the Crockpot. Top it with chili, and cook it on low for 2 to 3 hours.
- Top it with the shredded cheese. Cook it on low for another 10 minutes or until the cheese is melted.
It's so easy!
Can You Make this Dip in the Microwave?
Good news, lazy cooks! You can definitely make Skyline chili dip in the microwave. Just be sure to use a microwave-safe dish, and you’ll be fine.
- Spread the cream cheese into the bottom of the dish. Top it with chili. Microwave it for 3 to 5 minutes and sprinkle the cheese on top.
- Microwave it for another 2 to 3 minutes or until the cheese is melted.
Tips for Making The Best Skyline Chili Dip
- Indulge in full-fat cream cheese. Now is not the time to worry about your diet. This dip only has three ingredients, so every component is essential.
If you use low-fat cream cheese, you can tell the difference. My brand of choice is Philadelphia because its quality is unmatched.
- There's a secret to spreadable cheese. Set it out on the counter 1 hour beforehand. Or, pop it in the microwave in 10-second intervals until it becomes spreadable.
- Shred your own cheese. The original Skyline chili dip recipe calls for a bag of Skyline shredded cheddar cheese. But I prefer to shred the cheese myself.
Pre-shredded cheese is coated with cellulose. It's an anti-caking agent that prevents the cheese shreds from clumping together. While it’s safe to eat, it also reduces the cheese’s maximum melting potential.
- Cheese your own adventure. Mild, Pepper Jack, or sharp cheddar cheese works best for this dip. But then again, feel free to experiment. I imagine any melting cheese to work fine.
- Try a chili swap. Naturally, this recipe calls for Skyline chili, but don’t feel like you need to limit yourself to this brand. As long as you follow the basic formula of cream cheese + chili + grated cheese, you’ll be fine.
Variations
- Chip Champ: Dive in with nachos, tortillas, Fritos, potato, or corn chips. The crunchier, the better!
- Cracker Craze: Stack up saltines, soda, sesame, oysters, or Wheat Thins for a perfect bite.
- Mexican Magic: Pile it on tacos or pack it into enchiladas, quesadillas, and burritos for a fiesta in your mouth.
- Veggie Victory: Go green with celery, cucumber, bell peppers, and carrot sticks for a fresh dip delight.
- Chili Dog Delight: Elevate your hot dog to Coney status with a lavish ladle of chili dip.
- Pasta Perfection: Get Cincinnati sassy and dress your pasta in chili dip sauce for a twist.
- Spoon-Ready Goodness: Grab a spoon and savor every flavorful scoop!
How to Store and Freeze
In the unlikely event of leftovers, follow these steps to store and freeze the dip.
To store: Place the dip in an airtight container and refrigerate it for up to 4 days.
To freeze: This dip freezes beautifully, so you can double or triple the recipe and store the rest in the freezer. It keeps well for up to 2 months.
Place the dip in a freezer-safe container, label it, and freeze it. Thaw it overnight before reheating.
To reheat: Reheat refrigerated dip in the microwave. But be sure to reheat only the amount you plan on eating. Don’t re-refrigerate reheated dip. The quality won’t be the same.
More Dip Recipes You’ll Love
Skyline Chili Dip
This Skyline chili dip recipe is a must for any party! Made with cream cheese, chili, and cheddar, it's a Cincinnati favorite!
6-8
servings10
minutes15
minutesIngredients
12 ounces cream cheese, softened
1 (14-ounce) pouch of Skyline Chili
1 (12-ounce) bag of Skyline Chili shredded cheddar cheese
Instructions
- Preheat the oven to 375 degrees.
- Spread the softened cream cheese into the bottom of a 9×13-inch baking dish.
- Place the Skyline chili in a microwave-safe bowl and microwave it on high for 2 minutes. Spread the heated chili evenly over the cream cheese layer.
- Bake it for 10 minutes. Top it with shredded cheddar cheese.
- Let the dip sit for 5 minutes. Serve it with tortilla chips and enjoy!


5 Comments
Where do you get Skyline Chili??
Hi Marie, a lot of major grocery stores have it, but you can also order it on Amazon!
Publix carries it if your not near one of their restaurants
What is skyline chili?
Hi June, it’s a famous chain of chili restaurants out of Cincinnati, Ohio. At Skyline, the chili is typically served on top of spaghetti. People love it!