


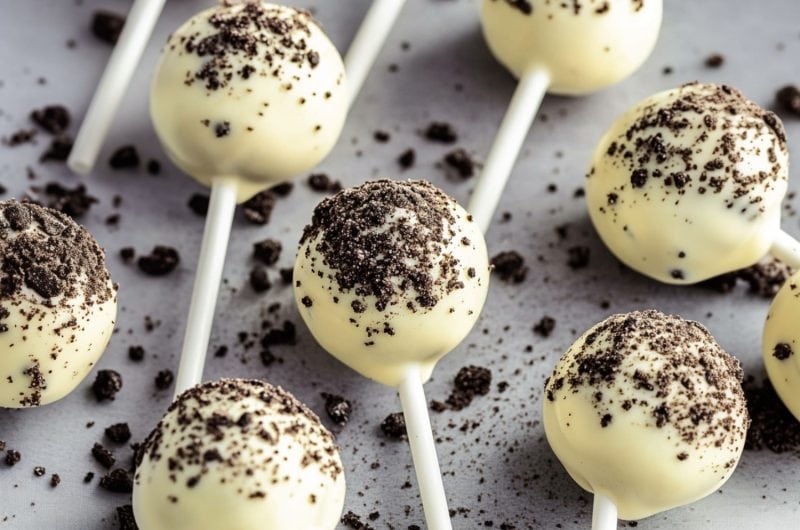
The next time you crave something sweet, skip the line and the expensive (but delicious) coffee.
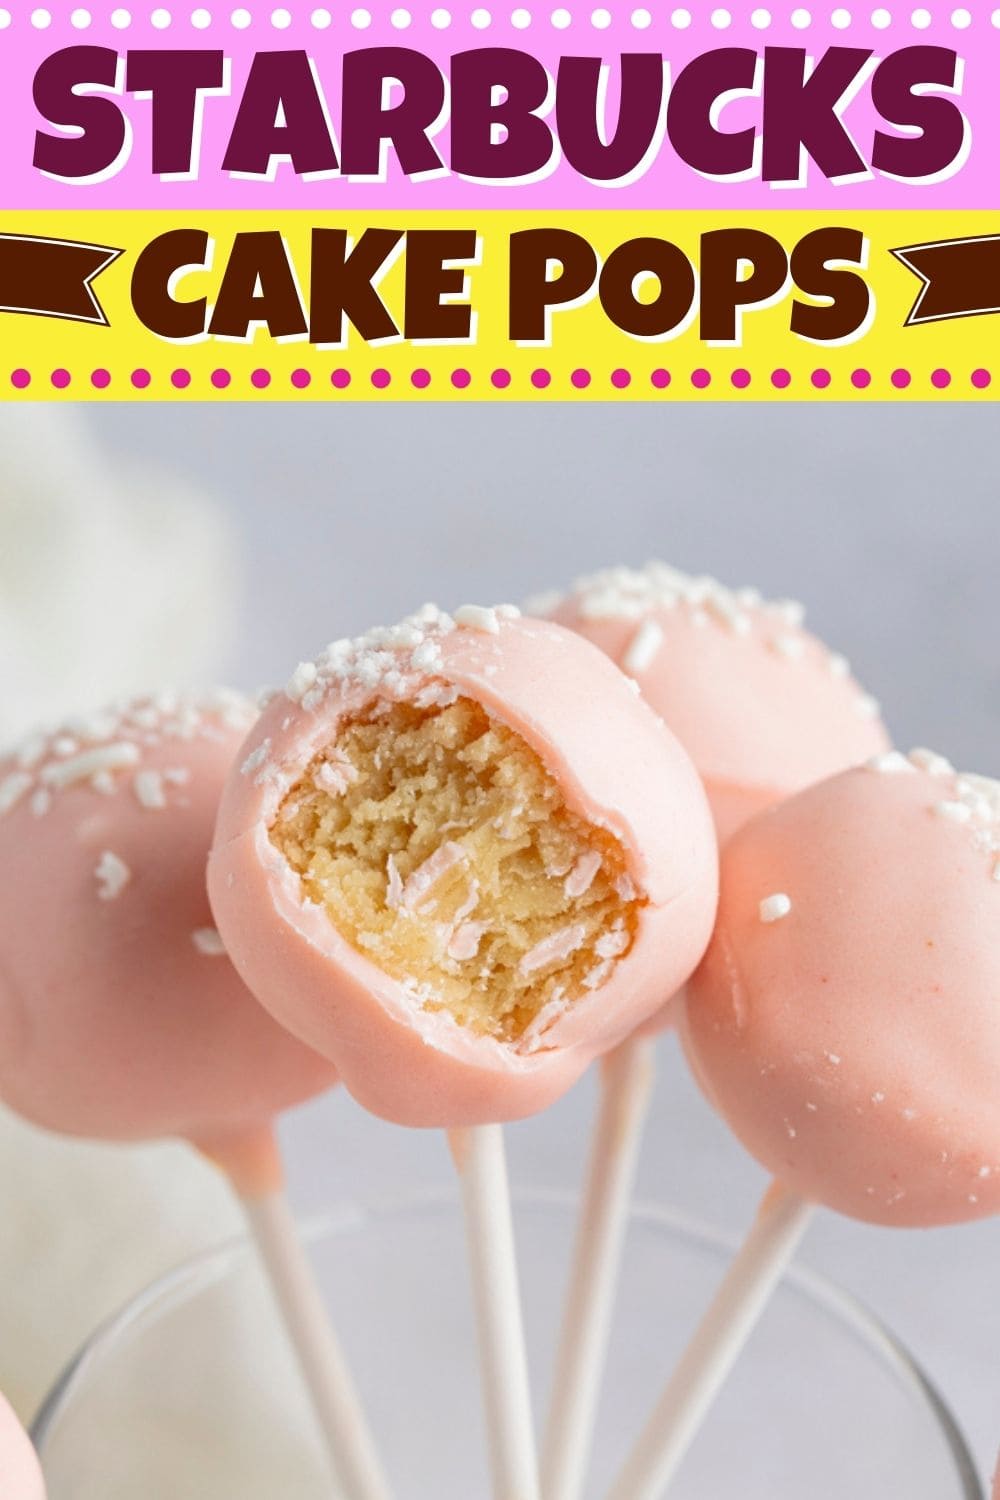
Instead, just make these easy and delicious copycat Starbucks cake pops at home.

WANT TO SAVE THIS RECIPE?
These babies taste exactly like the originals but are so much more economical.
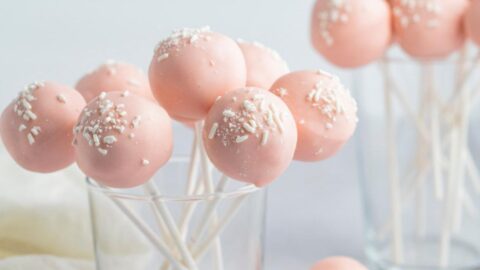
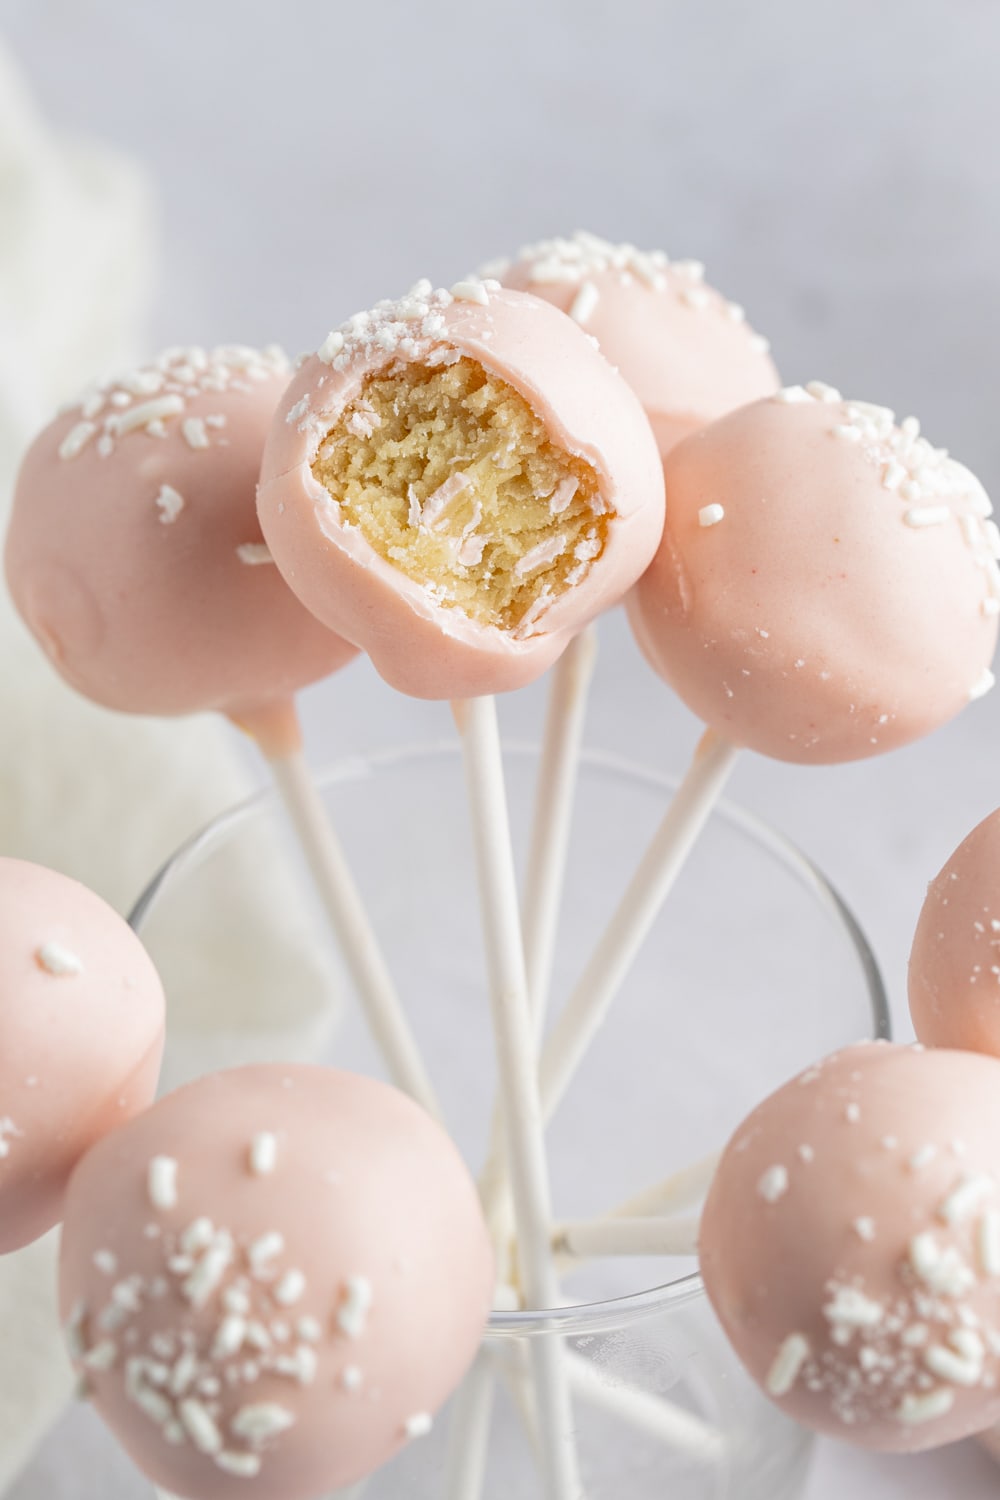
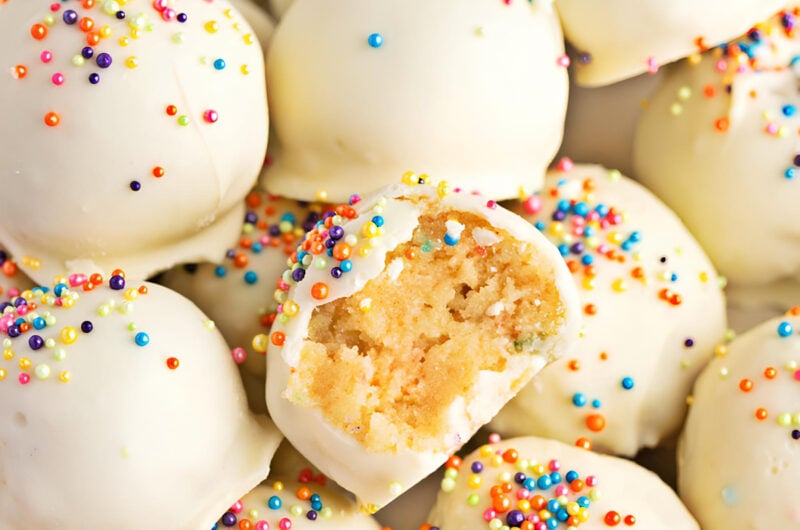
With a crunchy chocolate coating and a moist and creamy cake mix on the inside, cake pops are the ultimate bite-sized treat.
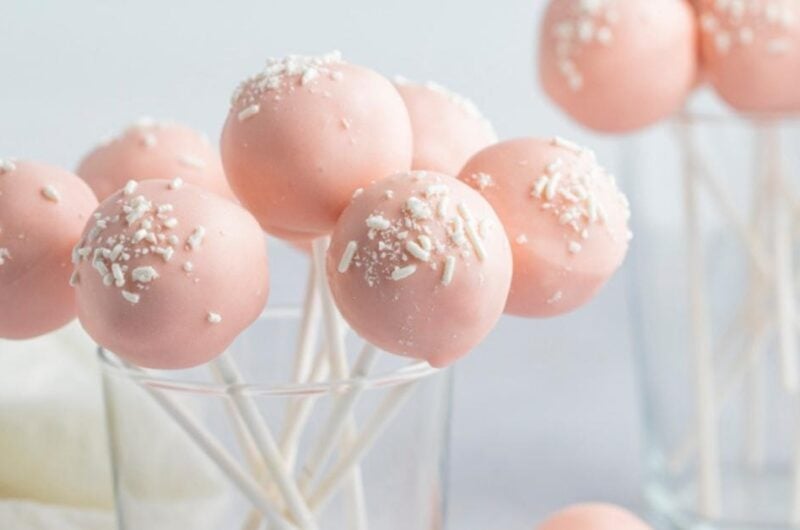
And because you can flavor and decorate them any way you like, they’re perfect for any occasion!
Of course, these Starbucks cake pops are pretty in pink with a wonderful nutty flavor.
Let's get to it!
Homemade Starbucks Cake Pops
Cake pops are crazy easy to make and start with a mixture of cake crumbles and frosting.
So, if you have tons of leftover cake (or maybe some cake you overbaked), cake pops are the perfect dessert to make.
Of course, you can bake any cake from scratch to make cake truffles.
You could even buy a whole cake that's frosted and ready to eat and mash it up if you want!
But why make life so hard? You'll be crushing it up anyway, so a boxed cake mix and store-bought frosting should do the trick – and save you on time too.
Once you've mixed the sponge and the frosting to make a soft yet firm consistency, it gets rolled into bite-sized balls and dipped into melted chocolate.
These cake pops are super tasty and easy to make, and they’re much more affordable than the ones offered at Starbucks.
So save yourself the trip and make these at home. You won't regret it!
What are Cake Pops Made Of?
Cake pops are usually a blend of plain sponge and a complimentary frosting flavor, such as chocolate and vanilla.
Also known as cake truffles, they can also be made with baked brownies and other cake fillings, such as chocolate ganache.
Once chilled and rolled, they're usually covered in chocolate.
Here's what you'll need to make these Starbucks cake pops.
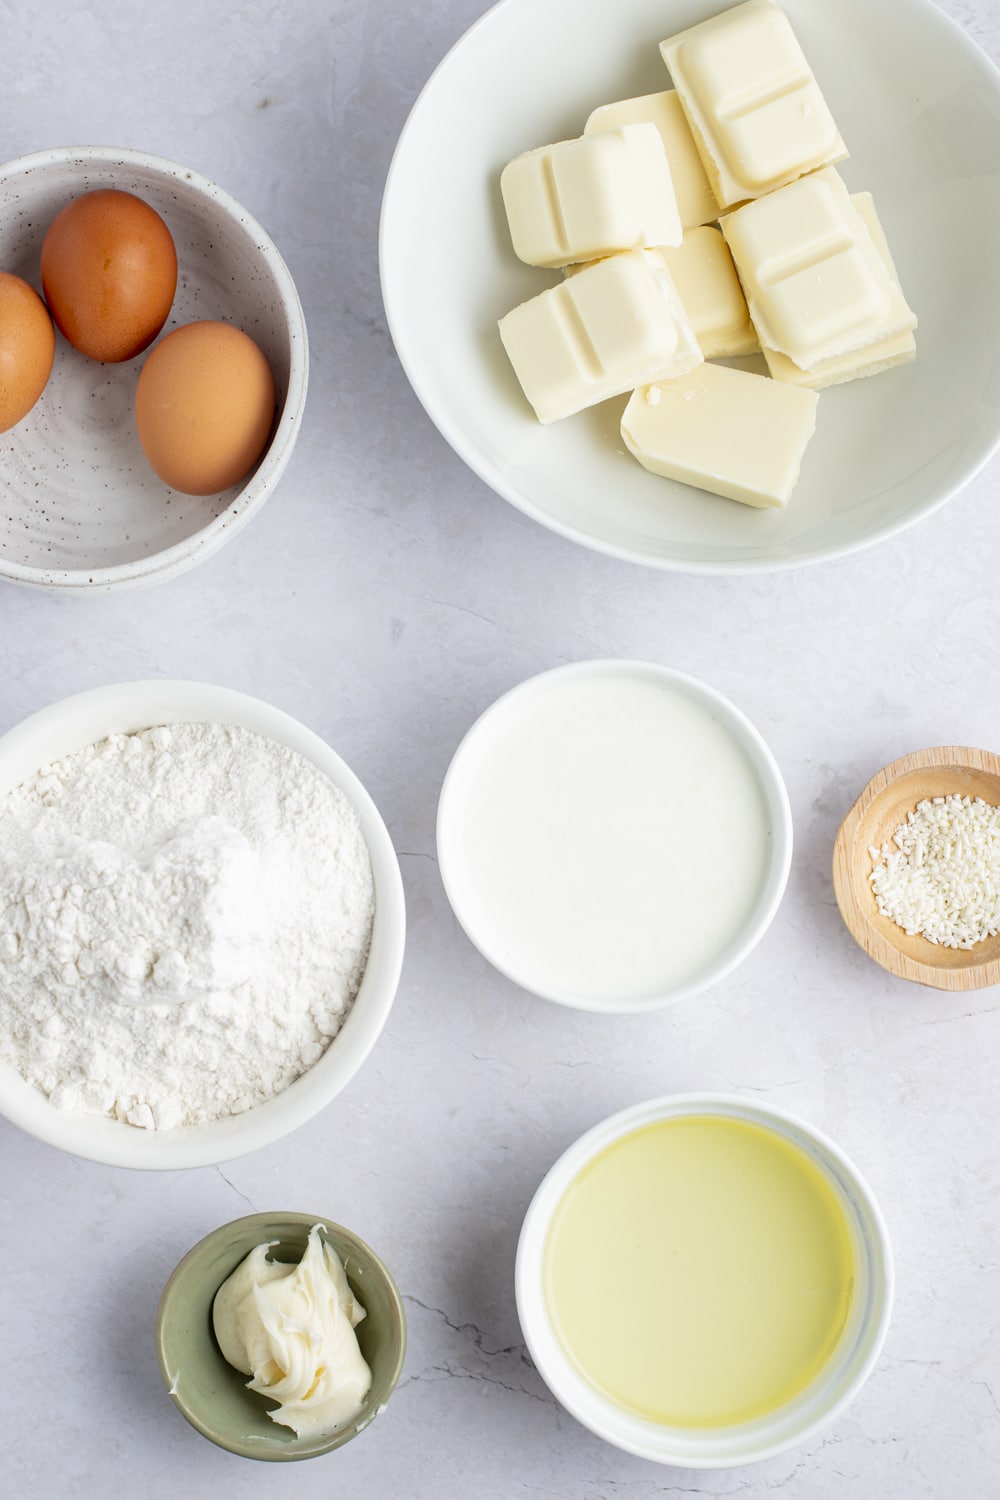
For the Cake Mix:
- White Cake Mix – Use any kind of boxed cake mix for convenience. Just bake according to package instructions and let it cool completely. You can also use any leftover cake here – even if it has frosting inside!
- Vanilla Frosting – To moisten the cake. Any kind of frosting works.
For The Candy Coating:
- White Almond Bark – You can also use candy melts or melting wafers like Ghirardelli. I’ve also tried chocolate bars for melting, and they worked beautifully.
- Vegetable Oil – It’ll give the melted chocolate a glossy finish.
- Red Food Coloring – Using red gives the chocolate a pastel pink hue. It doesn’t have to be red, though. Use whatever color you like. Just be sure to use gel food coloring!
- Sprinkles – For the perfect finishing touch.

How to Make Starbucks Cake Pops
Don’t be intimidated by the numerous steps! Making cake pops is a lot easier than you think.
1. Make and bake the cake.
I highly recommend using a box cake mix for cake pops. After all, there's no need to spend hours making the perfect cake only to crush it up in the end!
In this case, you'll bake a white cake according to package instructions and allow it to cool.
2. Crumble the cake and mix in the frosting.
This is where the fun part begins. Use your hands to crumble the cake until it looks like breadcrumbs.
I suggest trimming the hard edges first if you're using an overbaked, slightly dry cake.
Add in the frosting and mix to combine. You’ll want to do so gradually to keep from accidentally adding too much.
You need just enough so that the cake is moist and rollable. Too much, and it will be a sticky, soft mess.
3. Form the cake mix into balls.
I like to use a mini ice cream or cookie scoop for this, but you can just use your hands if you prefer.
Either way, you’ll want the balls to be bite-sized or about 1-inch in diameter.
This is easier if you allow the mixture to chill first. Just cover the bowl and pop it in the fridge for an hour or so until the frosting has set a little.
Once scooped and shaped, freeze the balls for at least an hour. This part is very crucial!
The cake truffles will fall apart if they’re not cold enough.
4. Dip the end of the sticks in chocolate and attach the cake pops.
This is another crucial step. If you don't add a little chocolate to the end of the popsicle stick, the cake pop won't stay in place when you dip the whole thing in chocolate.
Once the sticks are attached, let them chill again for about 10 minutes so the chocolate sets.
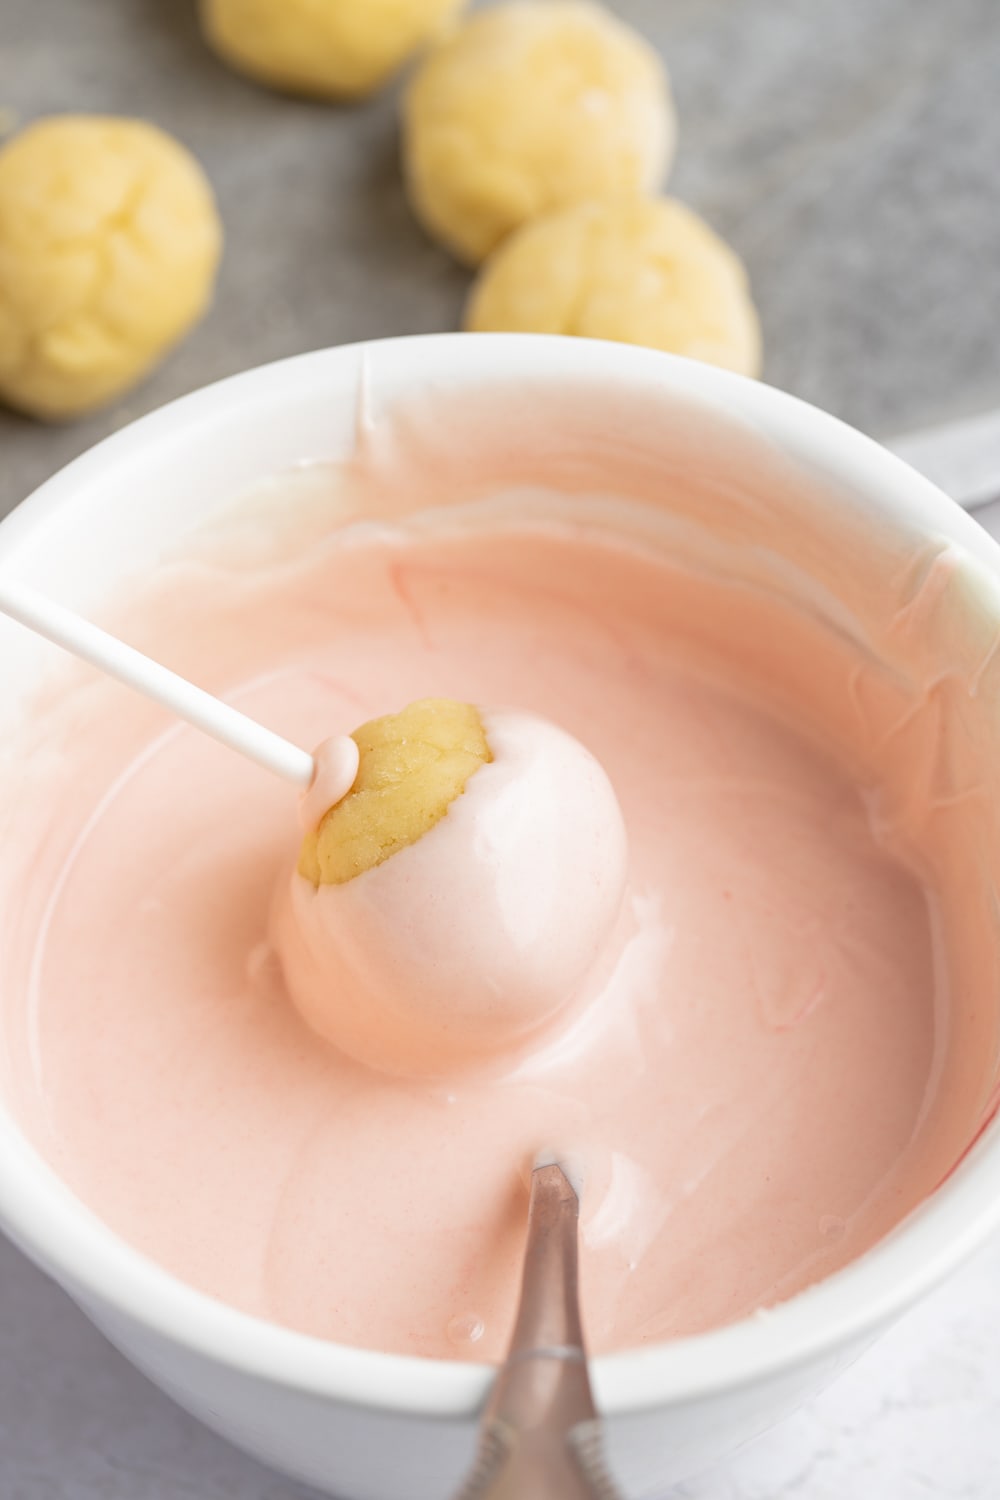
5. Dunk the balls in melted chocolate.
Ensure the chocolate is smooth and silky. I like to use a glass so you can easily submerge the cake truffle.
Of course, a bowl will work too.
Just so slow, and be sure to cover the whole thing. If you leave some of the cake truffle uncovered, it will dry out.
Try to tap off any excess chocolate, so it doesn't run down to stick.
Decorate with sprinkles, if desired.
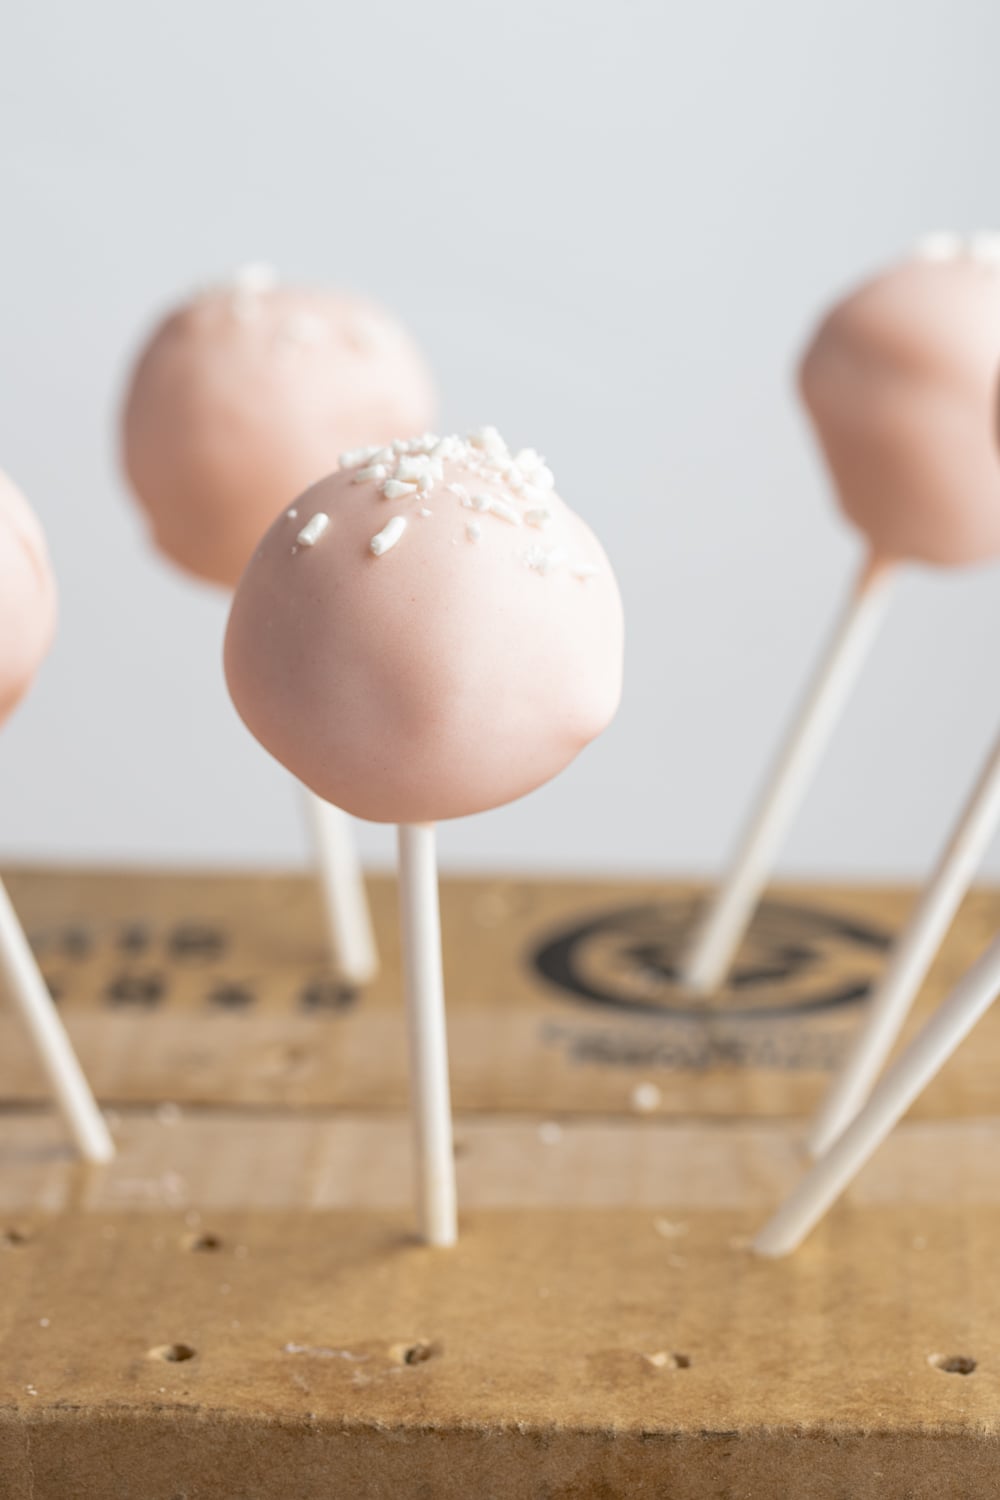
6. Let the cake pops cool upright.
Poke the sticks into styrofoam or a cardboard box and let the chocolate coating set.

Tips for the Best Cake Pops
- Let the cake cool completely before crumbling it and adding the frosting. A warm cake will also make the frosting warm, which will make the mixture difficult to form. Bake the cake a day in advance, if you can.
- Cut off the crispy edges of the cake. These will make the cake pops fall apart. If you don't want to waste them (and they're not burned), you could blitz them in a food processor and add them to the mix. Just be sure there are no big chunks.
- Crumble the sponge finely so the cake pops will easily roll and hold their shape. Large chunks of cake will make them hard to shape.
- Put just the right amount of frosting — not too much, not too little. The best way to know is to add the frosting gradually until you reach the right consistency. Use a scoop or spoon and try to roll the mixture in your hands.
- If it falls apart, add a little more frosting.
- If it's mushy in your hands, you'll need extra cake.
- If you have a very moist cake, use less frosting than you normally would. Again, just go slowly. Add the frosting a little at a time, and be sure to mix it thoroughly before adding more.
- Use a mini ice cream or cookie scoop to form the cake mix into balls. This will ensure you create even cake pops.
- Chill the balls in the freezer for at least 1 hour. If you don't have room in the freezer, leave them in the fridge for at least 2 hours.
- Don’t take out all the truffles at once to coat them in chocolate. Instead, only work on 5-6 balls at a time, and keep the rest in the freezer.
- Don’t overheat the chocolate. Make sure to melt only in 30-second intervals and stir it in between to get it as smooth as possible. Overheating will cause the chocolate to seize or turn into a gritty, oily mess.
- Use a deep cup or glass for dipping. It should be deep enough to dunk the entire cake ball in. But don't fill it too high, or the chocolate will overflow out of the top. About 2/3 full should do the trick.
- Let the chocolate cool for a few minutes before you dunk the cake pops in. Dipping cold cake into hot chocolate will cause the balls to expand and then contract, causing cracks in the chocolate coating.
- Don’t forget to dip the sticks into the chocolate before piercing through the cake balls. Otherwise, they'll fall off the stick.
- Let the cake pops cool upright. If you think you'll make cake pops a lot, head to Michael's and grab some styrofoam from the cake or plant section. It's super cheap and ideal for holding cake pop sticks.
- Also, be sure the sticks aren’t too thin. They should be thick enough to handle the weight of the cake pops. You'll find white sticks in Michael's too!
- Add vegetable oil to the melted chocolate to give it a smooth and glossy finish. Cocoa butter would work too, but I don't suggest using butter.
Flavor Variations
As I said before, the great thing about cake pops is you can use just about any flavor of cake, frosting, and melted chocolate you like, and they’ll still turn out amazing.
This recipe yields a simple white cake with vanilla frosting and a white chocolate coating, but you don’t need to stick to that.
Feel free to experiment with flavors! Here are a few flavor ideas to try:
Cake and Frosting Combinations:
- White or yellow cake with any flavor frosting you can think of!
- Chocolate cake with peppermint, raspberry, chocolate, or caramel frosting.
- Red Velvet cake with cream cheese frosting.
- Funfetti cake with vanilla frosting and extra sprinkles.
- Lemon cake with lemon or vanilla frosting.
- Carrot cake with cream cheese frosting.
- Strawberry shortcake with vanilla frosting and a little strawberry jam swirled into the mix.
- Crushed Oreo cookies with their filling and a little extra vanilla frosting.
- Brownies with chocolate frosting (add less frosting when using brownies as they're already super fudgy and moist).
Chocolate Coating:
- White chocolate
- Milk chocolate
- Dark chocolate
- Semi-sweet chocolate
- Chocolate oils for extra flavor
- Almond bark
- Colorful candy melts
Decorations
From tinting the chocolate and adding sprinkles, there are tons of ways you can decorate cake pops.
Just keep in mind:
- Place a plate or bowl below the cake pops to help catch the extras that don’t stick. No sense in wasting them, right? Once you have enough, you can reuse it.
- When coloring chocolate, use gel food coloring as it’s more concentrated than liquid and will give you a brighter color. Plus, the liquid kind will alter the consistency of the chocolate and keep it from setting properly.
Decoration Ideas
- Unicorn Cake Pops: Use funfetti cake for the base and garnish the chocolate coating with pastel-colored sprinkles.
- Halloween Cake Pops: dunk the cake pops in orange candy melt. Then, use a black edible marker to draw eyes, nose, and mouth, creating cute and creepy jack-o-lantern pops.
- Christmas Cake Pops: Dip the cake pops in red and green melted chocolate. Garnish with Christmas-themed sprinkles for the perfect finish or edible glitter.
- Chocolate-Drizzled Cake Pops: Once the chocolate coating has dried completely, drizzle more melted chocolate over the cake pops to complete the look.
- Dye the cake batter with your favorite color for a fun surprise center. I think these are great with a plain white frosting, so the colors inside can stand out!
Storage Instructions
Store these cake pops in an airtight container in the fridge for up to 5 days.
However, these are best enjoyed at room temperature, so if you plan to make them ahead, just be sure to get them out of the fridge about an hour before serving.
How to Freeze Cake Pops
Place either the cake pops in a freezer-safe container and freeze for up to 2 months.
Keep in mind that uncoated cake pops will hold better. The chocolate may tarnish in the freezer, so it's best to only freeze uncoated cake truffles.
Let them thaw completely at room temperature for about 30 minutes and enjoy.
More Bite-Sized Desserts You’ll Love
24 Best Mini Desserts
Mini Cheesecake Bites
Oreo Cheesecake Bites
Disney Churro Bites
13 Mini Cupcakes That Are Almost Too Cute To Eat
Starbucks Cake Pops (Easy Recipe)
The next time you crave something sweet, skip the line (and the expensive coffee) and make these easy and delicious copycat Starbucks cake pops at home.
30
servings15
minutes1
hour25
minutes166
kcalIngredients
- For the Cake:
1 box white cake mix
1 cup milk
3 eggs
1/2 cup vegetable oil
2 teaspoons vanilla extract
1/4 teaspoon almond extract
4 tablespoons vanilla frosting
- For the Candy Coating:
16 ounces white almond bark
1 tablespoon vegetable oil
5-6 drops red food coloring
- For Garnish:
White sprinkles
- Tools Needed
1 small cardboard box or styrofoam block
21 cake pop sticks
Instructions
- Preheat the oven to 350 degrees Fahrenheit. Grease a 9×13-inch baking pan with non-stick spray or butter.
- In a large bowl, blend the cake mix, milk, eggs, vegetable oil, vanilla, and almond extract until well-combined.
- Pour the batter into the greased pan and bake for 20-25 minutes or until a toothpick inserted into the center comes out clean. Baking times may vary depending on the type of pan or baking dish used. For example, darker pans will cook faster.
- Let the cake cool to room temperature, then slice it into 4 pieces and remove the outer brown layer and edges of the cake. Place the rest of the cake in a large bowl and crumble it with your hands.
- Mix in the vanilla frosting using your hands or a spoon until well combined. It should be sticky enough to form into balls but not mushy.
- Shape the cake mixture into balls and place them on a baking sheet lined with parchment paper. Freeze the cake balls for 1 hour.
- Meanwhile, poke small holes in the top of your cardboard box. This is where the cake pops will dry after dipping in the candy coating. Skip this step if using styrofoam.
- Once the cake pops have chilled, break the almond bark into pieces and place it in a tall microwave-safe bowl or glass measuring cup. Microwave in 30-second increments until it's melted, stirring after each increment. Once the almond bark is melted, stir in the vegetable oil and food coloring.
- Remove 5-6 cake pops from the freezer, leaving the others to stay cold. Dip the cake pop stick about ½ inch into the almond bark coating, then push the stick halfway through the cake pop. Next, dip the cake pop into the almond bark coating. Gently tap the stick against the edge of the bowl or cup to let any excess coating drip off.
- Coat cake pop with sprinkles, then place it upright in the box or styrofoam. Repeat this process until all the cake pops are dipped. Serve and enjoy!


%20and%20make%20these%20easy%20and%20delicious%20copycat%20Starbucks%20cake%20pops%20at%20home.)