


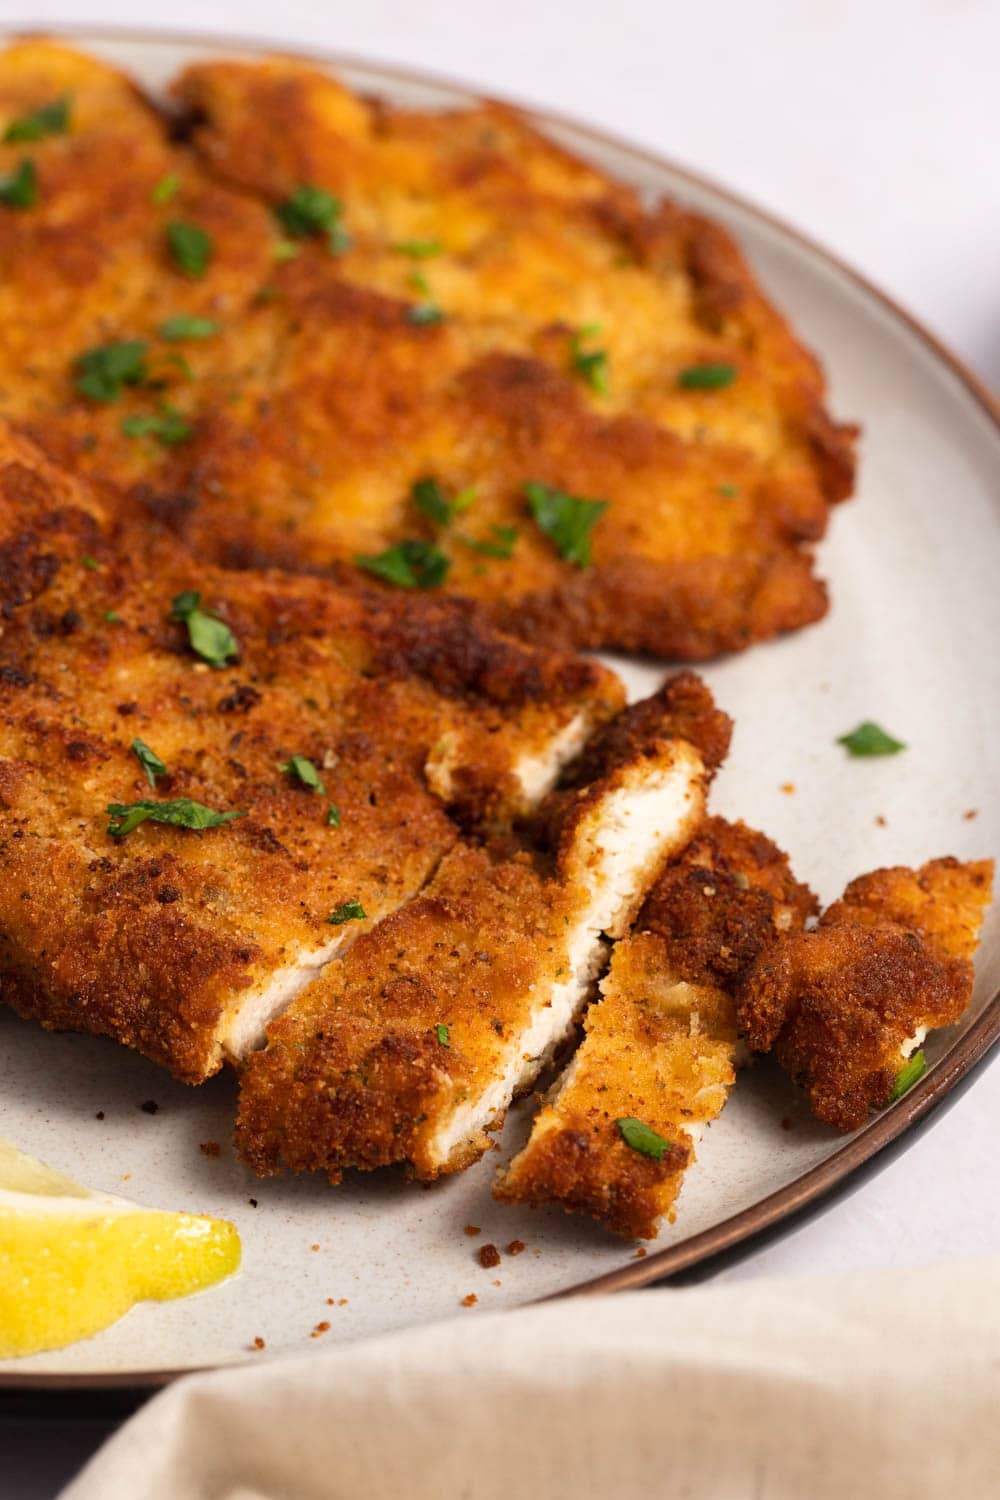
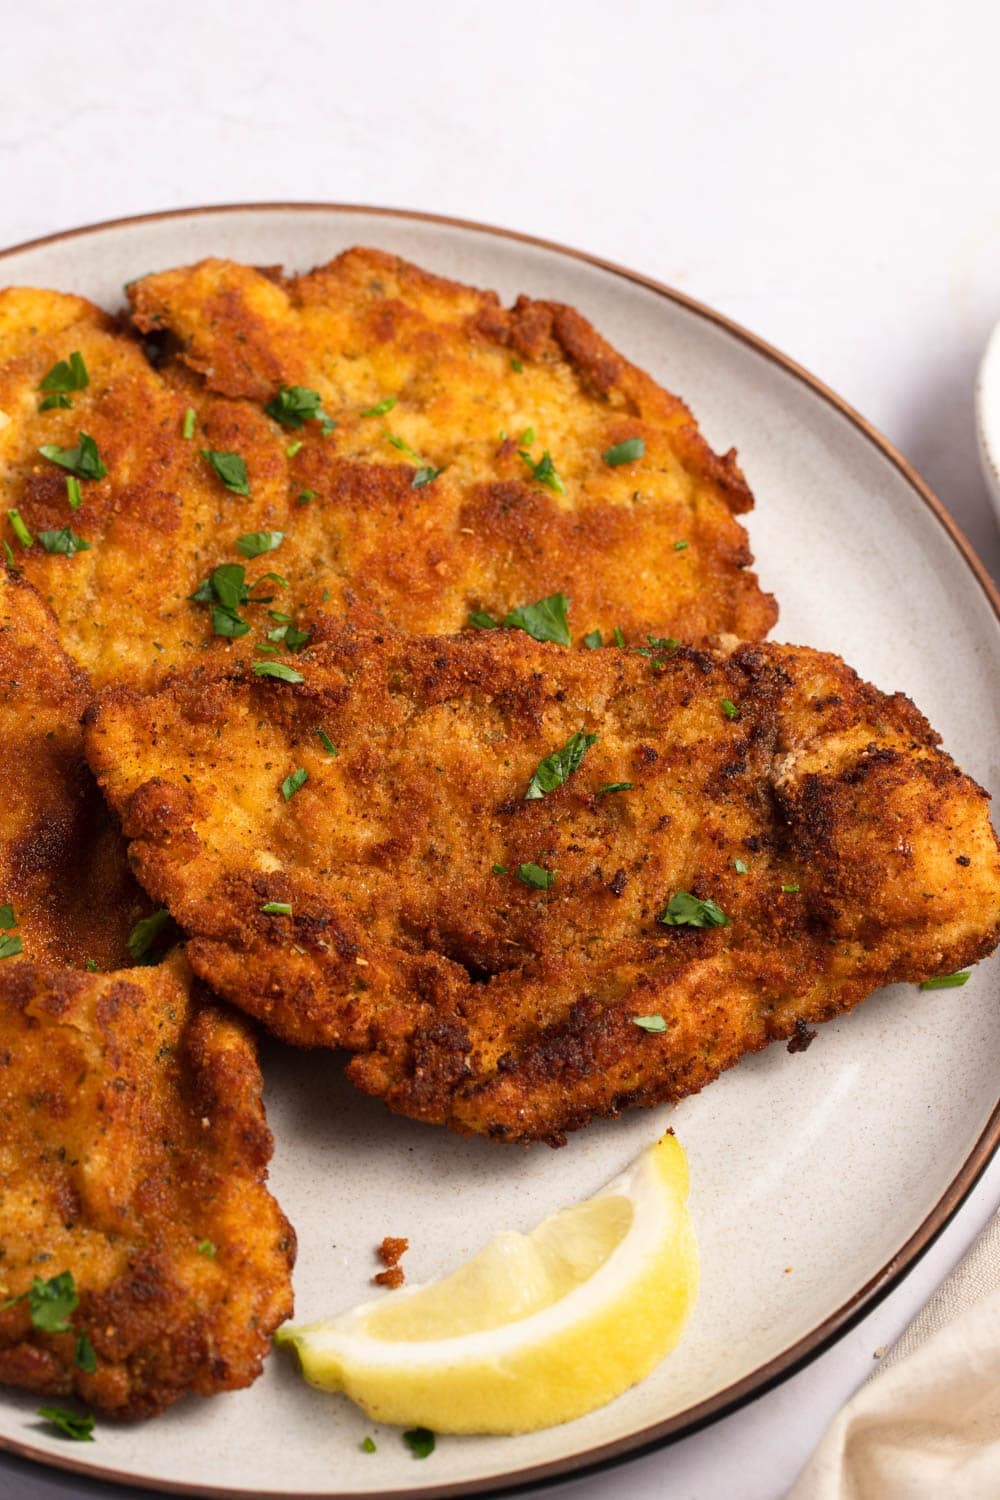
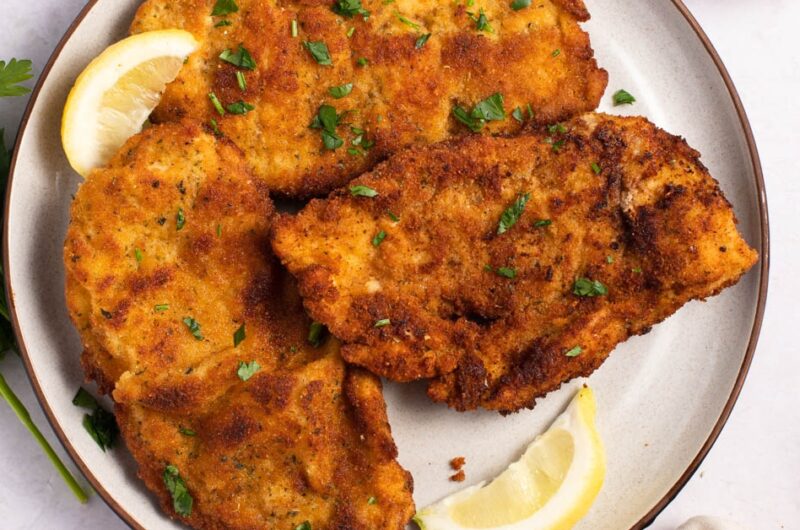
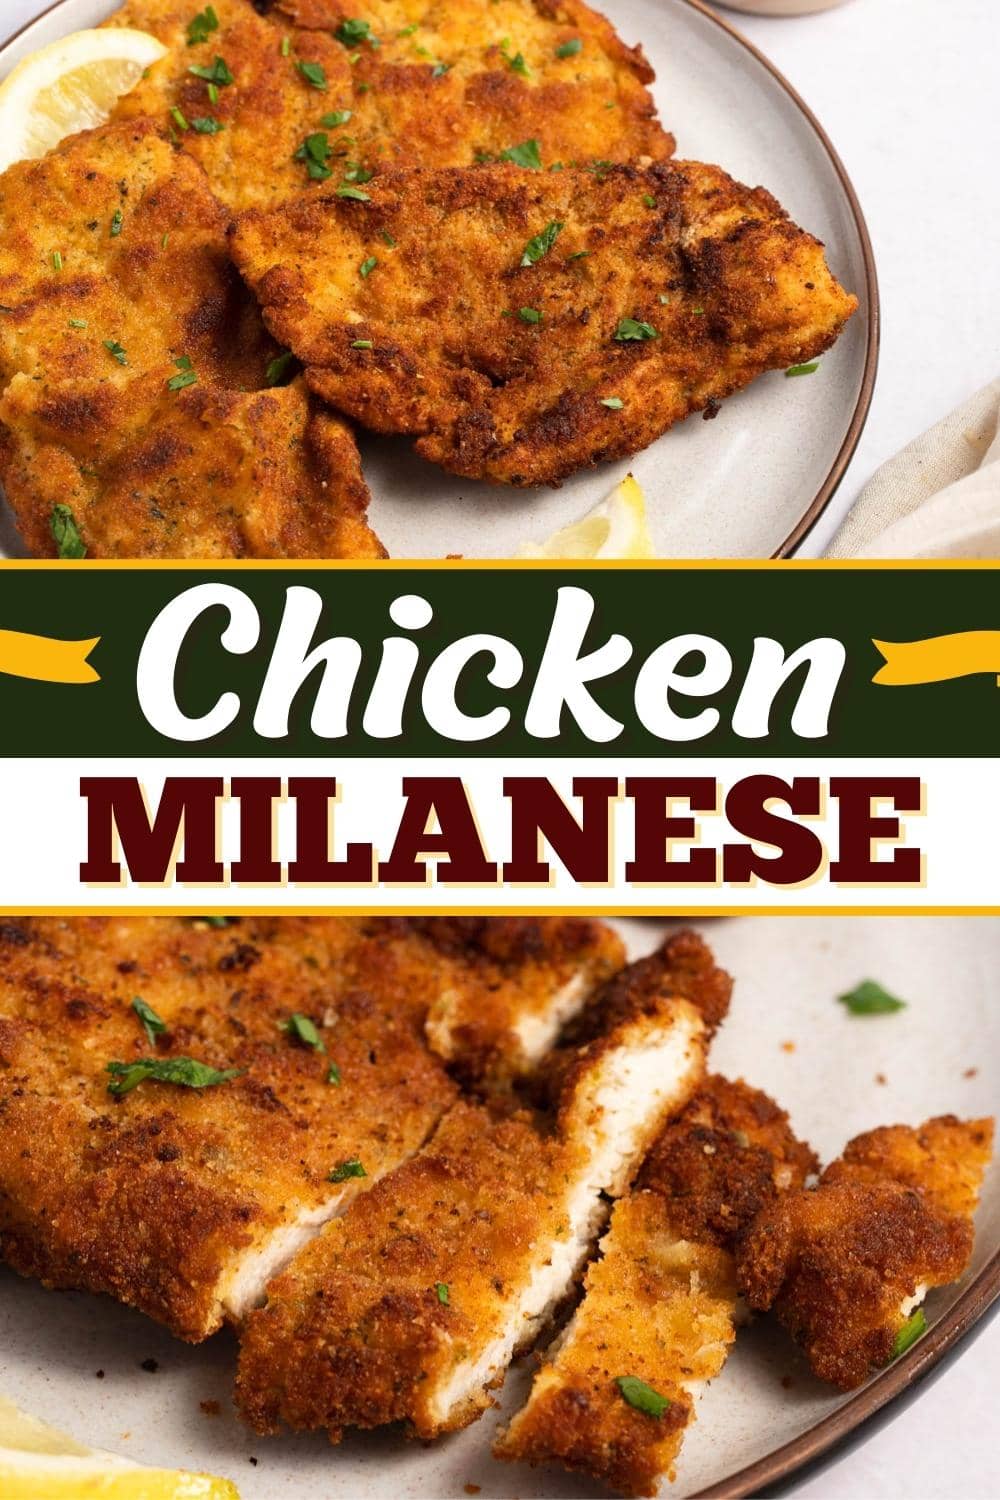
This chicken Milanese is a classic Italian recipe that's always a crowd-pleaser.
The recipe consists of crispy fried chicken breasts coated in Italian-style breadcrumbs. And it's served with juicy lemon wedges for extra flavor!
WANT TO SAVE THIS RECIPE?
When it's been a busy day, and you want to make something for dinner that's delicious but not too heavy, try this chicken Milanese.
It's incredibly simple to make, wallet-friendly, and full of flavor. Plus, it's the perfect solution to those mid-week dinner blues.
After all, it's fried chicken, but better. And who doesn't love fried chicken?!
Chicken Milanese
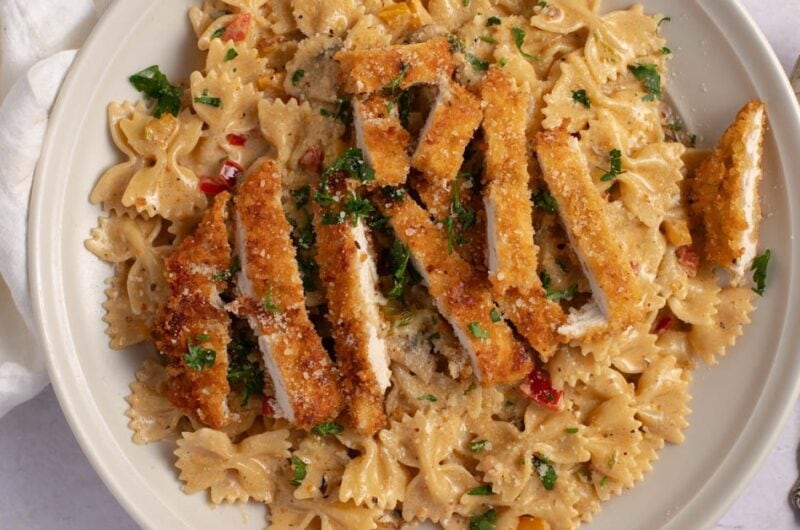
Like this Cheesecake Factory Louisiana Chicken Pasta recipe, chicken Milanese is perfect for any occasion.
Better yet, it requires fewer than 10 ingredients, so it's easy to whip up on busy weeknights.
Fortunately, it's also elegant enough for more formal dinners.
Its taste is phenomenal, too, making it a favorite among adults and kids.
In other words, there's really never a bad time to make this tasty chicken.
Ingredients
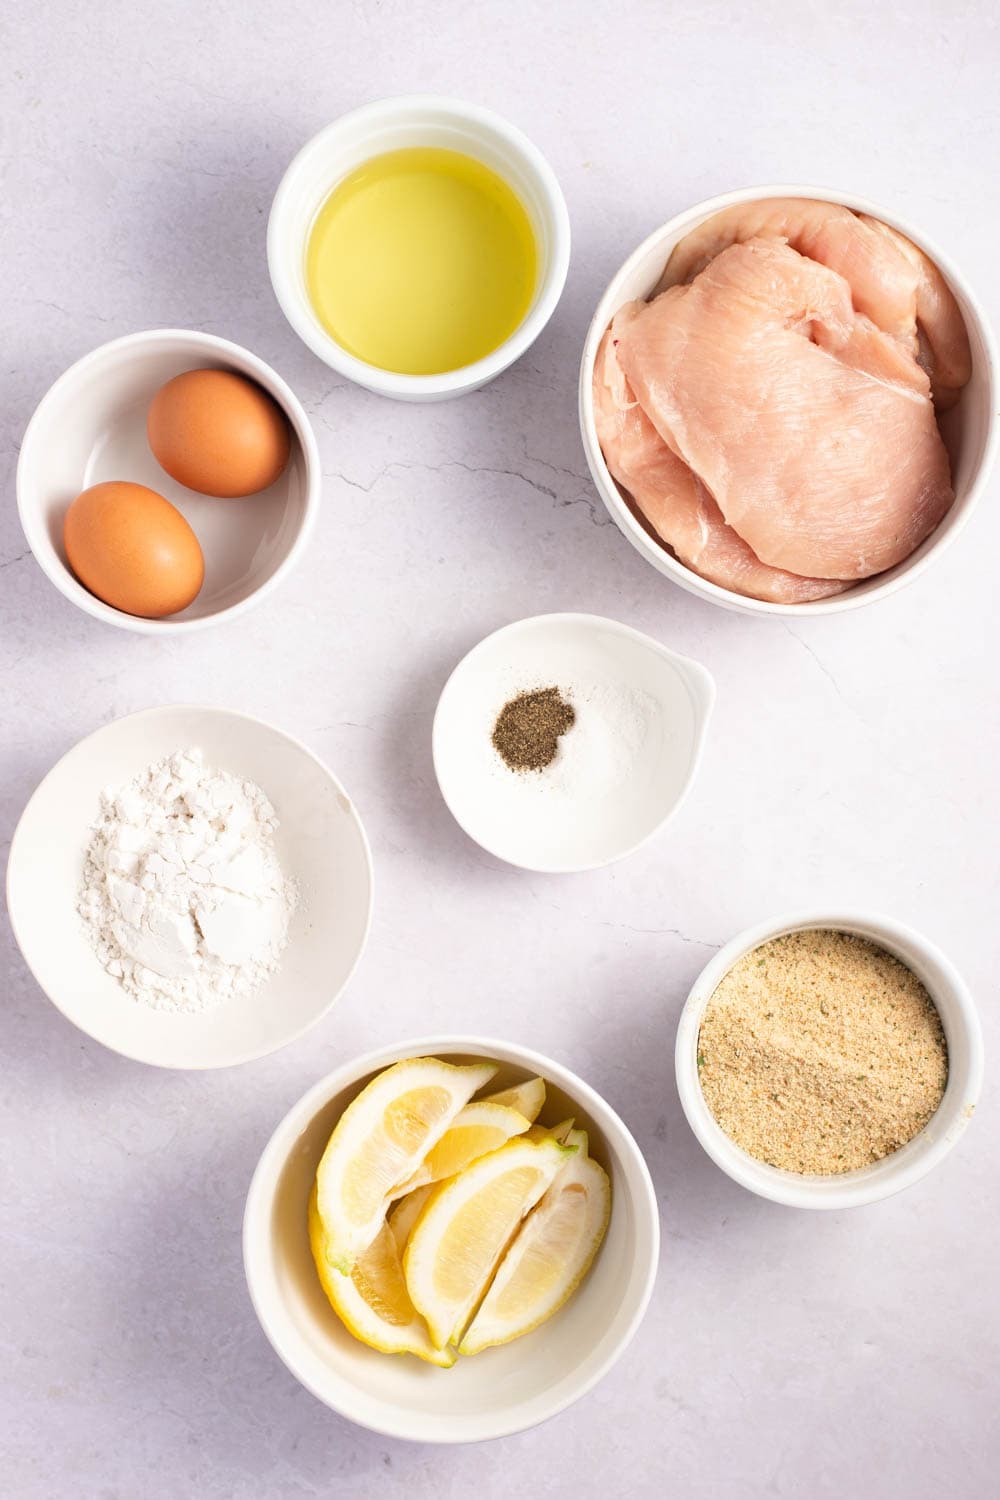
Here’s what you’ll need to make this delectable dinner:
- All-purpose flour. All-purpose flour is typically my go-to flour option. It’s relatively inexpensive and works well in most recipes. For this particular one, it’s especially awesome. It’ll ensure you get the perfect crispy crust every time.
- Eggs. The eggs act as a binding agent in this recipe. They help ensure the flour and breadcrumbs stick to the chicken.
- Kosher salt and black pepper. These everyday pantry staples do a great job of seasoning the meat.
- Italian-seasoned breadcrumbs. You can substitute any breadcrumbs for Italian breadcrumbs. However, Italian ones will give you that bold, herby Italian flavor that tastes so good. I recommend sticking to them unless you don't have any other option.
- Boneless chicken breast halves. I like to use boneless, skinless chicken breasts cut in half for this recipe. You can also use chicken cutlets if you prefer. Just be sure the chicken you’re using is thin so that it cooks properly.
- Vegetable oil. This is simply for frying the chicken. You can substitute olive oil or another type in a pinch.
- Lemon. Cut the lemons into wedges and serve them with the chicken. Everyone can add as much or as little juice as they want to their pieces.
What's the Difference Between Chicken Cutlets and Chicken Breasts?
It's actually pretty simple.
If you have chicken breasts, that's precisely what you have: chicken breasts.
You can cut them in half lengthwise, and you still have chicken breasts, only cut in half.
But if you cut those breasts in half horizontally and pound them down until they're flat, they become cutlets.
In other words, cutlets are really thin. That means chicken cutlet recipes cook faster.
How to Make Chicken Milanese
Here are the steps for preparing and cooking chicken Milanese:
1. Prepare everything. Start by preheating the oven to 200 degrees Fahrenheit. Then, prepare your chicken breasts. Remember to cut them in half and pound them down to ensure they're thin.
Finally, prep your three separate bowls for dipping the chicken.
You add flour to the first bowl, eggs, salt, and pepper to the second, and breadcrumbs to the third.
2. Bread the chicken. Start by pressing your first chicken breast into the flour. After shaking off any excess, dip it in the eggs. Last, press it into the breadcrumbs for a crispy coating.
Place the chicken breast on a clean plate. Then, follow the same instructions for dipping all the other chicken pieces.
Be sure to avoid stacking them on top of each other on the plate.
3. Fry the chicken. You'll fry the breasts (or cutlets) in batches of two or three pieces. Add the vegetable oil to your skillet first. Heat it over medium heat, then add the chicken.
They should only need about 2 to 4 minutes per side to cook.
Check them with a meat thermometer to ensure they're done. (The reading should be 165 degrees.)
4. Let the chicken warm in the oven until you've cooked all the pieces. Since you're cooking in batches, you'll need to place the cooked chicken on a baking sheet in the oven.
That will ensure it stays warm while you're cooking the other pieces.
5. Serve it and enjoy! When everything is done, serve the chicken with lemon wedges for extra flavor.
Tips and Variations
Here are a few things to keep in mind when preparing this recipe:
- Use homemade breadcrumbs if you don’t have Italian ones on hand. Breadcrumbs are surprisingly easy to make. Start with three pieces of dry, hard bread. Crumble them up and season them with thyme and basil. (A half teaspoon of each should suffice.) You can bake them for a few minutes if you want them extra crunchy, but you don’t have to.
- Wait until the oil is hot to cook the chicken. If it isn’t hot, your chicken will become greasy.
- Don’t forget to pound your chicken breasts or cutlets. The thinner the meat is, the better and more evenly it will cook.
- Don’t do a lot of moving around in the skillet. Leave your chicken alone to cook, only touching it when you flip it. If you move it too much, it can cook unevenly. Additionally, you may lose some of your breading.
- Mix a little parmesan in with your breadcrumbs. Doing so will give you an extra cheesy, impossible-to-resist flavor.
You're also not out of luck if you need a gluten-free option.
Simply swap out the all-purpose flour for gluten-free flour. Be sure your breadcrumbs are gluten-free, as well.
How to Store and Reheat
I don't recommend freezing this recipe as it will lose its crispiness when you thaw it out.
However, you can store it in the fridge for up to 4 days.
Be sure to use an air-tight container, and don't pack it with any sides (i.e., salad or pasta).
Store it by itself to keep the crust as crunchy as possible for as long as possible.
More Chicken Dinner Recipes You'll Love
Chicken à la King
Chicken Florentine Pasta
Princess Chicken
Buttermilk Baked Chicken
Greek Chicken
Chicken Milanese
This classic Italian recipe for chicken Milanese is a guaranteed hit! Thinly-sliced chicken is lightly breaded and cooked up to golden perfection. You'll love it!
4
servings15
minutes15
minutes322
kcalIngredients
3/4 cup all-purpose flour
2 large eggs
kosher salt, to taste
ground black pepper, to taste
1 cup Italian-seasoned breadcrumbs
2 skinless, boneless chicken breast halves, thinly sliced
1/4 cup vegetable oil (for frying)
1 lemon, cut into wedges
Instructions
- Preheat the oven to 200 degrees Fahrenheit. Prepare three shallow bowls as follows in steps 2-4:
- Pour the flour into the first bowl and spread it evenly.
- Add the eggs, salt, and pepper to the second bowl. Mix thoroughly (with egg beaters or by hand).
- Pour the breadcrumbs into a third bowl.
- Press one piece of chicken into the flour. Coat thoroughly, then shake off any excess.
- Dip the flour-coated chicken into the egg mixture.
- Remove the chicken from the eggs and press it firmly into the breadcrumbs. Then, shake the chicken gently to remove any excess crumbs.
- Place the breaded chicken onto a clean plate to rest. Then, repeat steps 5, 6, and 7 for the remaining chicken breast halves. Do not stack them on top of one another on the resting plate.
- Pour the vegetable oil into a large skillet and heat over medium heat. Then, pan-fry the chicken in small batches for approximately 2-4 minutes per side. The breading should turn golden brown, and there should be no pink left inside each piece. Check the chicken with a digital thermometer. The temperature reading should be 165 degrees Fahrenheit or higher.
- 10. Place the cooked chicken on a baking sheet in the oven. This will keep it warm while you're frying the remaining halves.
- 11. When all pieces are cooked, serve them with lemon wedges for spritzing. Enjoy!


2 Comments
I’d like to save this but there’s no box assigned to this. Help.
Hi, Veronica!
We are currently experiencing a glitch with our website provider and this feature. Hopefully, we’ll have it fixed soon. 🙂