

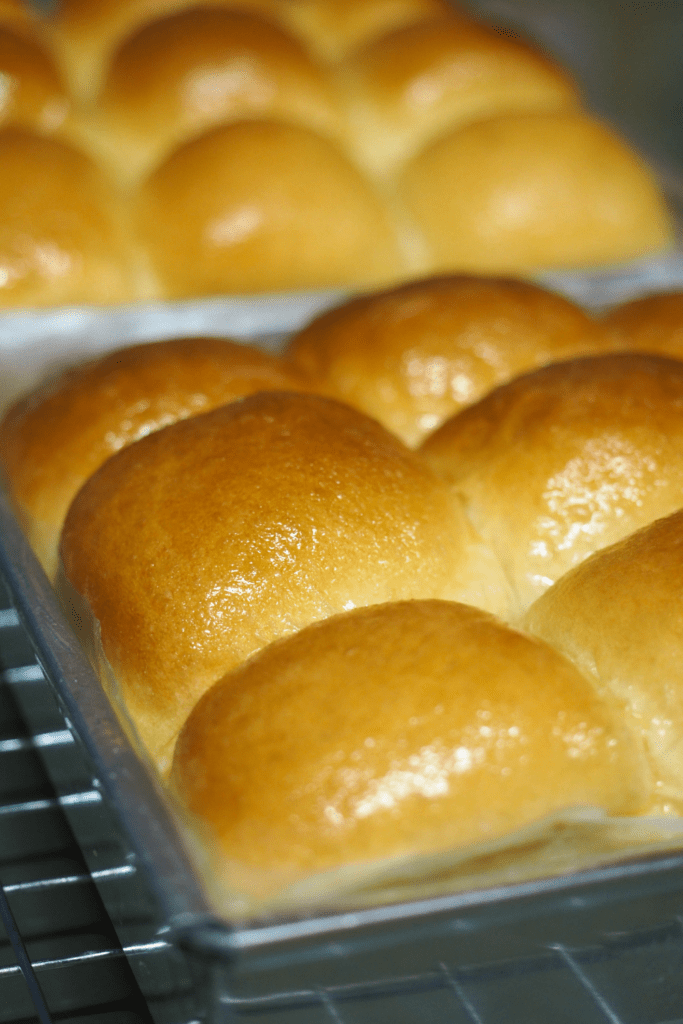
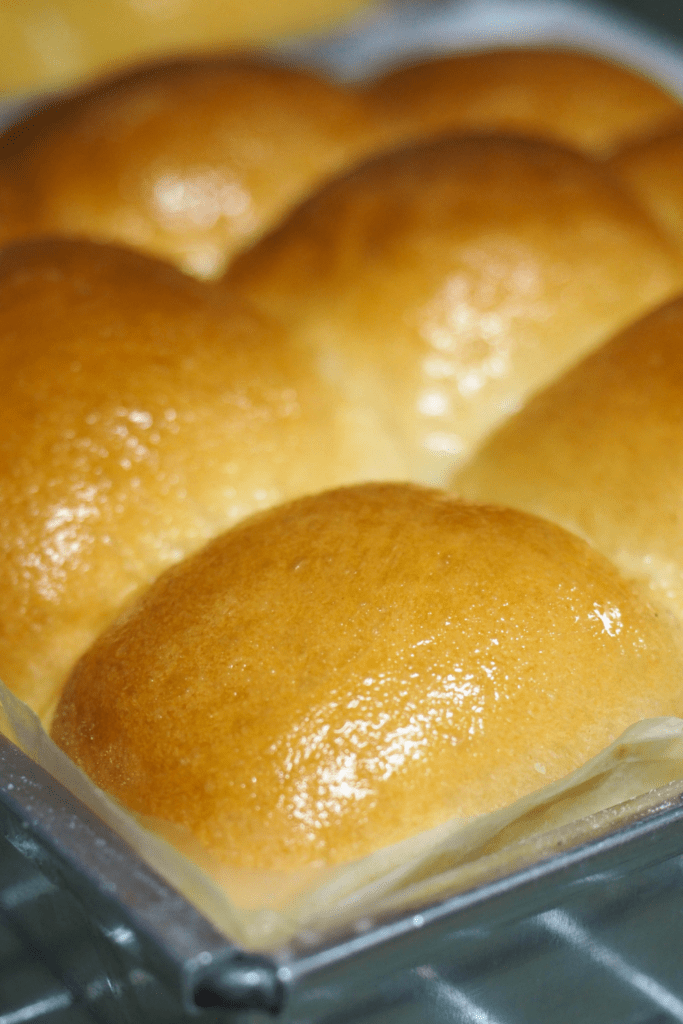
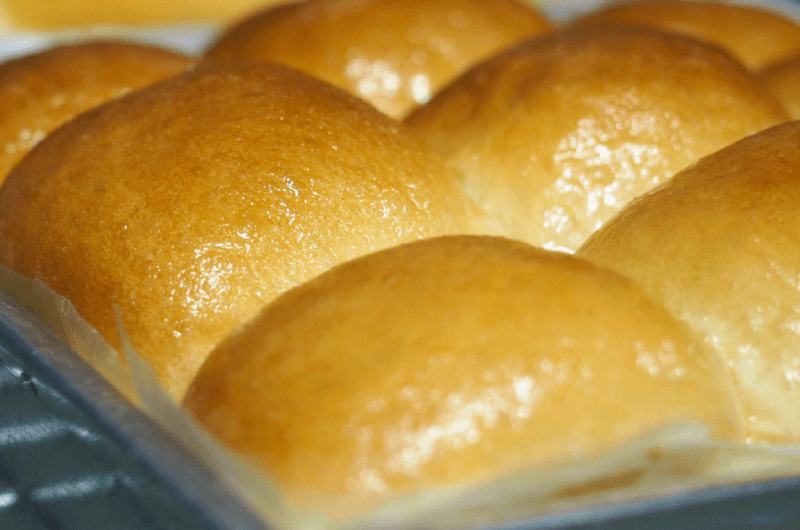
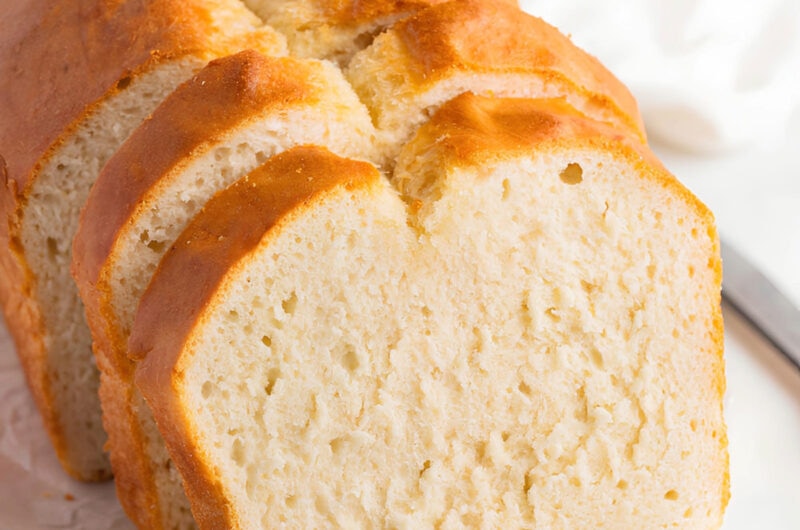
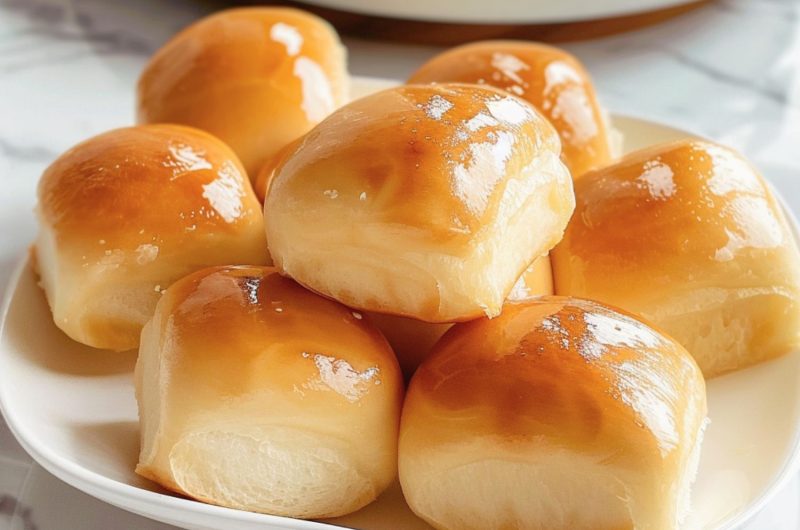
If you've never had it, condensed milk bread is unbelievably soft, fluffy, buttery, and simply delicious.
I’m not going to lie, bread-making is a long, tedious process. I’m sure you'll want the whole process to be rewarding, which is why I’m sharing this recipe.
Trust me, condensed milk bread is worth every step.
WANT TO SAVE THIS RECIPE?
The milky flavor is delightful, but it’s the consistency that makes this bread a must-try. It’s like biting into a cloud, but it’s also chewy at the same time!
If you’ve never made bread from scratch before, condensed milk bread will get you hooked. Let’s get to it!
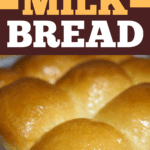
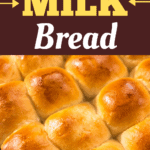
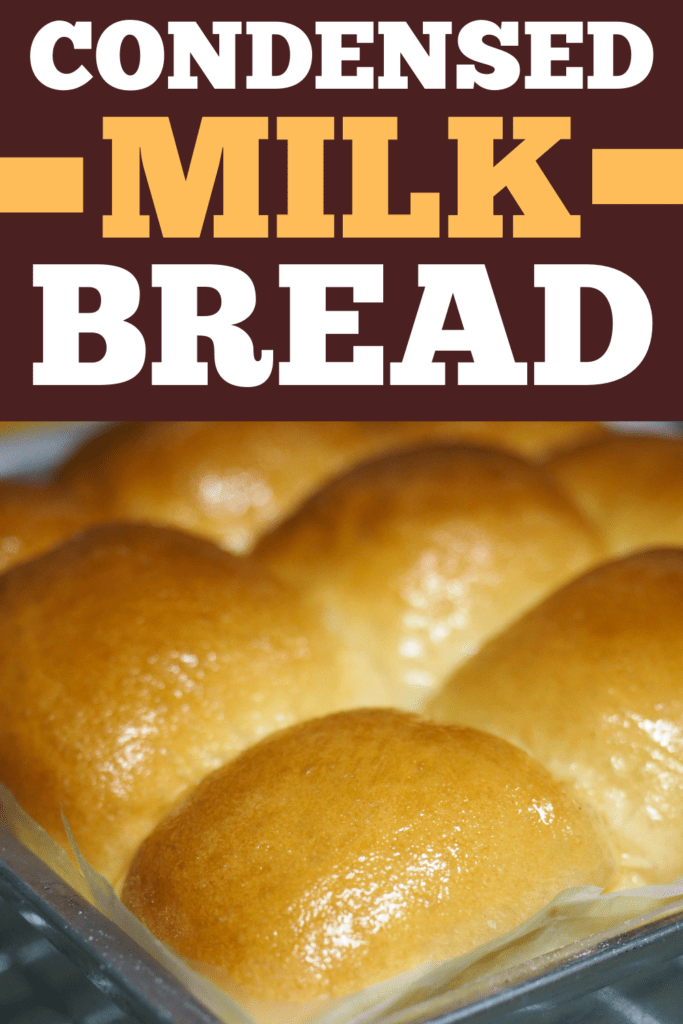
Condensed Milk Bread
Condensed milk bread is a Japanese-inspired white bread that’s insanely light, fluffy, and ultra-milky.
The combination of fresh and sweetened condensed milk gives this bread its unique and addictive flavor. The texture is to die for.
The Japanese process of making milk bread is a tad complicated, which is why I’m sharing with you a simplified version.
It’s still no piece of cake, but at least it’s a lot easier!
Ingredients
For the Bread:
- Milk – It’s not called milk bread for nothing! You'll use both fresh and sweetened condensed milk for a wonderfully rich and creamy bread.
- Egg – It also makes the bread ultra-rich. It also acts as a leavening agent (along with the yeast) that helps make the bread rise. Plus, the yolk makes the crumb extra soft and tender.
- Sugar – To add a bit of sweetness to the creamy bread.
- Instant Yeast – The key to making any type of bread. You'll use instant yeast for this recipe, so there’s no need to activate it beforehand. Just be sure it’s still fresh, otherwise, your bread won’t rise.
To test, stir 2 teaspoons of instant yeast in a mixture of ½ cup of water and ½ teaspoon of sugar. Let it rest for 10 minutes.
If the mixture has started to bubble and expand, congratulations, the yeast is still active.
- Flour – This recipe calls for all-purpose flour, but you can also use bread flour for a softer loaf with a chewy texture.
- Salt – For more flavor.
- Butter – For added richness.
- Egg Wash – For that lovely glossy finish. All you need is an egg and a bit of milk.
For the Glaze:
A sweet and smooth mixture of butter and sweetened condensed milk takes the bread over the top.
Tips for the Best Bread
- The dough will be sticky, so flour your hands to prevent it from sticking.
- You may notice in the recipe that I’ve included the measurement of the ingredients in grams. You'll want to measure the ingredients as accurately as possible, so it’s better to use a weighing scale instead of measuring cups.
- Milk bread slices better once cooled, but if you can’t resist the urge, feel free to tear into the hot bread.
- Store the yeast in an air-tight container and in the fridge. Exposure to heat and air kills the live organisms in yeast.
- Store the bread in a plastic bag to keep it softer, longer.
Proofing and Shaping
Proofing is a necessary step in bread-making that helps the bread rise. You’ll need to proof the dough twice, but don’t worry, this step is literally effortless.
All you'll need to do is let the dough sit for an hour covered in cloth post-kneading. After an hour, the dough should have doubled in size.
Once the initial proofing is done, it’s time to shape the dough. Punch the dough to deflate it and divide it in two.
Flatten and roll the dough with a rolling pin on a floured surface. Roll up the dough and cut it into seven equal slices.
Place the slices into a loaf pan, and proof it for one last time. The final proofing will take 45 minutes. Once it's done, it’s ready for baking.
What Else to Do With Milk Bread
Condensed milk bread is fantastic on its own. It’s sweet, creamy, and oh so fluffy.
But apart from eating it as is, there are other ways to enjoy it, too. Here are some ideas:
- Bread and butter is always a fantastic combo, so go ahead and slather your milk bread with butter! A sprinkle of sea salt adds more flavor, too.
- This bread is already sweet, but I still like to drizzle it with honey for extra flavor.
- Turn leftovers into French toast. The bread is milky, so expect your toast to be extra yummy!
- Make a sandwich. Whether your filling is sweet, savory, or a combo of the two, you can’t go wrong.
Condensed Milk Bread
9
servings30
minutes25
minutes226
kcalIngredients
- For the Bread
1 cup milk (250ml), room temperature
1/4 cup sweetened condensed milk (75g)
1 egg, room temperature
2 tablespoons sugar (30g)
2 1/4 teaspoons instant yeast (7g)
3 1/4 cups all-purpose flour (400g), plus more for kneading
1 teaspoon salt (5g)
1/4 cup butter, softened (50g)
1 egg, lightly beaten
2 tablespoons milk
- For the Glaze
3 tablespoons butter (45g), softened
3 tablespoons sweetened condensed milk (45g)
Instructions
- In a bowl, stir the milk, condensed milk, egg, sugar, and yeast until combined. Add the flour and salt and mix until a stiff, shaggy dough is formed.
- Add the softened butter and mix until combined. (This is best done by hand.) When mostly incorporated, transfer the dough to a lightly floured surface and knead until smooth and elastic, about 8 minutes. The dough is ready if it doesn’t tear when gently stretched.
- Grease a large bowl with oil. Place the smooth dough inside, cover it with a dry cloth, and let rest for 1 hour in a warm place, or until doubled in size.
- Punch the dough with your fist to deflate it. Then, use a knife or bench scraper to split it in two.
- Place one half on a floured surface and flatten it into a long rectangle with a rolling pin, about 1/4-1/2 inch thick. (The width of the dough should be the length of the loaf pan.)
- Starting from a short end, roll it tightly and seal the seam (pinch the dough with your fingers). Use a sharp knife or bench scraper to cut the log into 7 equal pieces.
- Stack the pieces in one 7×4-inch, lightly greased loaf pan, then repeat with the other half of the dough. Cover the pans with a dry cloth and let rest in a warm place for 45 minutes.
- Preheat the oven to 350 degrees Fahrenheit. Whisk together the egg and milk to make an egg wash. Brush the top of the dough with the egg wash and bake for 20 to 22 minutes.
- To make the glaze, stir the butter and condensed milk until well combined. Let the bread cool in the pan for 5 minutes, then brush it with glaze. Serve warm and enjoy!


22 Comments
absolutely garbage recipe, avoid at all costs. what a waste of good ingredients
Seems like at least 4 other people have found the shaping step confusing and the recipe poster hasn’t responded to any of them??
Is anyone going to explain the rolling, cutting and stacking? There are three separate inquiries about this. Please explain it. I love your recipes but this has me stumped. The picture looks like regular rolls placed on a baking sheet, not rolled and stacked in a loaf pan. Thanks!
Supberb. Thank you!
I would like to make this but the cutting and stacking has me lost. In the picture they look like regular rolls. Please explain. Thanks!
I don’t understand the roll, cut and stack part. Isn’t that the way you would roll and cut for cinnamon rolls? And what about the stacking? I must be really be dense, but the rolls in the picture do not look like they’ve been rolled into a log and cut
Ahhh, yes!!! A taste of Japan in the USA! I used to go into the Japanese convenience stores and buy individual slices of milk bread, I loved it!! Now, Im excited to make my own at home!! yay!!
This looks really good. I will try this out for Thanksgiving
Do you have a photo or video showing how to stack them in the pan? Are we using two loaf pans? Can we use any other size pan? I have made rolls before but recipe called for a 13” x 9” pan. Thank you for any clarification . Looks amazing !
Can you make individual rolls with this recipe?
This my favorite go to recipe for making actual bread. I even sell a few loafs at my lil stand when I sell eggs and jams. Best seller for sure, both for my neighbors and my family!!!
Oh yes!
This is a really good one for that, Candace!
There is a teaspoon of salt and 2 Tablespoons of milk in the recipe but not in the instructions section when to use them??
Hi, Eunshil!
The salt is in step 1: “In a bowl, stir the milk, condensed milk, egg, sugar, and yeast until combined. Add the flour and SALT and mix until a stiff, shaggy dough is formed.”
The 2 tablespoons of milk comes in at step 8: “Preheat the oven to 350 degrees Fahrenheit. Whisk together the egg and MILK to make an egg wash. Brush the top of the dough with the egg wash and bake for 20 to 22 minutes.”
Hope that helps. 🙂
Thank you! I just got a bread maker and was having trouble making bread that my family would actually eat. I measured everything I could by weight and put it straight into my bread maker using the dough cycle; then baked it in my oven. Your recipe is definitely a family favorite.
I’m so happy to hear you liked it, Alesia!
Thanks for sharing Kim . God bless. I will sure make it and keep you posted
I’d love to try this can I use a bread maker to knead the dough?? I figured it will be easier. Still 8 min to knead??? Thank you for your time on this matter. Rolls looks sooooo good too excited to try
Hi Cindy!
I’ve never tried it, but here’s how I’d do it:
1. Ensure your machine can hold the recipe (each machine has a maximum flour capacity listed somewhere)
2. Melt the butter and mix it into the milk, condensed milk, and egg.
3. Add the ingredients in the order listed on the machine (usually the wet, the dry, the yeast – mix the sugar with the flour in this case, not the milk)
4. Set the machine to a basic dough cycle (which is usually around 90 minutes)
5. Punch the dough, split it in 2, cover, and proof until doubled in size.
6. Roll/shape as instructed, place in the pans, and proof again. Then brush and bake!
Omg I love you. This bread is so good and so easy to follow the recipe.
I can’t wait to take some to my grandson. He loves homemade bread. Thanks again for the recipe.
Hi Nina, I’m so glad you enjoyed it! And I hope your grandson likes it, too!
This bread is absolutely delicious. My family went crazy eating this. For a twist, I added 1/4 teaspoon of anise oil to the recipe. It is better than the Easter Breads I have been making for the past 52 years. Thank you, thank you, thank you! This recipe is now my new best friend!