If you want a whole year’s supply of corn in your home, this detailed walkthrough of how to freeze corn on the cob is just for you!
And don't worry, it's a breeze!
Apart from being delicious, versatile, and affordable, another great thing about corn is that it freezes well.
So if you do it right, you won’t just have corn in the summer, but the entire year!
A-maiz-ing, am I right?
And you can freeze the kernels or the whole cob, depending on how much room you have.
So let's find out how to freeze corn on the cob, shall we? That way, you can throw some on the grill even when it's snowing!
Do I Have to Blanch the Corn Beforehand?
In terms of food safety, no, you don't need to blanch corn before freezing.
But in terms of quality, the answer is yes, you should blanch corn before freezing it.
Blanching, the process of submerging food quickly in hot water, kills enzymes that cause the flavor, texture, and color of vegetables to change.
But really, it kind of depends on what corn recipes you plan to make.
If you want to eat fresh corn on the cob, you definitely need to blanch it before freezing.
Otherwise, the kernels will be dry and chewy once thawed.
On the other hand, if the plan is to make corn puree or soup, then it's okay to remove the kernels from the cob and freeze them without blanching.
Can You Freeze Whole Corn on the Cob?
Yes, it's a great way to store it for use later.
That said, it’s more advisable to freeze the just kernels if that's what you'll use.
In other words, if you plan to use the kernels in a recipe, it's easier to freeze them as kernels than try to cut them off a frozen cob.
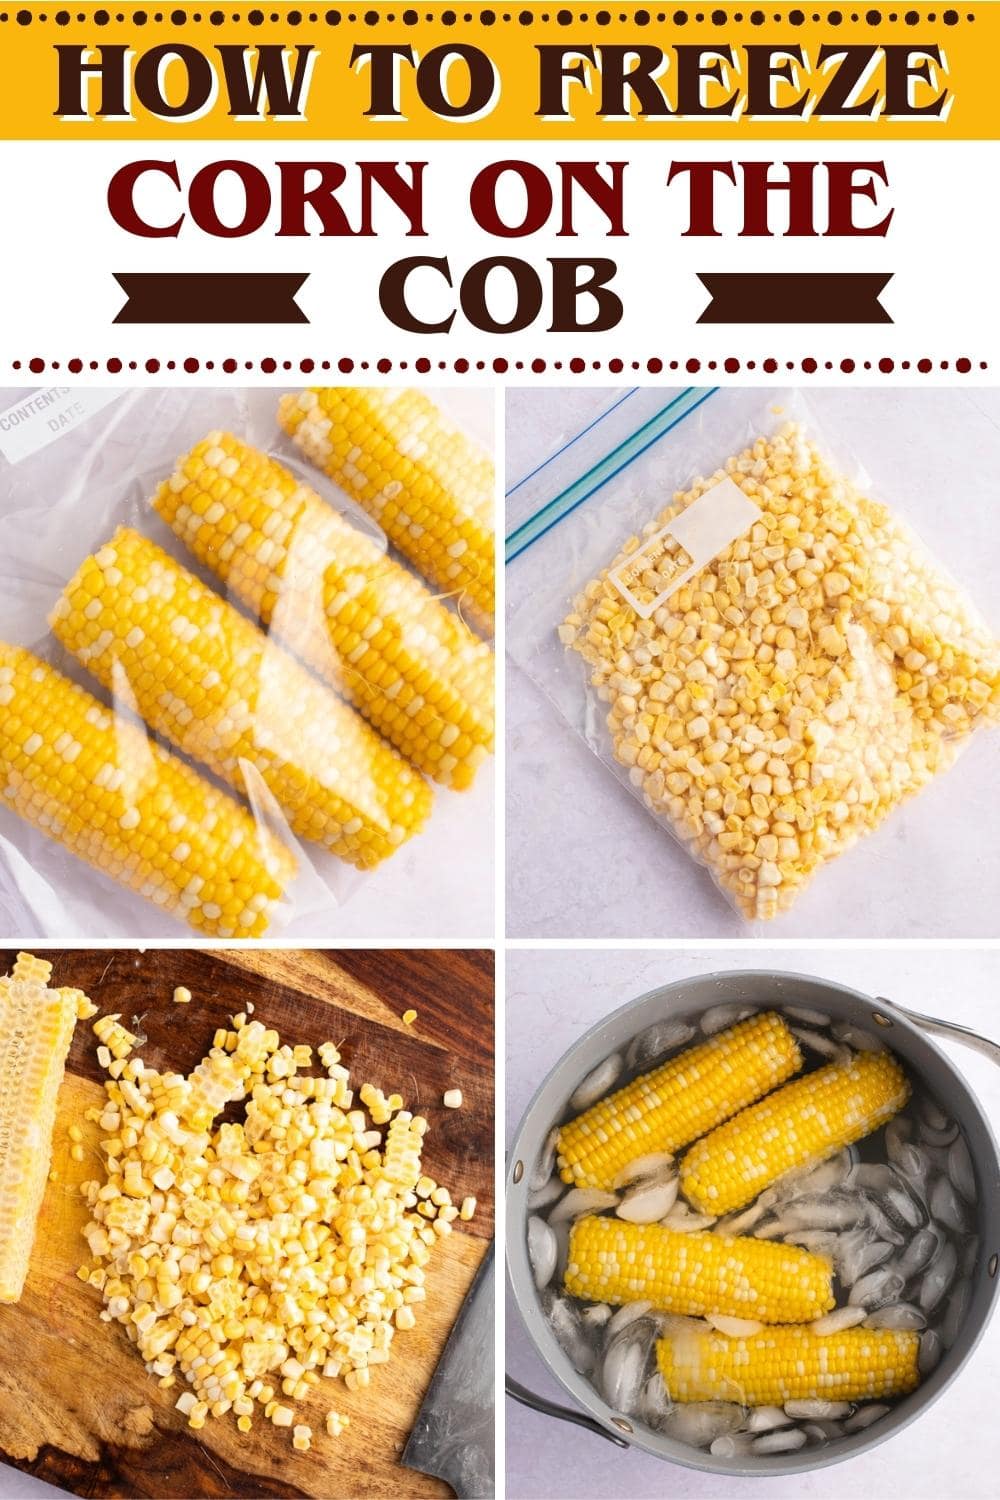
How to Freeze Corn on the Cob
As mentioned, when it comes to freezing corn on the cob, you should always blanch it first. If you aren't sure how, don't worry.
Here's a step-by-step guide on everything you'll need to do.
How to Freeze Corn on the Cob
1. Shuck the corn.
Remove the corn’s husks and silks. Fill a large pot of water halfway and set it over medium heat.
2. Prepare the ice bath.
Meanwhile, fill a large bowl with water and ice. Set aside.
3. Blanch the corn.
Once the water starts to boil, add the shucked ears of corn. Cook them for about 3-4 minutes, turning the corn every 1-2 minutes.
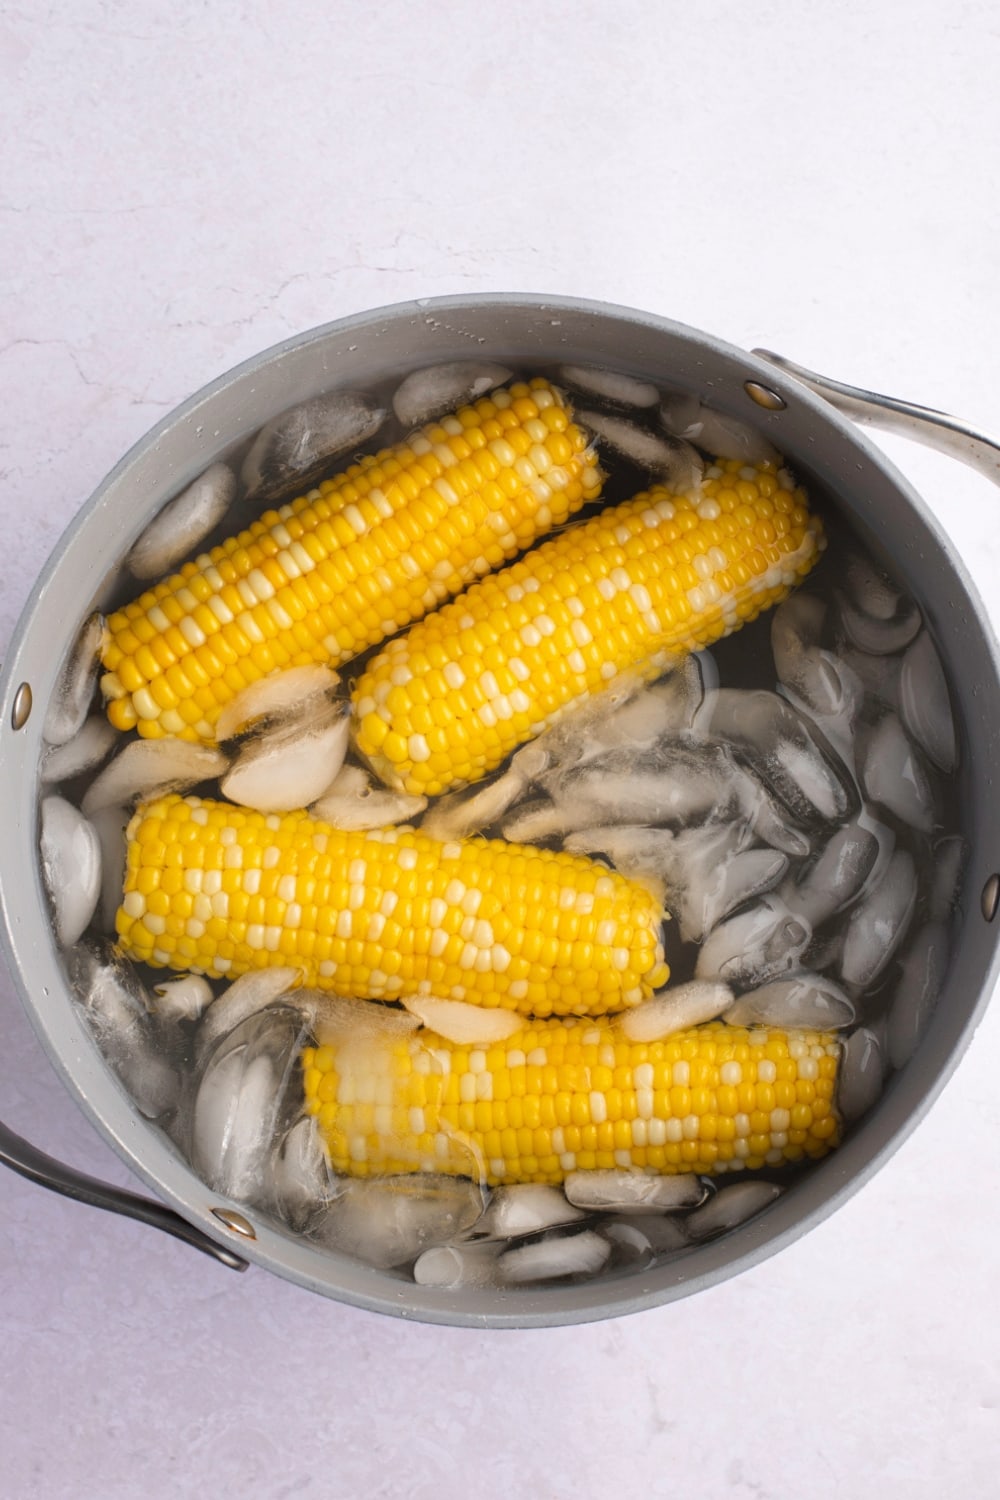
4. Submerge the corn in the bowl of ice water.
This will stop the corn from cooking further.
Transfer the corn immediately into the ice bath using a pair of tongs. Let the corn soak in the ice bath for 4-5 minutes or until cool to the touch.
5. Flash Freeze the Corn.
Place the corn on a baking sheet and freeze for 1-2 hours, or until frozen solid.
This will keep the individual cobs from sticking together once you freeze them.
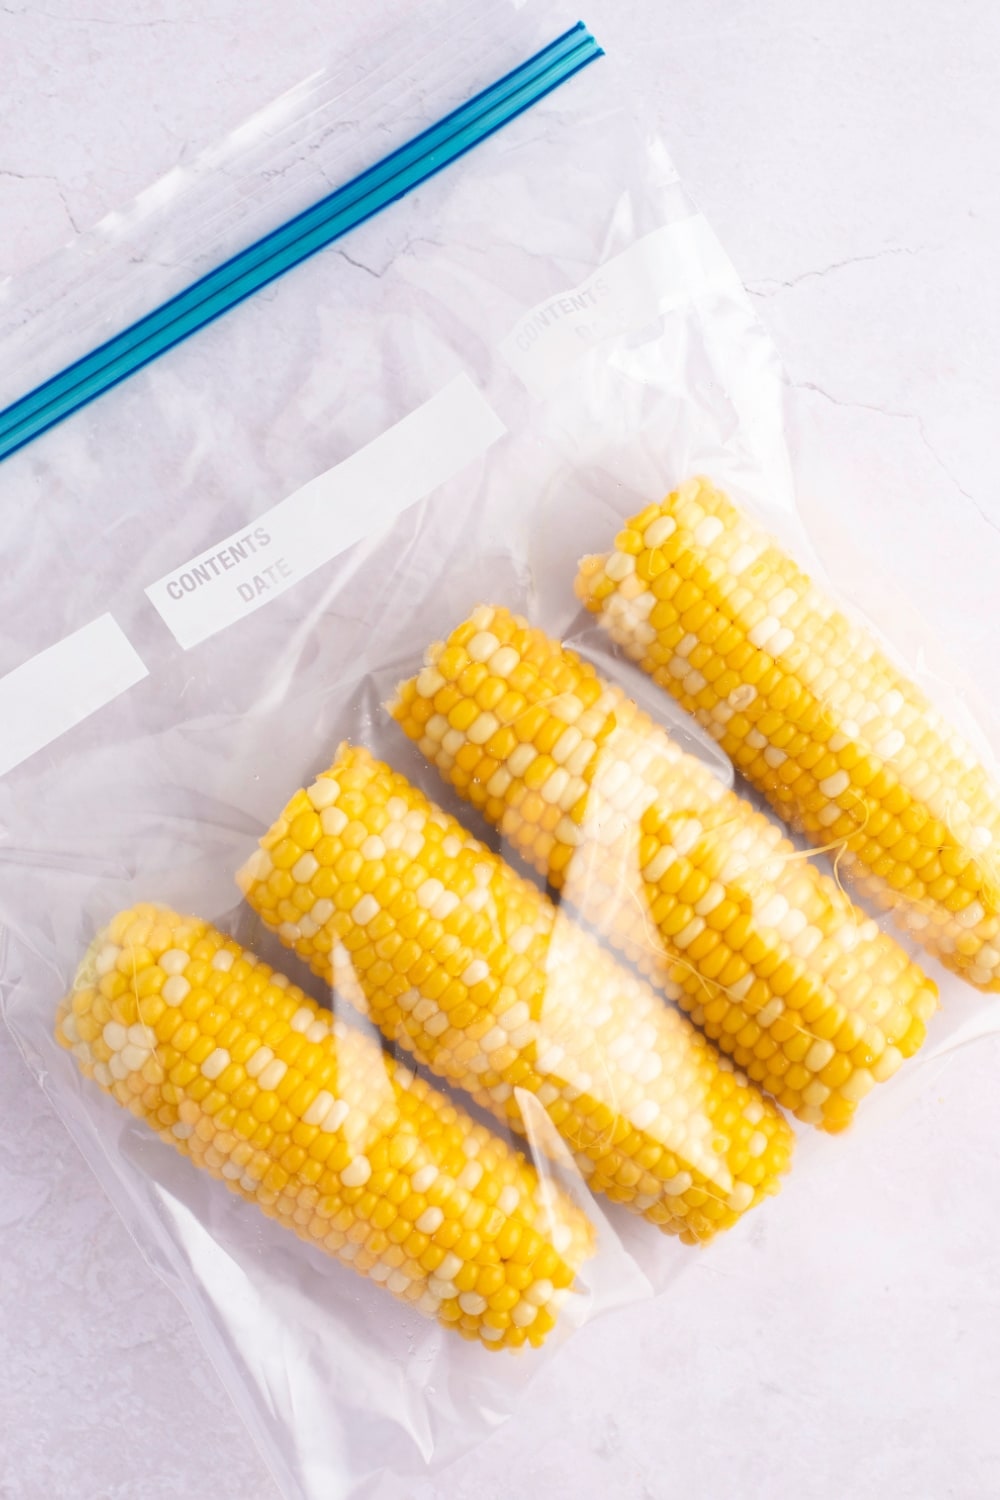
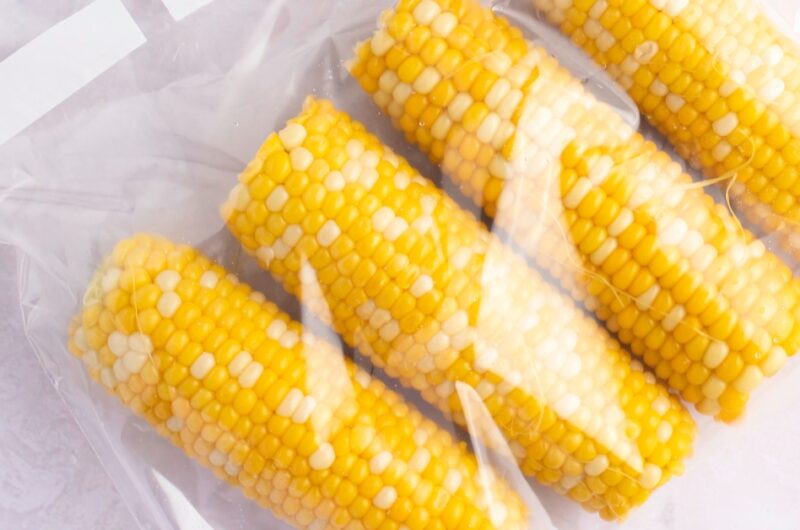
6. Transfer the corn to a freezer-safe bag.
Before sealing the bag completely, squeeze out as much air as you can. This will protect against freezer burn.
Seal, label accordingly, and freeze. Frozen corn will keep well for up to a year, but it’s best consumed within 6 months.
How to Freeze Corn Kernels
Cooked Kernels
When freezing cooked corn kernels, the steps are pretty similar to those listed above. You'll only make a few changes.
1. Shuck the corn.
Remove the corn’s husks and silks. Fill a large pot of water halfway and place over medium heat.
2. Prepare the ice bath.
While the water is heating, fill a large bowl with cold water and ice. Set aside.
3. Blanch the corn.
Once the water starts to boil, add the shucked corn. Cook it for 3-4 minutes, turning every 1-2 minutes.
4. Submerge the corn in the bowl of ice water.
Use tongs to remove the cooked corn from the boiling water. Submerge it immediately in the ice bath to prevent further cooking.
Let it soak in the ice bath for 2-3 minutes or until cool enough to handle.
5. Remove the kernels from the cob.
Hold the ear of corn vertically, placing the bottom end against a cutting board.
Hold the top end of the corn with one hand. With your other hand and a sharp knife, slice the kernels off the cob in a downwards direction.
Rotate the corn and repeat until the corn kernels on all sides are removed.
Break up large sections of kernels with your hands.
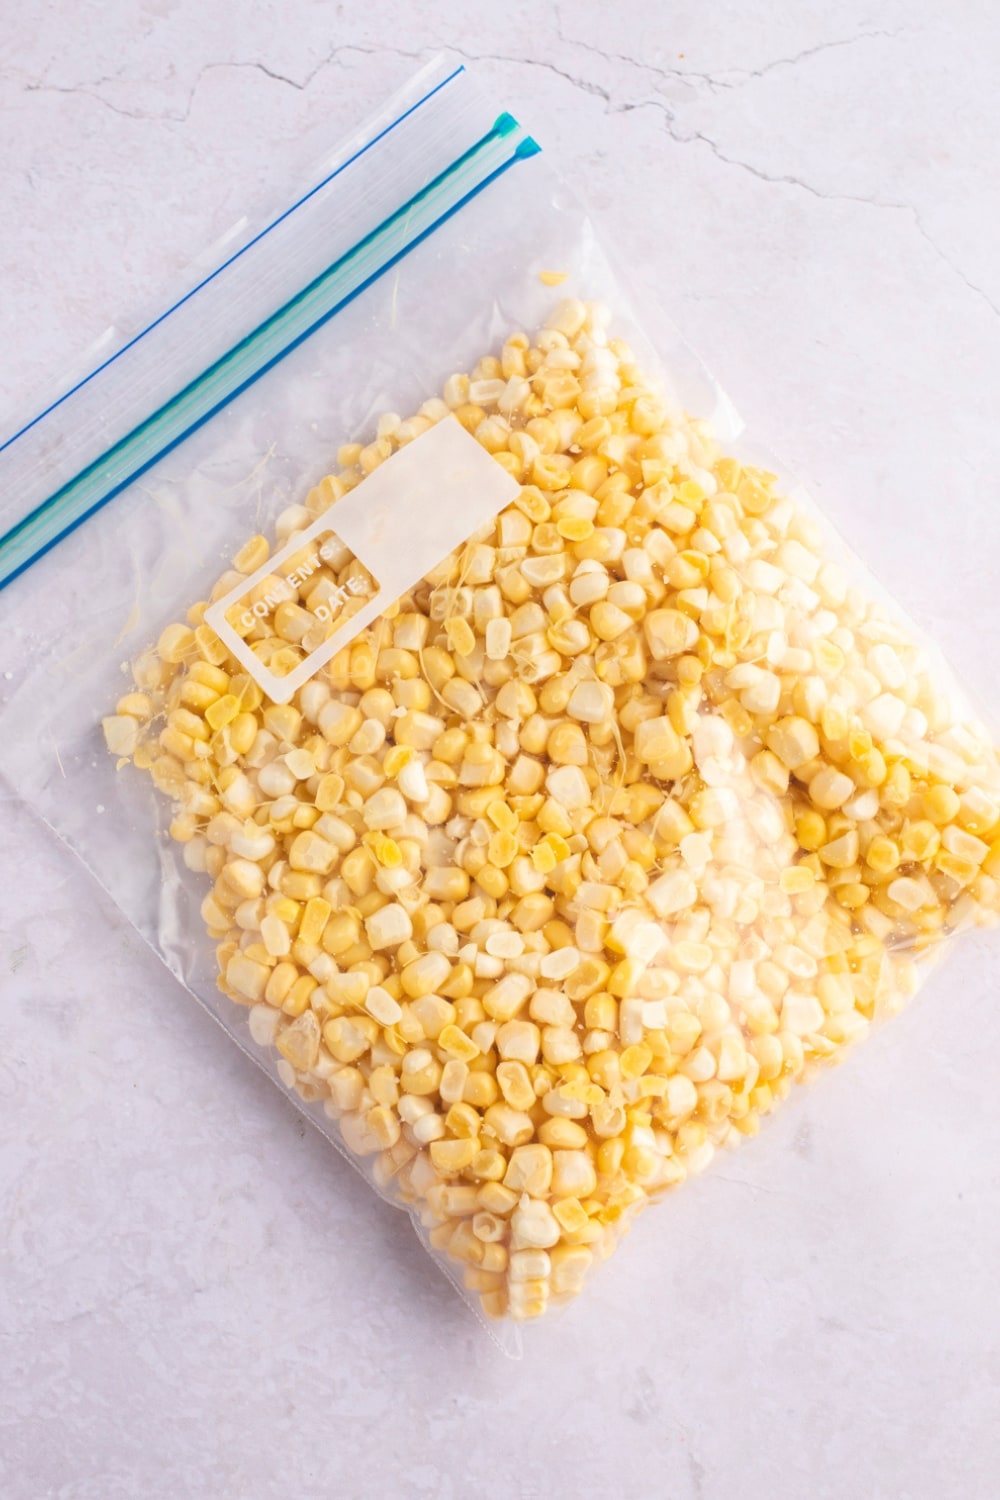
6. Transfer the kernels to a freezer-safe bag.
Before sealing the bags completely, squeeze out as much air as you can to prevent freezer-burn.
Seal, label, and freeze. As with corn on the cob, the kernels will last for up to a year. They taste best if eaten within 6 months, though.

Raw Kernels
Unlike corn on the cob, kernels can be frozen raw. Here's how:
1. Shuck the corn.
Remove the corn’s husks and silks.
2. Remove the kernels from the cob.
Hold the ear of corn vertically, placing the bottom end against a cutting board.
Use the same technique listed above to remove the kernels. (Slicing downward and rotating until they've all been removed.)
Use your hands to break up larger sections.
3. Transfer the kernels to a freezer-safe bag.
Remove as much air as possible to guard against freezer burn. Then, seal, label, and freeze for up to 1 year. Again, they'll taste best in the first 6 months.
Tips for Freezing Corn on the Cob
A few more tips before you get started:
- Use the freshest corn you can find! Frozen corn will taste exactly like it did the day it was frozen. That said, you want to preserve it when it’s at its best flavor and texture.
- Don't use salt. When blanching the corn, don't add salt to the water. Doing so will make the kernels tough.
- You CAN use sugar. If you want to sweeten the corn a little, sugar is okay. Add just a bit, though, as corn already has some natural sweetness.
- Store the corn flat. It'll save you lots of space in your freezer.
- No need to wrap. Some walkthroughs advise wrapping corn on the cob in plastic wrap before storing it in a freezer-safe bag. I find that unnecessary. As long as you use excellent-quality bags, your corn will be more than okay.
Does Frozen Corn on the Cob Need to Be Thawed?
Whether you should thaw frozen corn on the cob depends on how you're using it.
If it's an ingredient in soups, stews, or anything that requires cooking, there’s no need to thaw.
It’ll thaw as it cooks, anyway, so there’s really no point.
For frozen corn on the cob that you plan to eat as is, yes, you should definitely defrost it first.
You can thaw and reheat the frozen corn on the cob either on the stovetop or in the microwave. For corn kernels, use the microwave method.
Stovetop:
1. Remove the corn from the bag. Place it in a large pot of water and bring it to a boil over high heat.
2. Once it's boiling, reduce the heat to medium and cover the pot. Allow it to simmer for 6-8 minutes, or until it's heated through.
Microwave:
1. Place 1-2 frozen ears of corn in a 2-quart microwave-safe dish filled with 1/4 cup of water. Cover with a lid.
2. Microwave on high for 7-9 minutes, or until heated through. Flip the corn over midway through cooking.
How to Freeze Corn on the Cob (Raw or Cooked)
Wondering how to freeze corn on the cob? I have a guide for you! By following a few easy steps, you can freeze raw or cooked corn for use at a later date.
4
servings15
minutes10
minutes77
kcalIngredients
Corn on the cob
Ice and water (for ice bath)
- Equipment:
Large pot
Large bowl
Freezer-safe bags
Tongs
Baking sheet
Cutting board
Sharp knife
Instructions
- Cooked Corn on the Cob
- Remove the corn’s husks and silks. Fill a large pot of water halfway and set it over medium heat.
- Meanwhile, fill a large bowl with water and ice. Set aside.
- Once the water starts to boil, add the shucked ears of corn. Cook for about 3-4 minutes, turning the corn every 1-2 minutes.
- Transfer the corn immediately into the ice bath using a pair of tongs. Let the corn soak in the ice batch for 4-5 minutes or until cool to the touch.
- Flash freeze the Corn. Place the corn on a baking sheet and freezer for 1-2 hours, or until frozen solid.
- Transfer the corn to a freezer-safe bag. Squeeze out as much air as you can before sealing completely to prevent freezer burn. Seal, label accordingly, and freeze. Frozen corn will keep well for up to a year, but it’s best consumed within 6 months.
- Cooked Kernels
- Remove the corn’s husks and silks. Fill a large pot of water halfway and set it over medium heat.
- Meanwhile, fill a large bowl with water and ice. Set aside.
- Once the water starts to boil, add the shucked corn. Cook for about 3-4 minutes, turning the corn every 1-2 minutes.
- Transfer the corn immediately into the ice bath using a pair of tongs. Let the corn soak in the ice batch for 2-3 minutes or until cool to the touch.
- Hold the ear of corn vertically, placing the bottom end against a cutting board. With one hand on the top end of the corn, slice the kernels off the cob using a sharp knife. Start from the top and slice straight down to the bottom. Rotate the corn and repeat until the corn kernels on all sides are removed. Break up large sections of kernels with your hands.
- Transfer the kernels to a freezer-safe bag. Squeeze out as much air as you can before sealing completely to prevent freezer burn. Seal, label accordingly, and freeze. Frozen corn will keep well for up to a year, but it’s best consumed within 6 months.
- Raw Kernels
- Remove the corn’s husks and silks. Fill a large pot of water halfway and set it over medium heat.
- Hold the ear of corn vertically, placing the bottom end against a cutting board. With one hand on the top end of the corn, slice the kernels off the cob using a sharp knife. Start from the top and slice straight down to the bottom. Rotate the corn and repeat until the corn kernels on all sides are removed. Break up large sections of kernels with your hands.
- Transfer the kernels to a freezer-safe bag. Squeeze out as much air as you can before sealing completely to prevent freezer burn. Seal, label accordingly, and freeze. Frozen corn will keep well for up to a year, but it’s best consumed within 6 months.
Notes
- It's not recommended to freeze raw corn on the cob. However, you can freeze the kernels raw without issue.