


If you're looking for low-carb alternatives, these Carbquik Buttermilk Biscuits will do the trick. With just 2 grams of net carbs per serving, these biscuits will satisfy your cravings without crashing your diet.
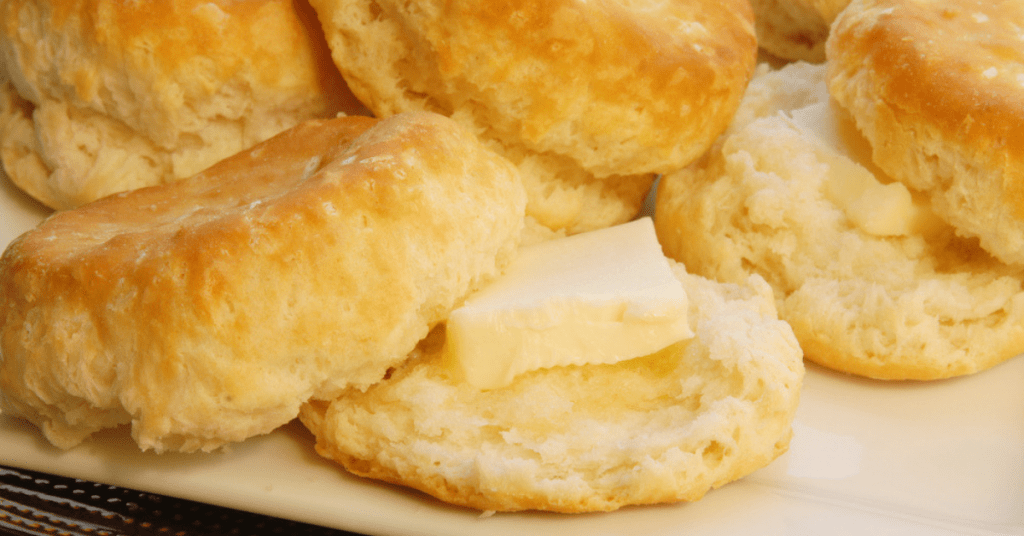
Plus, there's nothing better than a warm biscuit fresh-from-the-oven, topped with a nice spread of butter. Whether it's a holiday, family get-together, or just a lazy weekend, I find myself going back to this recipe again and again.
How to Make Carbquik Biscuits
Carbquik actually has 9 excellent recipes right on the box. But we've modified the original recipe to come up with something extra special. In just 15 minutes, you'll have warm, flaky biscuits for the whole family.
I love making these on the weekend. Top it off with a little butter. Or turn it into a breakfast sandwich with sausage, egg, and cheese.
It's the perfect low-carb breakfast that will power up your morning and keep you full and satisfied for hours.
Plus, making biscuits is just pretty darn fun!
Let's dig in…
Preheat oven to 450 degrees.
Place 2 cups of Carbquik, 1 teaspoon of sugar, and 1 heaping tablespoon of baking powder into a food processor. Pulse until well mixed.
Cut 4 tablespoons of cold butter into chunks, then add to the flour. Pulse five to ten times. Just to get the butter to cut into the flour.
You'll know it's ready when your butter is in pea size pieces. Kind of like pebbles. If you still see large chunks, pulse a few more times.
It's important NOT to overmix. Otherwise, your biscuits will be dense and heavy. Pulse sparingly to keep the biscuits light and fluffy.
Add 1/2 cup heavy cream into the food processor. Pour evenly in a circle around the blade. Pulse again 5 to 10 times, just to combine. You can add a little more cream if they seem dry. But it's important not to overwork the dough.
When you're able to form them into balls, you're good to go. Lumps are ok. This keeps them light and fluffy.
There's no need to roll these. Simply pat the biscuit dough into a large rectangle about 1/2 inch thick. You can use some flour to keep them from sticking.
Then use a biscuit cutter to form your biscuits.
Or to keep it super simple, you can even just cut them into squares with a knife.
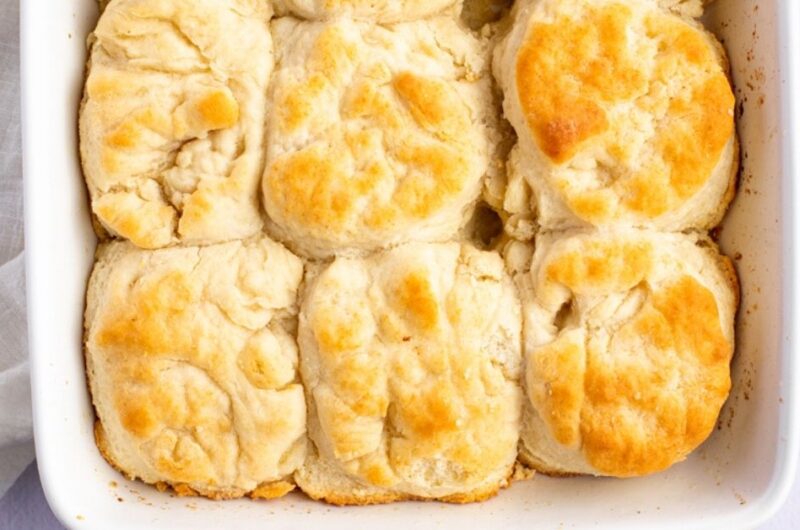
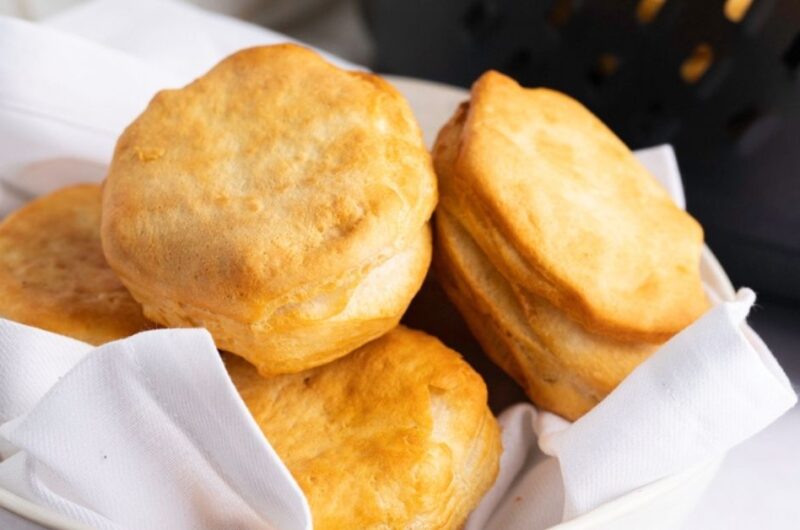
Place biscuits onto a greased baking sheet. Bake at 450 degrees for 8 to 10 minutes or until golden. Biscuits should be a pale-golden on top and a deeper brown on bottom.
This recipe makes 8 large biscuits. But what I really love is how the extra baking powder makes them rise. Tender, golden brown biscuits that melt in your mouth.
Brush with melted butter. These biscuits are best if eaten shortly after cooking.
Tips for Making the Best Carbquik Biscuits
1. Freeze your butter. Most recipes call for cold butter. But some of the best biscuits are actually made from frozen butter. The next step is to grate your butter with a box grater. It does require an extra step in the baking process, but it's well worth it!
Cold dough is what makes a biscuit flaky.
2. Never use your hands to mix the batter. The temperature of your hands will melt the butter. Use a metal fork, pastry blender or spoon instead. This will keep the ingredients cold. Which is the key to good, flaky biscuits.
One of the keys to a great biscuit is handling the dough as little as possible.
3. Do not twist the ring mold. When you're forming your biscuits, avoid twisting the ring mold. As soon as you've formed your biscuit (using either a biscuit cutter or the rim of a large cup, pull the biscuit straight out.
If you twist, it causes the layers to slant and the biscuit will not cook evenly. It also creates a lopsided biscuit.
To keep it simple, I often just use a knife to cut the biscuits into squares. Not as fancy, but it does the trick! And you don't have to worry about any leftover dough.
4. Have FUN! Don't take baking too seriously. Cooking is half art. Half science.
Have fun with it and learn as you go. After all… baking should be fun. Getting your hands dirty. Playing in the kitchen. And filling your house with the sweet,
sweet smell of buttery biscuits. What could be better?
How Long Do Biscuits Last?
Biscuits are best right out of the oven. But can also be stored in the refrigerator for up to 4 days. Place in an airtight container or resealable plastic bag. They can also be frozen for up to a month without drying out.
If you're preparing your dough ahead of time, you can also freeze unbaked cut-out biscuits for up to 1 month as well. Place the unbaked, cut biscuits on a baking
sheet. Cover lightly with plastic wrap and place in the freezer. When the biscuits are frozen solid, stack them in a resealable freezer bag.
When you're ready to bake, simply place them in the oven and cook for twice as long as fresh biscuits. No need to thaw.

WANT TO SAVE THIS RECIPE?
Carbquik Buttermilk Biscuits
8
servings5
minutes10
minutes95
kcalIngredients
2 cups Carbquik
1 tablespoon (heaping) baking powder
1 teaspoon sugar
4 tablespoons cold butter
1/2 cup heavy cream
Instructions
- Preheat oven to 450 degrees.
- Add the Carbquik, sugar, baking powder, and xanthan gum, if using, to a food processor. Pulse until well mixed.
- Cut 4 tablespoons of cold butter into chunks, then add to the flour. Pulse five to ten times or until it looks like coarse breadcrumbs with a few pea-sized chunks.
- Add the heavy cream, pouring it evenly in a circle around the blade. Pulse again 5 to 10 times, just until it looks like a shaggy dough. Add 1-2 tablespoons extra if it seems dry. Do not turn the processor on to a continuous spin.
- Turn the dough onto a very lightly floured surface and press it gently into a 1-inch thick rectangle. Then, cut the dough into 8 biscuits (or slice it into squares to prevent waste). Gently press excess dough into a smaller rectangle and cut extra biscuits, if possible.
- Place the biscuits onto a greased baking sheet and bake at 450 degrees for 8 to 10 minutes or until golden.
- Serve immediately and enjoy!
Notes
- Don't use a glass to cut the biscuits. The blunt edge will seal the sides and keep them from rising.
- Do not overwork the dough. Just pulse it a few times until it starts to come together. If it looks like a smooth ball, the biscuits will come out dry and dense.
- No food processor? Cut the butter into the flour with a pastry cutter or butter knife. Then stir in the cream and press it gently together on a lightly floured counter.
- Add xanthan gum. 1 teaspoon will help the texture, making it fluffy and tender.


15 Comments
I made these as instructed except for the Gum
I made these exactly as instructed and they have a great taste but are crumbly. Of course I did not let them cool before I tried one. Should I have made the dough a little wetter so that I can slice them open?
I ordered a big box of carb quick and couldn’t wait to make biscuits. I used the.recipe on.thw.box and thought they.were.awful. Now I was stuck with.the big box! Today I stumbled onto your recipe and I was blown away! They were awesome! I am thrilled! I wonder if.you ever figured out the net carbs for each biscuit?
Having to count calories (type2).
If I use just 2 cups of carbalose flour & water and makes 12 biscuits.
How many calories are there in one biscuit?
Xanthan gum???
Hi there!
Yes, while xanthan gum isn’t a required ingredient, it will help give the biscuits a fluffier more “normal” biscuit texture. (It’s a thickening agent and stabilizer.) You can typically find it on the baking aisle at Walmart. They even carry it in their Great Value products now, which surprised me!
Loved the recipe! But the biscuits tasted really salty. Could it be cut in half, or cut completely, without affecting the way the recipe works?
They were also quite dry. You said we could add “a little more” cream – how much is too much?
Hi Becky! I’ve made an adjustment to the recipe based on feedback.
Since there’s already salt in the Carbquik, you can leave it out (or just add 1/4 teaspoon).
As for the cream, you can add more, 1 tablespoon at a time, until the dough comes together.
Keep in mind, the more you work the dough, the less flaky it will be.
If you’re having trouble with the texture, try this:
1. Freeze the butter, then grate it.
2. Add the grated, still frozen butter to the dry mix in a bowl, give it a stir so it’s evenly distributed, then drizzle over the cream.
3. Use a butter knife or fork to cut and stir the liquid in, adding more if needed.
4. When it’s shaggy but coming together, turn it onto a lightly floured surface and simply press it together with your hands.
5. Gently press and pat it into a 1-inch thick rectangle.
6. Then, instead of cutting it with a biscuit cutter, slice it with a sharp knife into squares. That way, it’s not getting overworked.
7. Bake as instructed and they should come out nice and flaky!
You can, of course, still use a biscuit cutter (not a glass), but then you just need to be gently with the excess dough.
Hope this helps!
I love this recipe! Thank you! I used salted butter, so adding 1 tsp. salt made them way too Salty. So I left the salt out and they were perfect! Thanks so much!
My mods: Double the butter and use a cheese slicer to make small butter slices. Sugar is not necessary. Use a muffin pan to drop dough into. Oven at 475 deg F.
This is supposed to be Buttermilk Biscuits, but there’s no buttermilk in the recipe?
hi Jill! The buttermilk is actually already in the Carbquik! They use powdered buttermilk in the blend so you don’t need to add extra.
That said, you can use buttermilk instead of heavy cream if you want, but you might not need as much.
I recommend cutting the butter into the dough, then transferring it to a bowl. Add 1/3 cup buttermilk and stir with a butter knife until it starts to come together. Add more buttermilk, as needed (1 tablespoon at a time), until the dough is shaggy. Then press it with your hand to bring it together properly.
Hope this helps!
Unless you are a salt fiend, leave out the salt entirely, especially if the butter is salted.
I used a biscuit cutter and hand-formed the leftover dough into balls placed next to the rolled and cut biscuits. The hand-formed biscuits rose more, so in the future I will skip the rolling and cutting.
What is carbquik flour ?
Hi Pauline! Carbquik is a low-carb, keto-friendly baking mix. You can find it in most supermarkets or online.