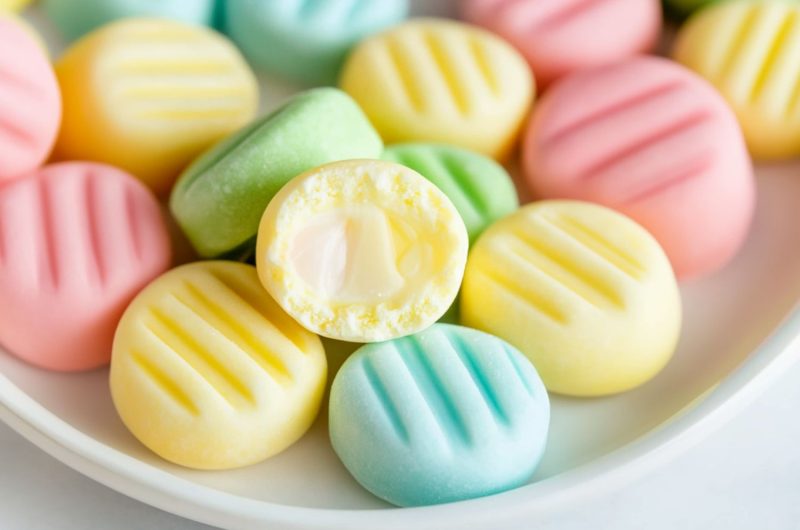
I’ve always had a soft spot for butter mints. They remind me of when I’d sneak a few from the candy dish before Christmas dinner.
These homemade mints are a throwback to that. They’re sweet and fresh and melt in your mouth.
And they’re better than any store-bought candies because you can easily adjust the flavor and color to your liking.
Super cute, simple, and perfect for holidays, they’re a must-make this festive season.

Why You’ll Love These Butter Mints
Perfect for Any Occasion: They’re ideal for holiday gatherings, gifting, or just as a sweet treat to enjoy at home.
Customizable Colors: Use gel food coloring to match any theme or celebration!
Perfect for Gifting: Homemade butter mints are a thoughtful, customizable gift everyone will love.
Melt-in-Your-Mouth Texture: There’s nothing quite like these mints! They’re unbelievably soft, creamy, and irresistible.
Ingredients
- Unsalted Butter: For a creamy base and rich texture. Set it out early to soften, so it blends smoothly with the other ingredients.
- Powdered Sugar: For sweetness without graininess. Sift it to prevent lumps.
- Heavy Cream or Milk: Adds moisture and helps achieve the right consistency.
- Peppermint Extract: Delivers the signature cool, minty flavor. Use it sparingly, as it’s highly concentrated.
- Vanilla Extract: To help balance the peppermint. It also adds depth and warmth.
- Salt: Enhances the sweetness and brings out the mint flavor. Add just a pinch.
- Food Coloring: Optional for visual appeal and customization.
How to Make Butter Mints
With their creamy texture and subtle peppermint flavor, butter mints are the perfect little bite to enjoy after dinner.
And they come together in a snap!
1. BEAT the butter until smooth and creamy. Scrape the bowl and beat again until lump-free.
2. BLEND in 2 cups of powdered sugar on low speed, then add the vanilla, peppermint extract, and salt.
3. ADD the remaining powdered sugar gradually. Add heavy cream as needed to create a soft, playdough-like dough.
4. COLOR the dough, if desired, by dividing it into bowls and kneading in gel food coloring until uniform.
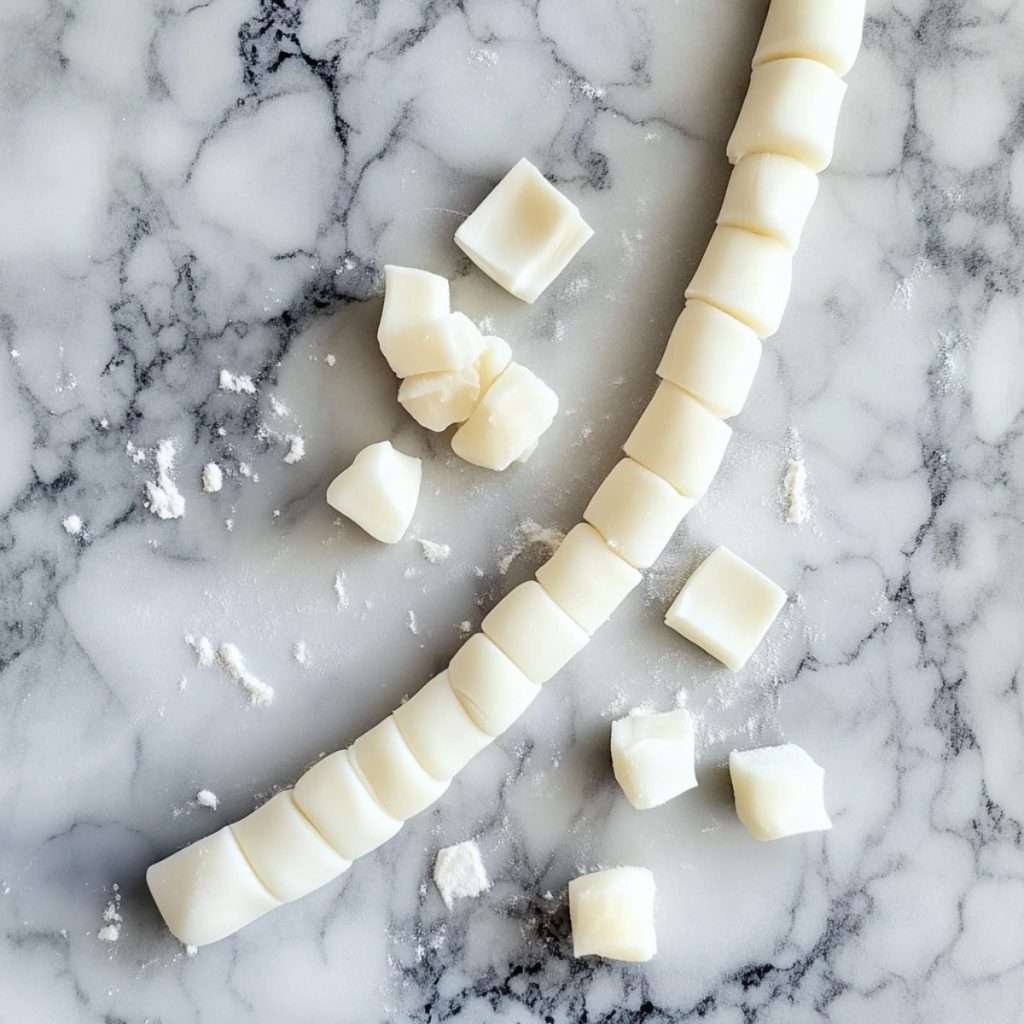
5. ROLL small portions of dough into 1/2-inch-thick ropes on a lightly powdered surface, then cut into 1/2-inch pieces.
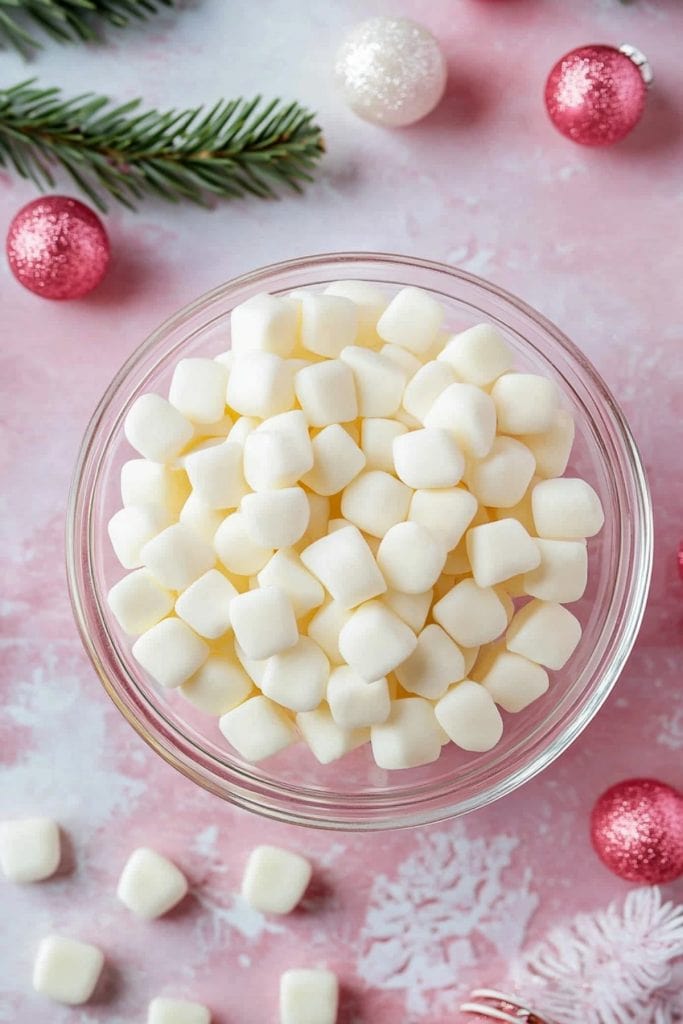
6. AIR DRY at room temperature for 12-24 hours until a firm outer shell forms. Enjoy!

Tips for the Best Butter Mints
How cute do these mints look? Seriously, I must’ve taken a hundred pictures.
And really, the hardest part is waiting for them to dry (patience is key here).
But trust me, it’s worth it when you pop one in your mouth, and it just dissolves into creamy, minty goodness.
For the softest, creamiest, yummiest mints possible? Incorporate these tips:
- Use room-temperature butter. Set it out early so it softens completely. And be sure to use good butter for the best taste and texture.
- Sift the powdered sugar. It can come with some lumps, so this will just ensure the mints are as smooth as can be. Add it slowly in small increments, as well. This helps the dough stay moist and pliable.
- Go easy on the peppermint. Peppermint extract is much more concentrated than most people realize. So, start with a very small amount (1/4 teaspoon). Then, add the vanilla and taste before adding any more peppermint.
- Use gel food coloring. It provides the brightest colors without watering down the dough. Dip a sharp knife or toothpick into the color, starting with a small amount, and go from there.
- Roll the rope evenly. The more uniformly sized the ropes are, the more evenly sized the mints will be.
- Add texture. After cutting the mints, use a pasta former to add texture. Or gently press a fork into the top.
- Allow proper drying time. Don’t cut the drying time short! The mints must dry for at least 12 hours (preferably 24). If you live in an extremely humid area, it may take longer.
- Try different extracts. Not a big fan of peppermint? Try using other extracts, such as almond, lemon, or orange.

How to Store
These mints last for quite a while if stored correctly. Here’s how:
To Store: Keep the mints in an airtight container. They should last up to 2 weeks at room temperature or in the fridge for up to 1 month.
To Freeze: Freeze the dried mints in a single layer on a baking sheet. Transfer them to an airtight container and freeze for up to 3 months.
More Festive Treats You Have to Try
Christmas Cookie Bars
Gingerbread Crinkle Cookies
Christmas Poke Cake
Chocolate Coconut Balls
Butter Mints
~3
cups20
minutes12
hoursSoft, creamy, and perfectly sweet, these homemade butter mints melt in your mouth with a smooth, buttery texture and refreshing hint of peppermint.
Ingredients
1/2 cup unsalted butter, softened
4 cups powdered sugar, sifted, divided
1/2 teaspoon vanilla extract
1/4 teaspoon peppermint extract
pinch salt
1 tablespoon heavy cream or milk, as needed
food coloring, optional
Instructions
- In a large mixing bowl, beat the softened butter with an electric mixer on medium speed until smooth and creamy. Scrape the bottom and sides and beat again until lump-free.
- Reduce the speed to low and slowly blend in 2 cups of powdered sugar. Then, blend in the vanilla, peppermint extract, and salt.
- Slowly add the remaining powdered sugar, adding the heavy cream if needed to reach a soft, playdough-like dough.
- If using food coloring, divide the dough into separate bowls. Color the dough with gel food coloring, kneading lightly until uniform.
- On a surface lightly dusted with powdered sugar, roll small portions of dough into long, thin ropes, about 1/2 inch thick. Cut the ropes into 1/2-inch pieces.
- Place the mints on a parchment-lined baking sheet. Allow them to air dry at room temperature for 12-24 hours or until they form a firm outer shell. Enjoy!
Notes
- Sift the powdered sugar to ensure smooth mints.
- Add the peppermint extract slowly, a small amount at a time. Taste and adjust as needed. It’s quite strong!
- Make them extra pretty by pressing a fork into the individual mints.
Did you like the recipe?
Click on a star to rate it!
Average rating 5 / 5. Vote count: 2
No votes so far! Be the first to rate this post.
We are sorry that this post was not useful for you!
Let us improve this post!
Tell us how we can improve this post?


