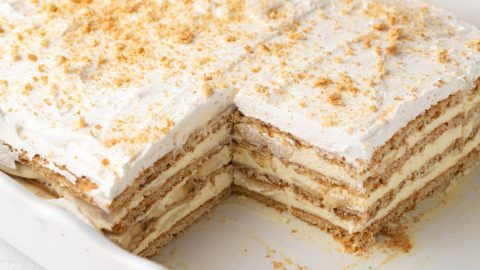


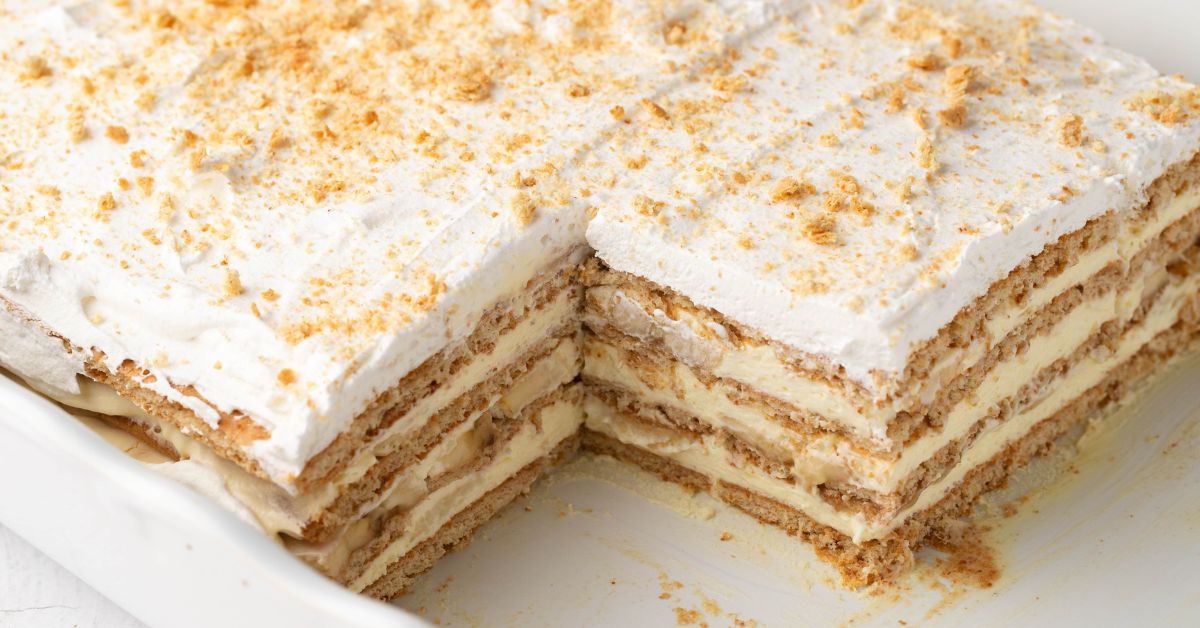
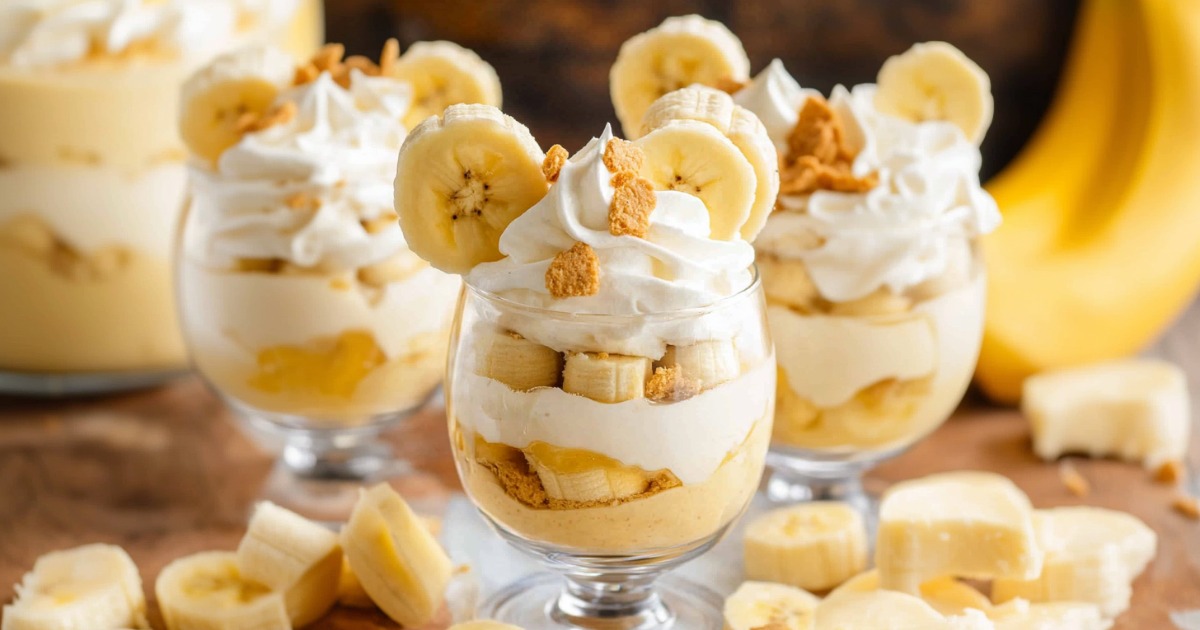
This no-bake banana icebox cake transforms simple ingredients into an impressive layered dessert! It takes practically no time to make but tastes like it came from a high-end bakery.
It features dreamy layers of creamy banana pudding, fresh bananas, and graham crackers. Every time I make this, people beg for the recipe!
WANT TO SAVE THIS RECIPE?
I love making it for potlucks, family gatherings, and holidays.
No matter the occasion, it's guaranteed to impress!
Why You’ll Love This Banana Icebox Cake
No-Bake: Also known as no-bake banana pudding cake, this sweet treat is irresistible. All it takes is a bit of mixing, and then it comes together in the fridge!
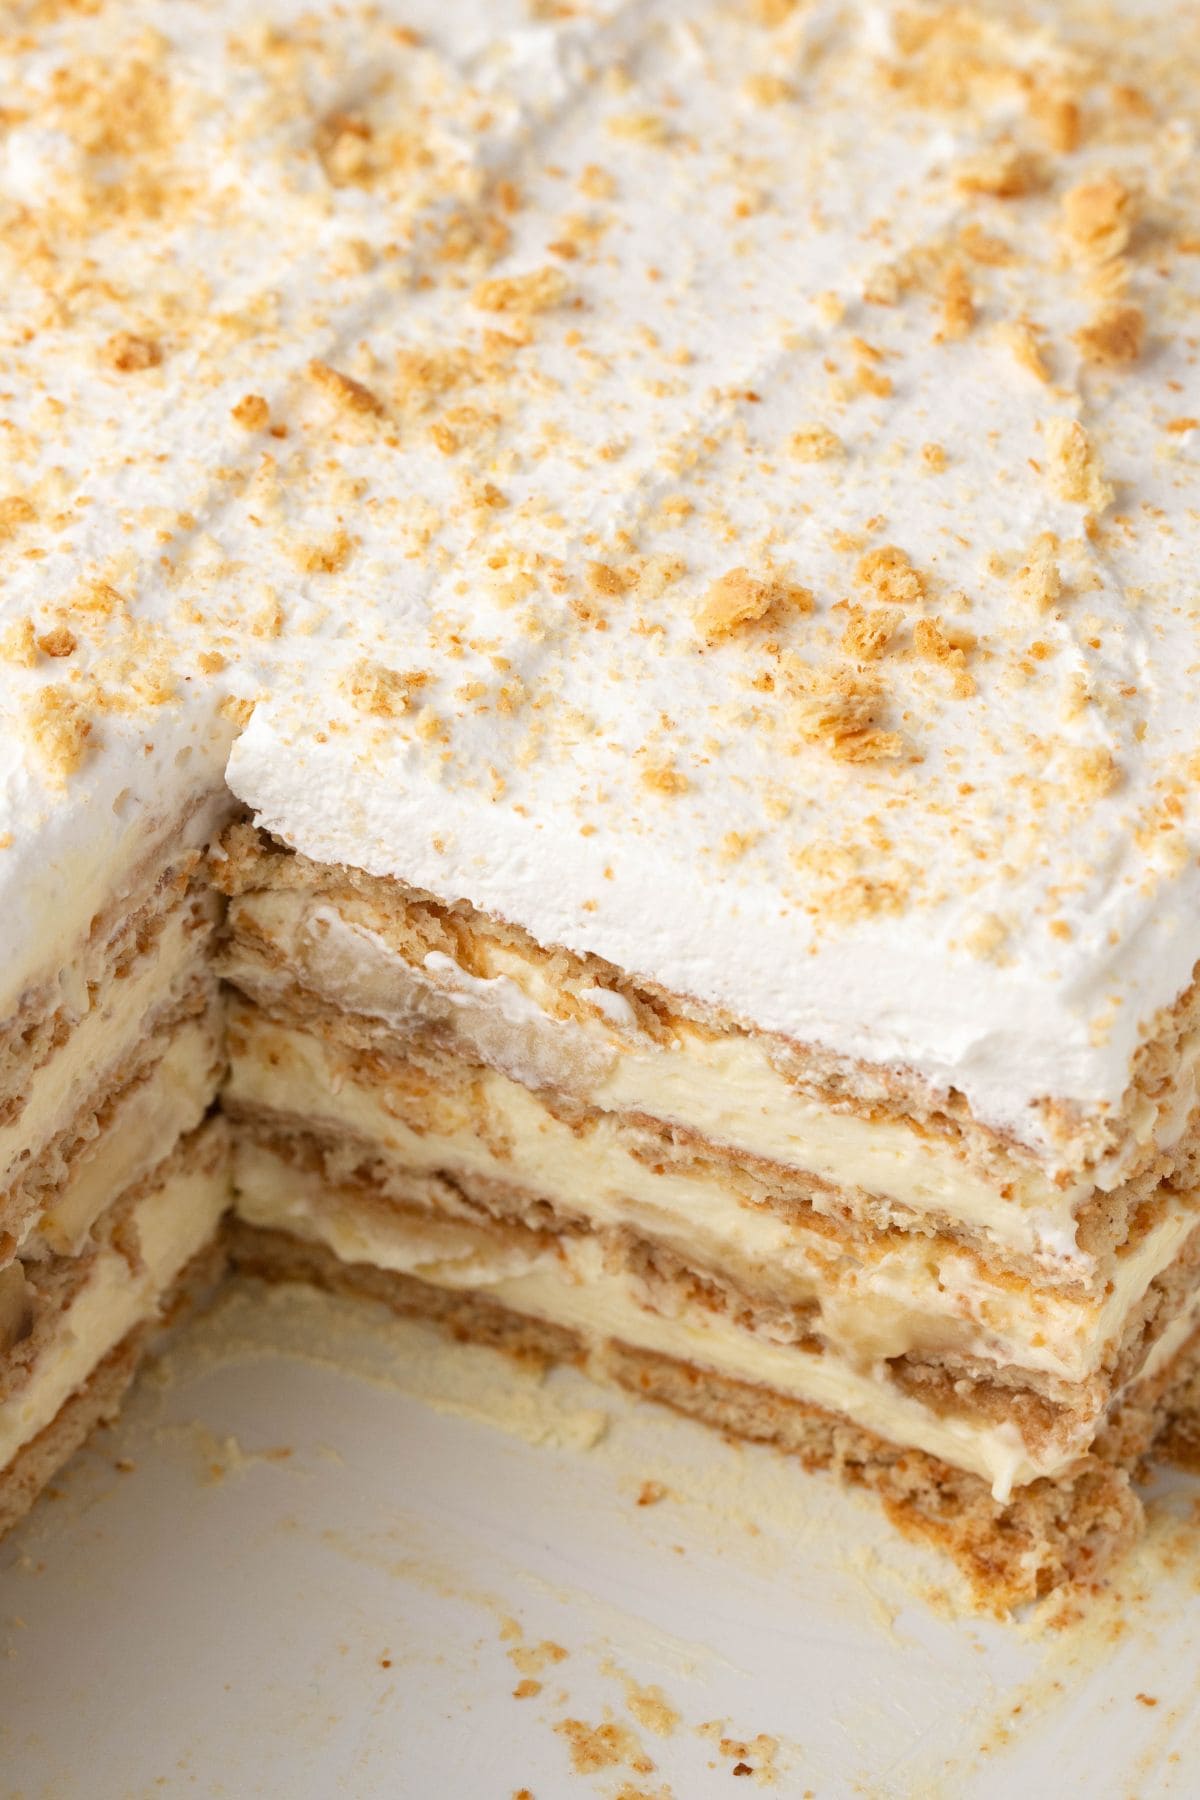
Creamy Texture: You’ll adore the layers of silky pudding and fluffy whipped topping. Heck, even the graham crackers are soft in this one! The whole dessert has a delightfully smooth and luscious texture.
Minimal Ingredients: Banana icebox cake requires only five main ingredients. That makes it super easy to shop for and assemble. Plus, it comes together with only 15 minutes of hands-on work.
Party Perfect: The 9×13 pan yields enough generous portions for a whole crowd. And you can use optional toppings to elevate the dessert’s visual appeal.
Ingredients
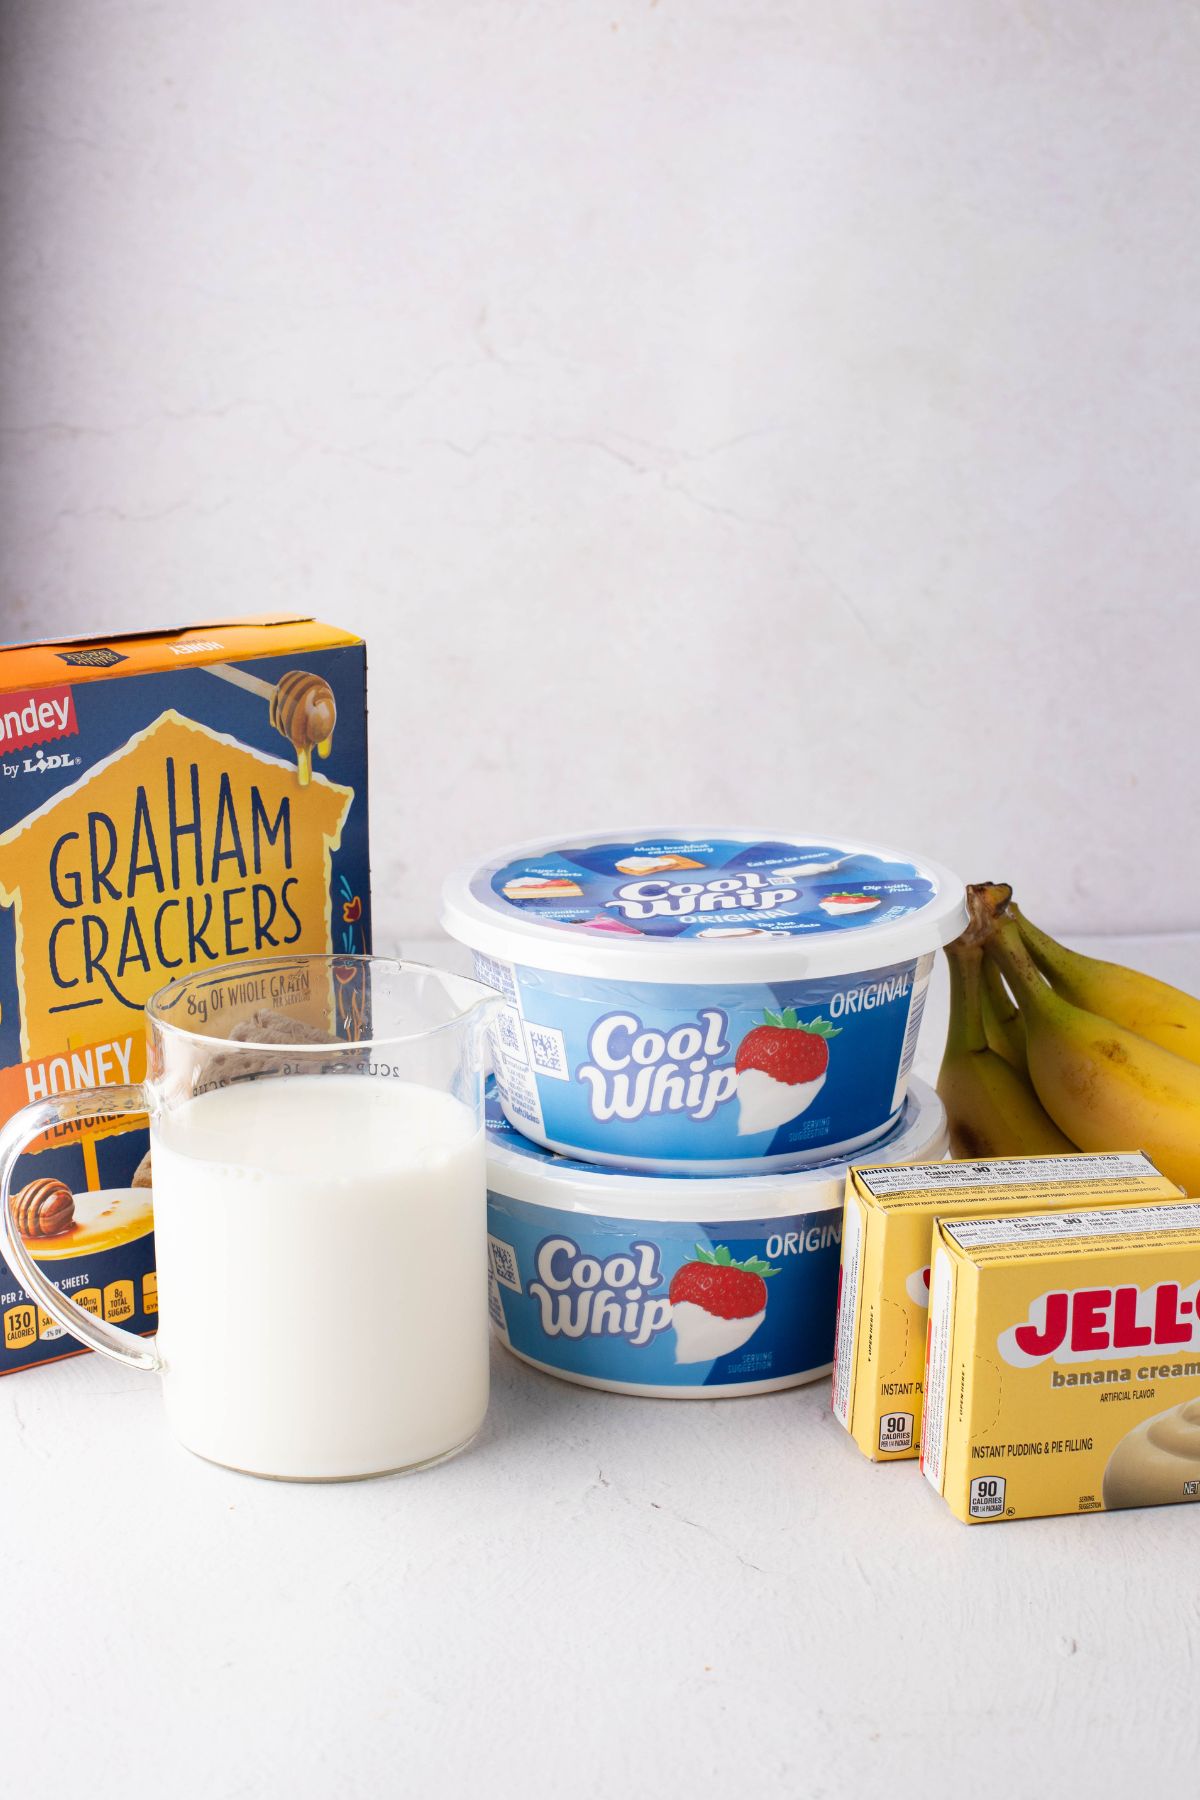
- Banana Cream Instant Pudding Mix: The foundation of the creamy filling. Be sure to get an instant mix, not cook and serve.
- Cold Milk: It activates the pudding mix and ensures the filling sets properly.
- Whipped Topping: It makes the filling light and fluffy and for the creamy, cloud-like topping.
- Graham Crackers: They provide the dessert with structure and integrity.
- Ripe Bananas: They bring the fresh banana flavor.
- Caramel Syrup: Though optional, it provides a rich, buttery sweetness and an elegant finishing touch.
How to Make Banana Icebox Cake
Like most icebox cakes, this one is super easy to make. It’s really just a matter of mixing, assembling, and chilling.


1. Prepare the pudding. Whisk the instant pudding mix and cold milk in a large bowl until smooth. Set aside for 5 minutes to thicken.
2. Add the whipped topping. Once the pudding has thickened, gently fold one container of whipped topping into it until thoroughly mixed.
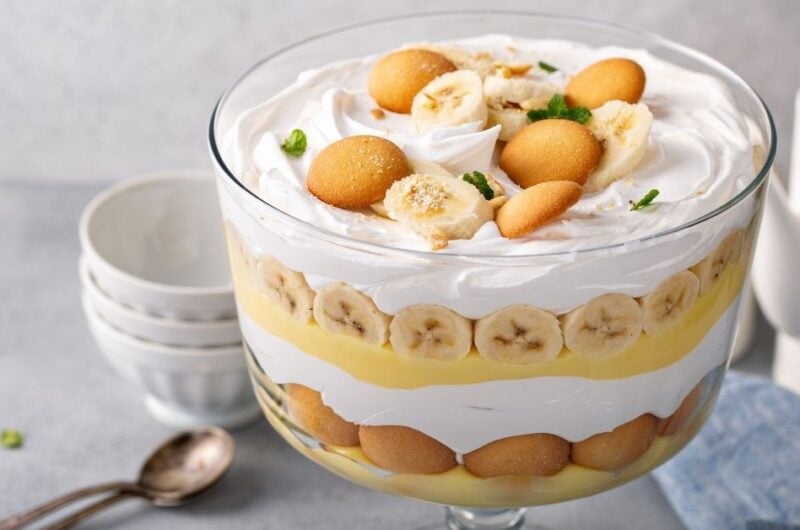
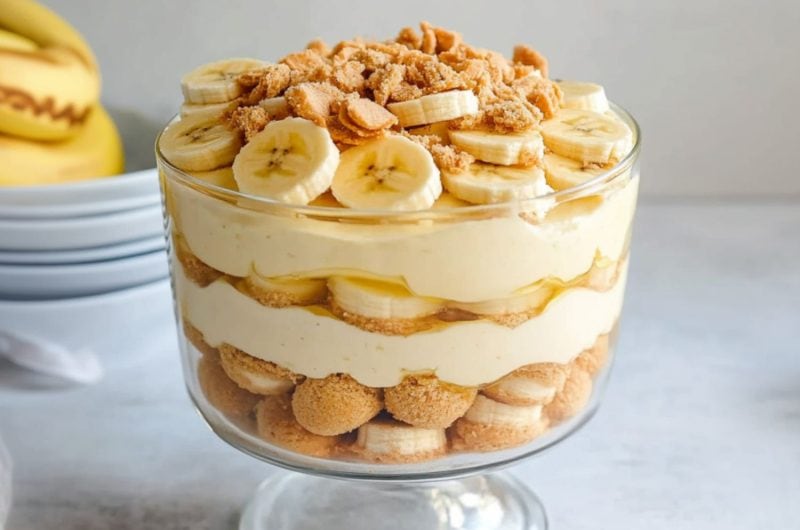
3. Assemble. Spread a layer of the pudding on the bottom of a 9×13-inch dish. Then, add a layer of graham crackers, a layer of sliced bananas, and 1/3 of the remaining pudding mixture. Repeat these layers twice, finishing with a final layer of graham crackers on top.


4. Add the topping and chill. Spread the remaining tub of whipped topping evenly on top. Then, cover the dessert with plastic wrap and pop it in the fridge for at least 4 hours.
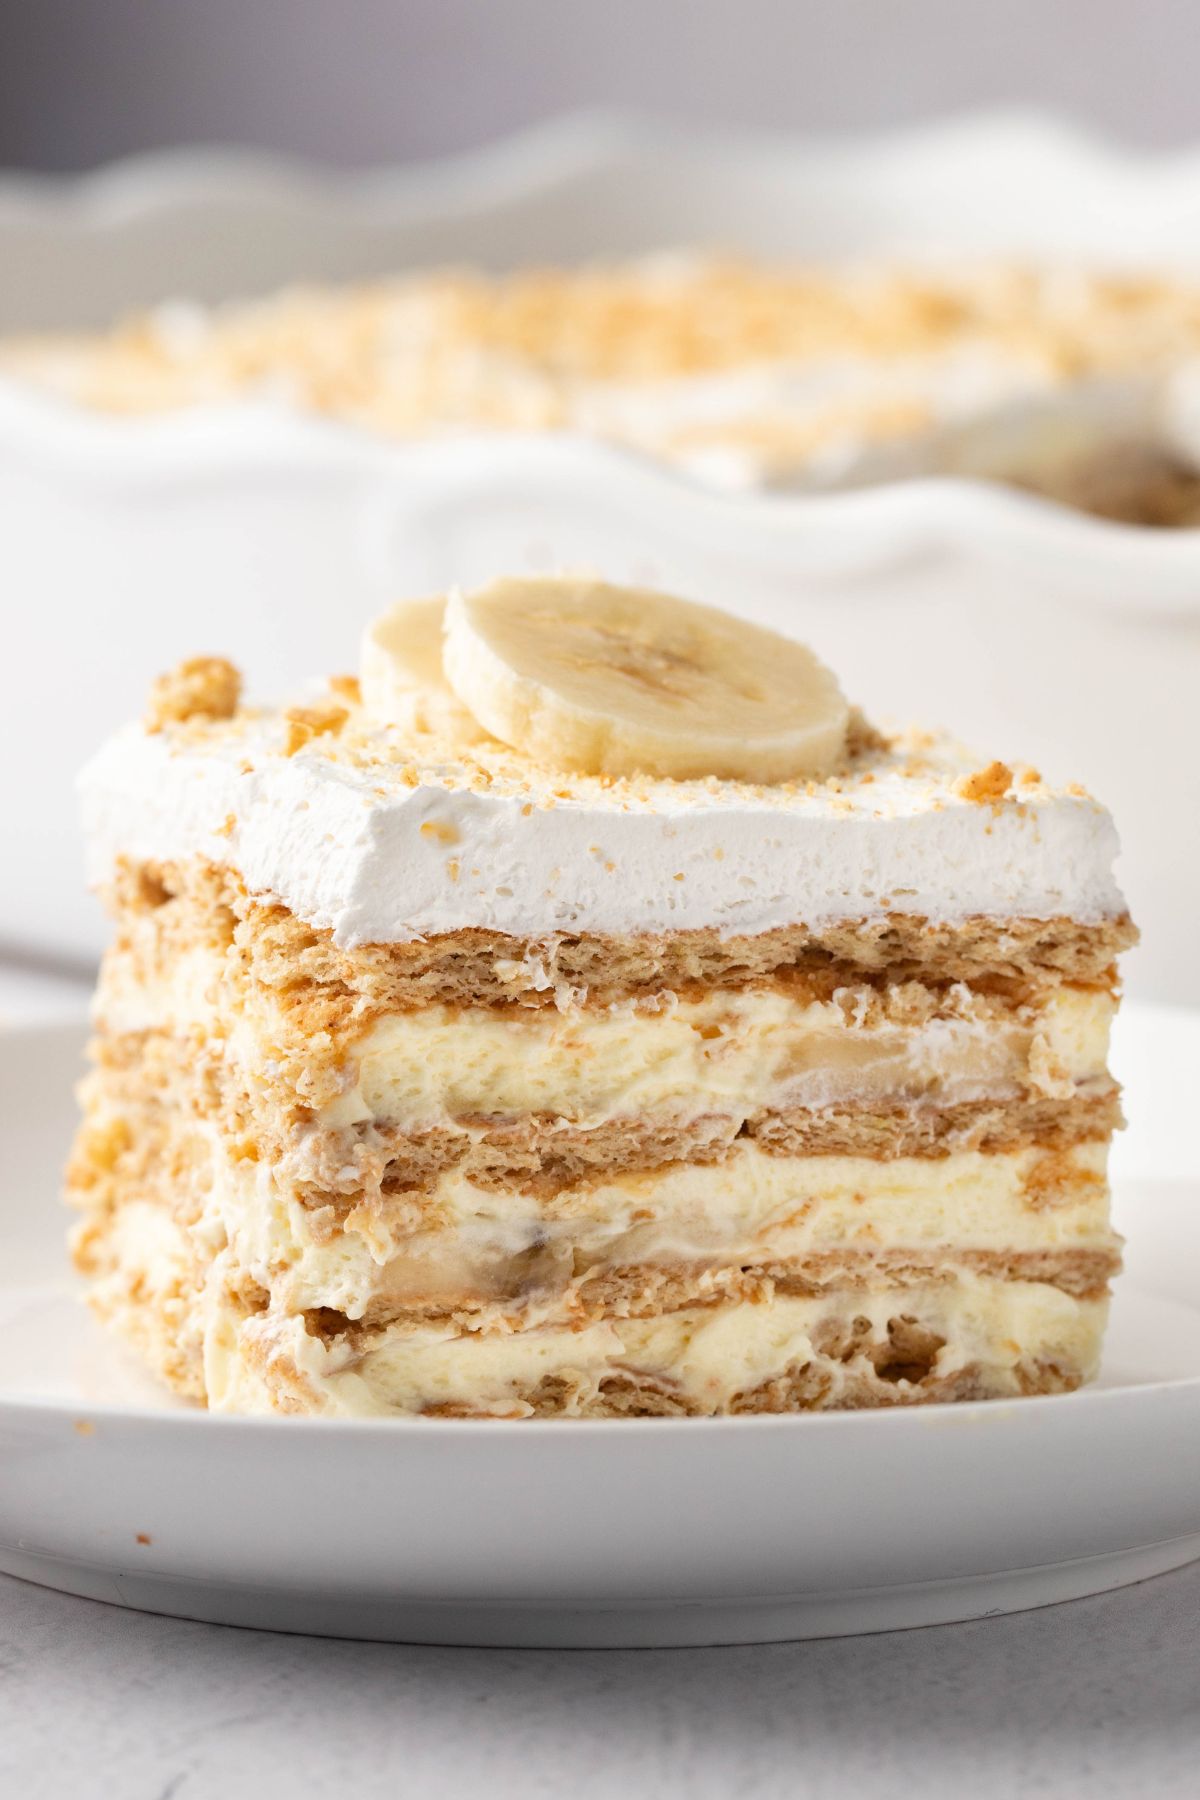
5. Garnish and serve. Garnish the cake with extra banana slices, crushed graham crackers, and caramel syrup if desired. Slice, serve, and enjoy!

Tips for the Best Banana Icebox Cake
Want to ensure your cake turns out correctly every time? Check out these tips:
- Pick the best bananas. Choose bananas that are ripe but not too soft. (A few black spots are fine!) They’re optimally sweet but will still hold their shape well.
- Don’t prepare the pudding! Forget the recipe on the outside of the box. Simply use the pudding mix as directed in the recipe. If you follow the box directions, you’ll add the wrong amount of milk.
- Stick to whole milk. Unless you have dietary restrictions, use whole milk. Its high-fat content will give you the creamiest, richest pudding possible.
- Think thin. Keep each layer of crackers, pudding, and banana thin and even. Doing so will result in a more balanced texture and flavor throughout. When adding the final layer of whipped topping, cover the crackers completely. This will keep them from drying out.
- Give it more chill time. The recipe says 4 hours, but overnight is best. That will give the graham crackers plenty of time to soften and the flavors to meld.
- A few notes on cutting. Use a sharp, clean knife for ease of slicing. (Run it under hot water and dry it completely first for an even easier time of it.) Cut the cake as soon as you remove it from the fridge. It’s easiest to slice when chilled.
- Hold off on the garnishes. Add the fresh banana slices immediately before serving to prevent them from browning. Save the other garnishes till the last minute, too.
Variations
Want to mix things up a bit? Try one of these variations.
- Switch up the pudding. Swap the banana cream for instant vanilla or even chocolate! For a more complex flavor, mix and match the pudding. Use one box of banana cream and one box of vanilla. Just be sure they’re both instant!
- Experiment with different fruits. Try things like strawberries or peaches for a new twist on this old classic. You may want to pair them with different pudding flavors, as well.
- No graham crackers? No problem! Use Nilla Wafers, Teddy Grahams, or another favorite cookie. For an extra rich cake, try Nutter Butters.
- Make an Elvis-style cake. Add a layer of peanut butter between the pudding layers. Then, sprinkle a few chopped peanuts on top of that. For extra decadence, use chocolate graham crackers, too.
- Be creative with the garnishes. Try chocolate sauce, shavings, or chips. Nuts and crushed cookies work well, as does melted peanut butter. The options are pretty much endless.
How to Store
Icebox cakes go, well, in the icebox! That makes storing them a breeze.
To Store: Cover the cake tightly with plastic wrap and refrigerate for up to 4 days. (Best consumed within 1 to 2 days to prevent soggy graham crackers.)
To Freeze: Tightly wrap the ungarnished cake with plastic wrap and foil. Then, freeze it for up to 3 months. Thaw in the fridge overnight before adding fresh garnishes and serving.
Banana Icebox Cake
This banana icebox cake is sweet, creamy, and irresistible! The layers of banana pudding, bananas, and graham crackers simply can't be topped.
12
servings15
minutes300
kcalIngredients
2 (3.4-ounce) boxes banana cream instant pudding mix
3 cups cold milk
2 (8-ounce) containers thawed whipped topping, divided
1 (14-ounce) box graham crackers
3-4 ripe bananas, thinly sliced
optional garnishes: crushed graham crackers, banana slices, and caramel syrup
Instructions
- In a large bowl, whisk together the banana cream instant pudding mix and cold milk until smooth. Let it sit for 5 minutes to thicken.
- Gently stir one container of whipped topping into the pudding until fully combined.
- Spread a thin layer of the pudding mixture on the bottom of a 9×13-inch dish to prevent sticking. Place a single layer of graham crackers on top, breaking them as needed to fit. Add a layer of sliced bananas. Spread 1/3 of the pudding mixture over the bananas.
- Repeat the layers (graham crackers, bananas, pudding) two more times. Finish with a final layer of graham crackers on top.
- Spread the second container of whipped topping evenly over the top layer of graham crackers.
- Cover with plastic wrap. Refrigerate for at least 4 hours (or overnight) to let the graham crackers soften.
- Before serving, garnish with additional banana slices and crushed graham crackers. For added flair, drizzle caramel syrup on top. Slice into squares and serve chilled. Enjoy!
Notes
- Select ripe, not-too-soft bananas with a few black spots.
- Follow the recipe exactly, and don’t prepare the pudding beforehand.
- Use whole milk and chill overnight for the best results.
- Add the banana slice garnishes immediately before serving to prevent browning.


3 Comments
Can you use heavy whipping cream instead of Cool Whip? If so, how many cartons of whipping cream would you use?
The directions say to add pudding for your first layer, yet in the picture, it shows the crackers as the first layer. So is the picture wrong, or is the recipe wrong?
Hi Mark!
Sorry about that – we’ve updated the recipe slightly and that got overlooked.
I’ve fixed it in the recipe box now, so thanks for catching it 🙂
PS. You want to start with the crackers!