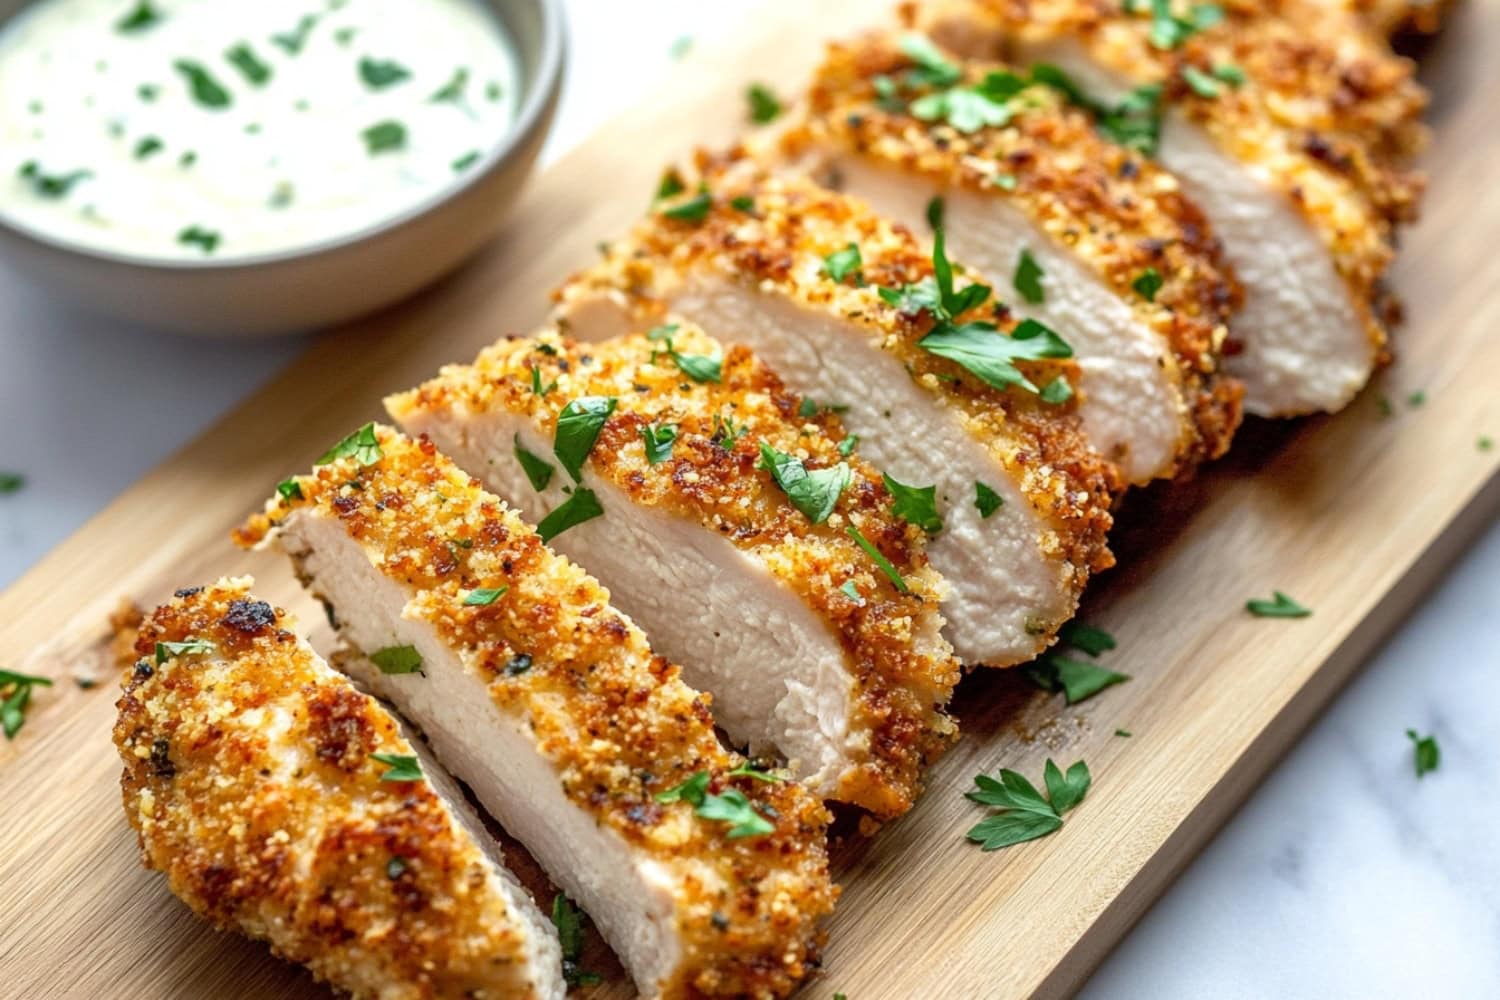


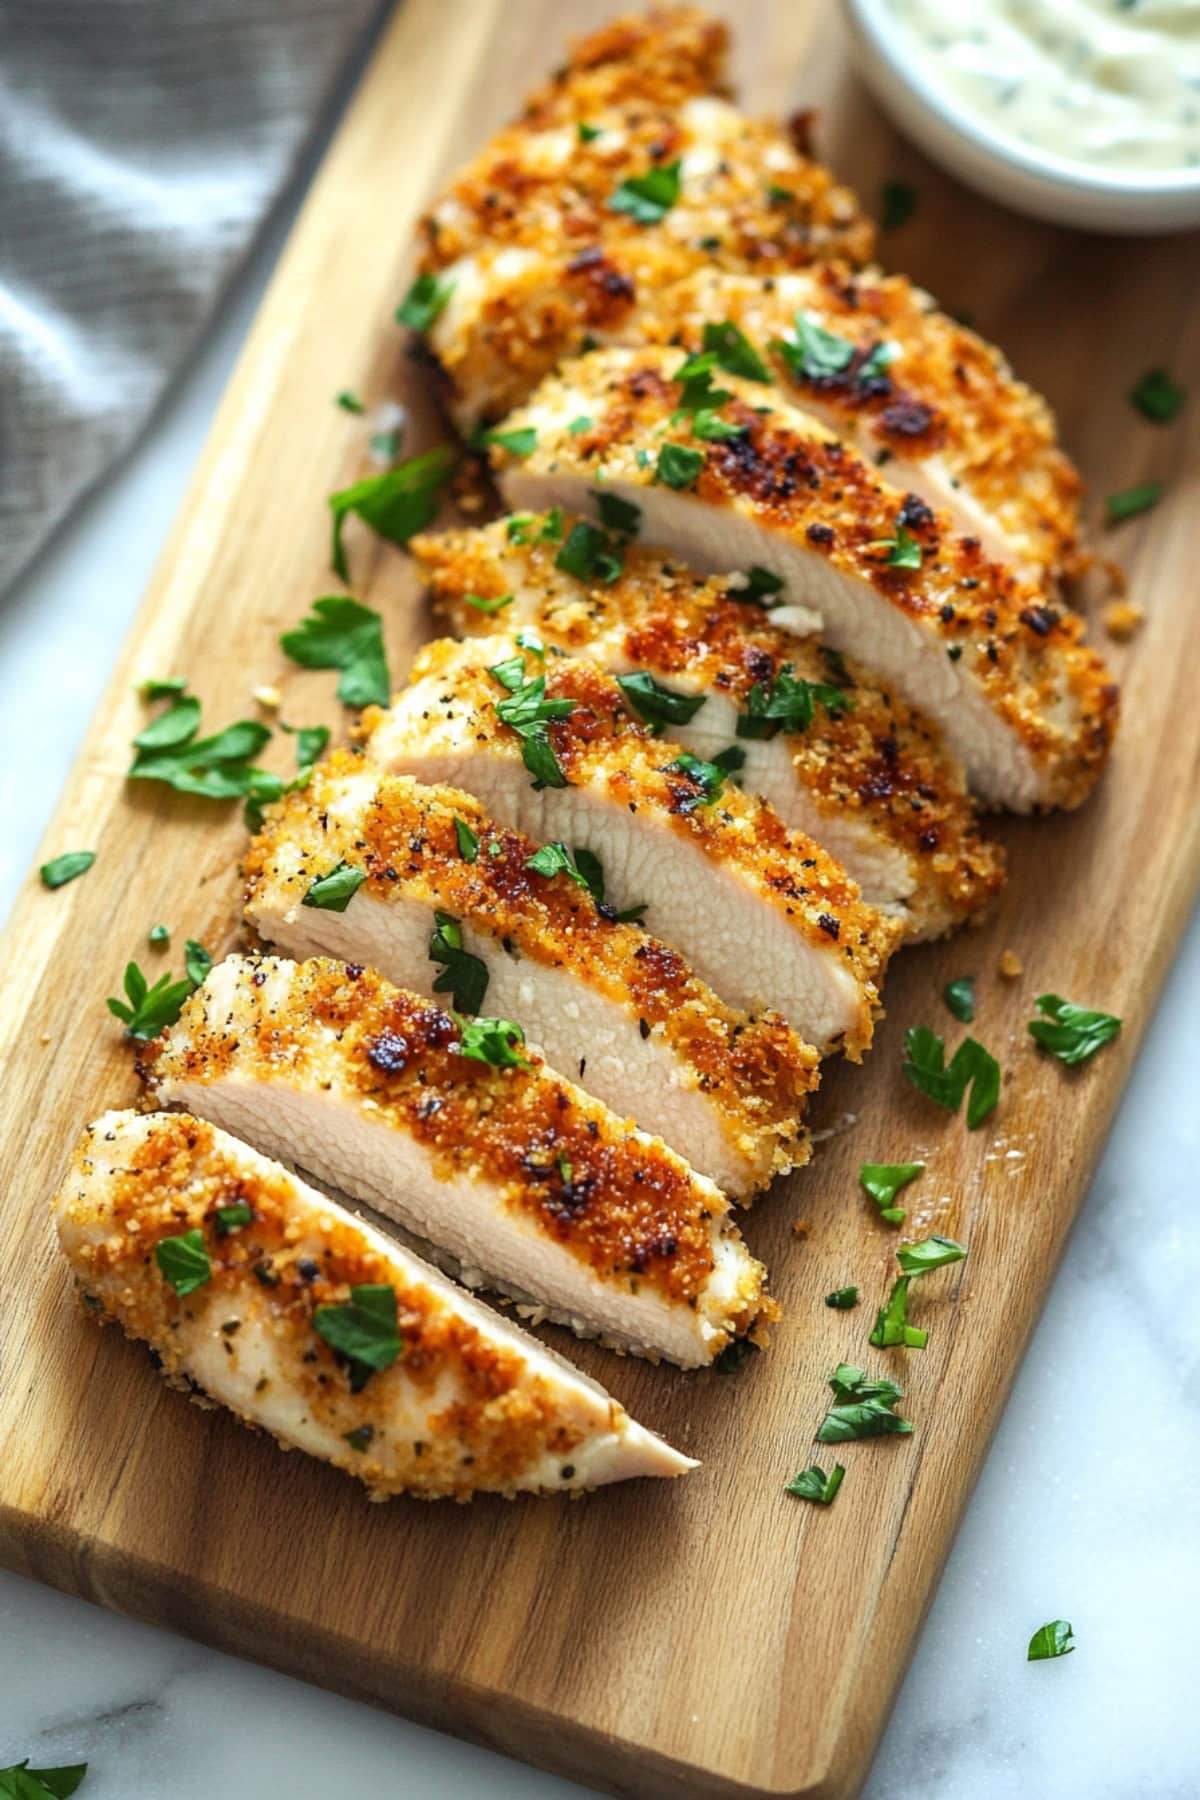
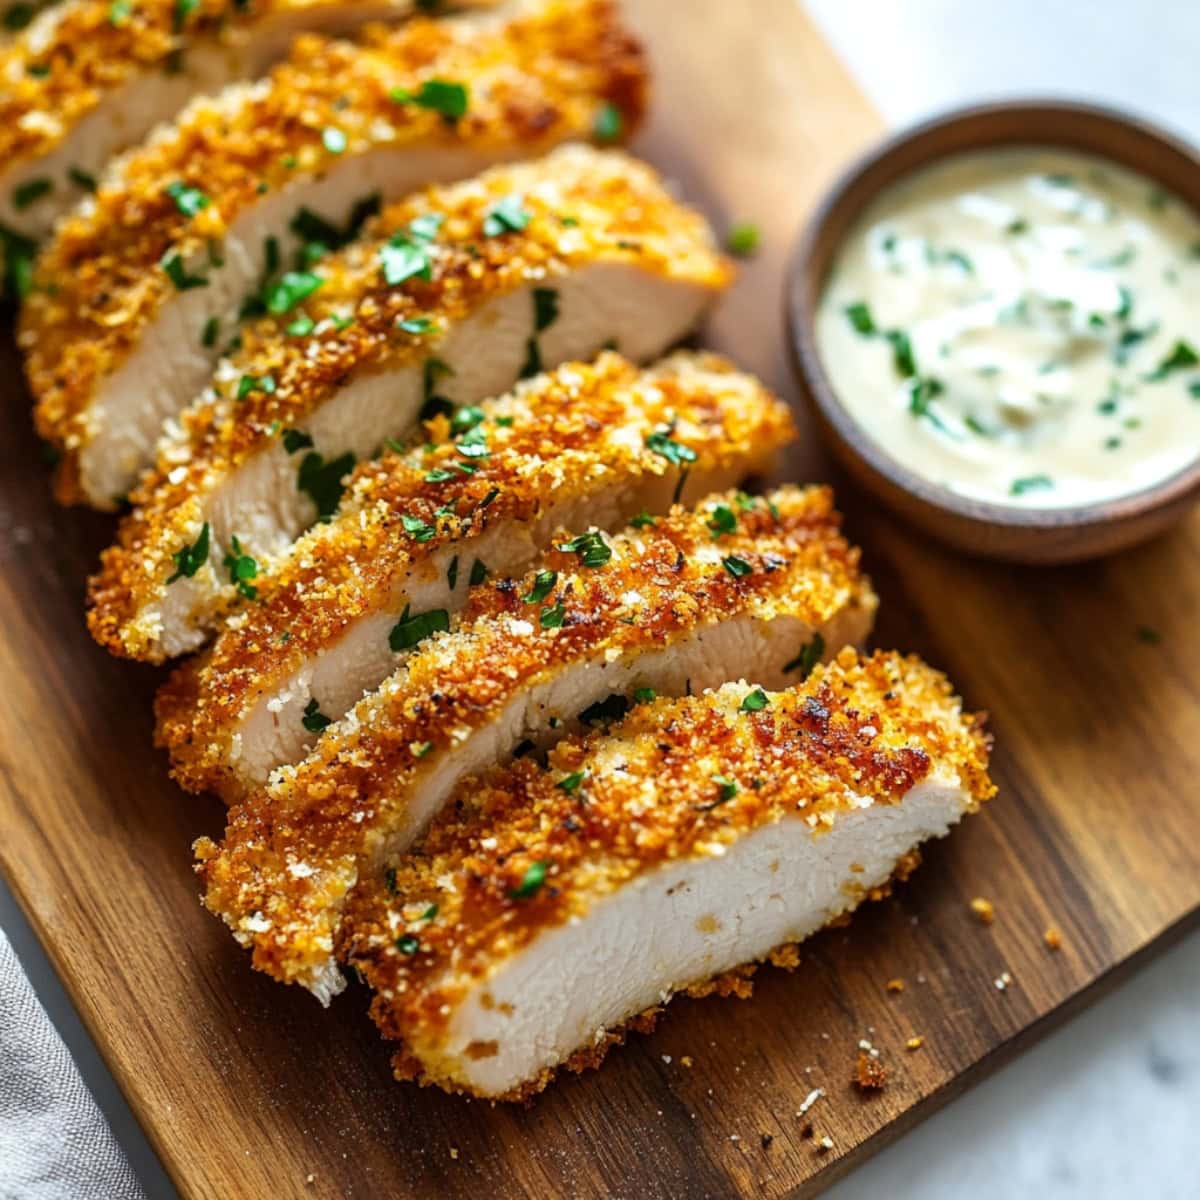
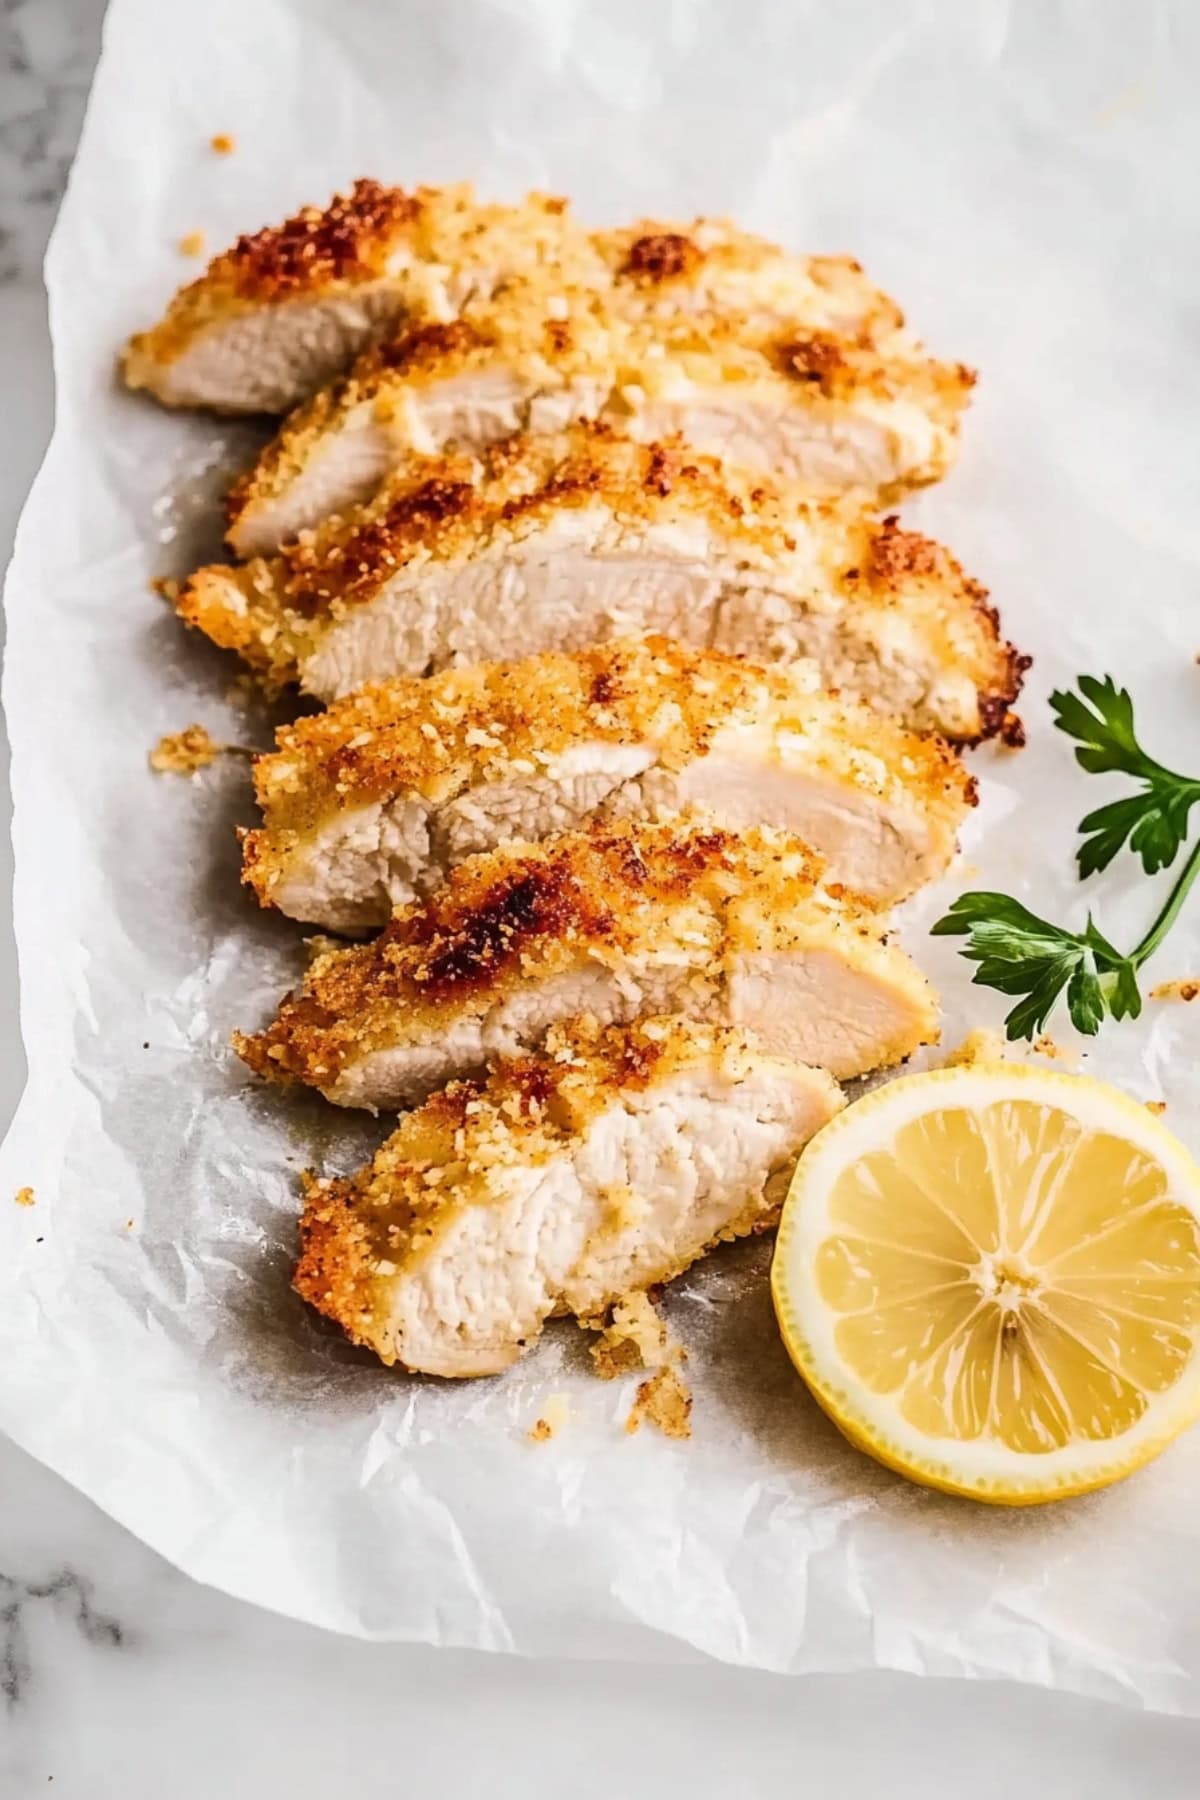
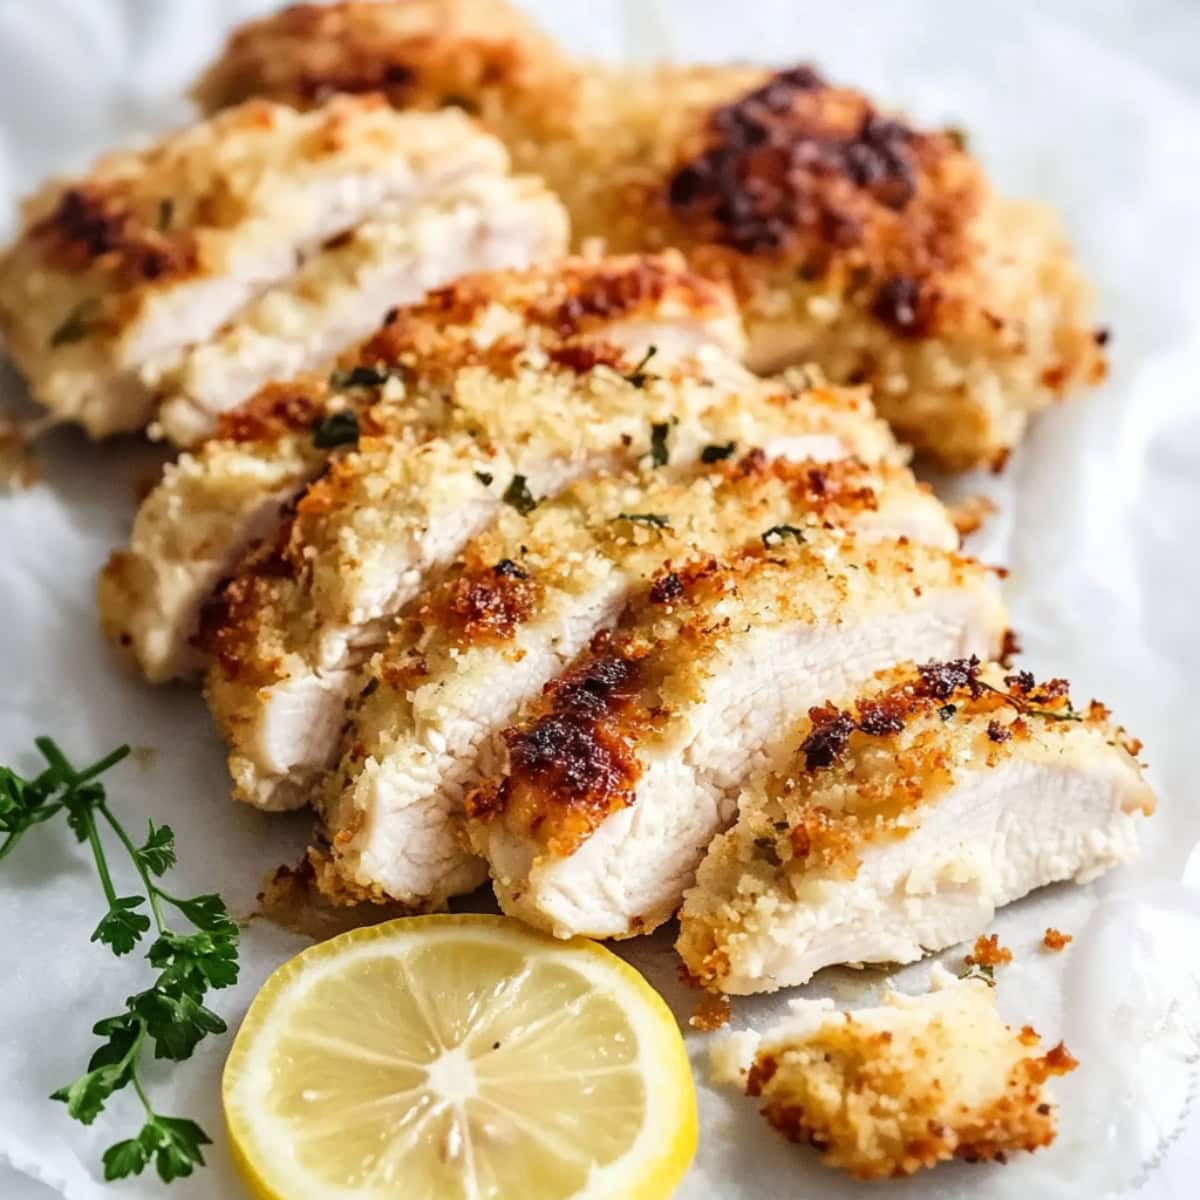
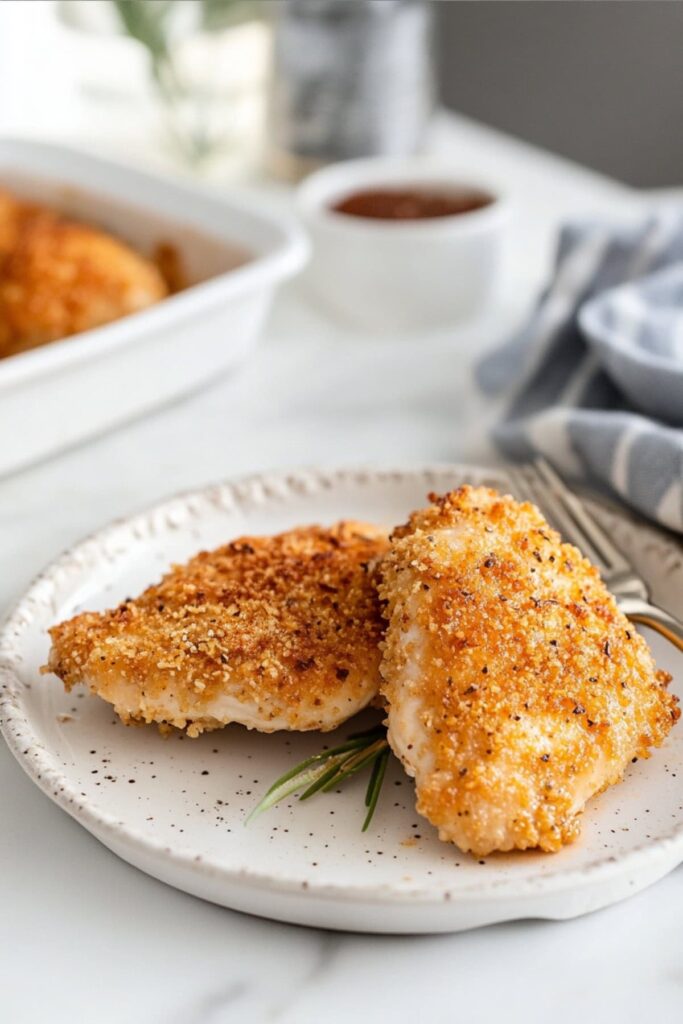
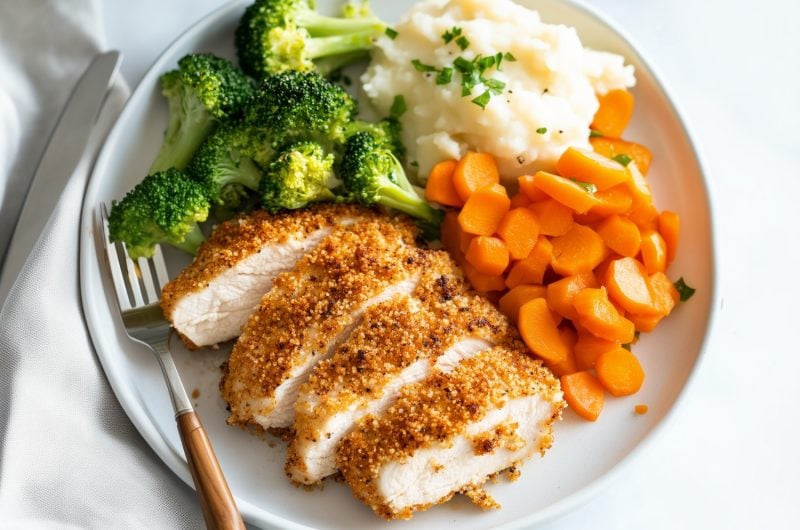
This baked panko chicken feels fancy but takes little to no effort! It’s crispy and juicy, and the golden breadcrumb crust is absolutely out of this world.
But here’s the kicker: it’s ridiculously easy to make. I'm talking weeknight hero status!
WANT TO SAVE THIS RECIPE?
Pair it with your favorite sides, or slice it up over a fresh salad.
Feed a crowd or just cook for yourself. Either way, this dish will deliver!
Why You’ll Love This Baked Panko Chicken
Crispy Perfection: This recipe is all about the panko breadcrumbs and the mayo-coating technique. Together, they create an exceptionally crunchy exterior that stays crispy even after cooling. No sogginess here!
Time-Saver: The recipe requires just 15 minutes of prep and 25 of baking time. It delivers restaurant-quality chicken without the mess and hassle of traditional frying.
Delightfully Savory Taste: The rich combo of Parmesan, garlic, onion powder, and oregano creates a perfectly seasoned, savory bite. It’ll have everyone reaching for seconds and maybe even thirds.
Ingredients
- Boneless, Skinless Chicken Breasts: Tender cuts of chicken provide a lean, juicy protein base.
- Panko Breadcrumbs: Light and airy Japanese-style breadcrumbs create an ultra-crispy, golden crust when baked.
- Parmesan Cheese: It adds a salty, savory, nutty flavor to the breadcrumb coating.
- Seasonings: A blend of garlic, onion powder, dried oregano or Italian seasoning, salt, and pepper. It adds depth, aroma, and a balanced flavor profile. Paprika is optional but provides a hint of smoky warmth and a vibrant color.
- Olive Oil: It helps the panko coating crisp up beautifully in the oven for a satisfying crunch. (Cooking spray will also suffice.)
- Mayonnaise: It acts as a flavorful binder for the breadcrumbs. It also keeps the chicken juicy and locks in moisture during baking.
How to Make Baked Panko Chicken
Follow these simple steps to make baked panko chicken.
1. Prepare. Preheat the oven to 400 degrees. Line a baking sheet with parchment paper or lightly grease it with cooking spray.
2. Coat. Mix the breadcrumbs, grated Parmesan, and seasonings in a shallow bowl or large plate. Stir to combine. Then, pat the breasts dry with paper towels and spread mayo over both sides of each. Firmly press them into the panko mixture to ensure an even coating.
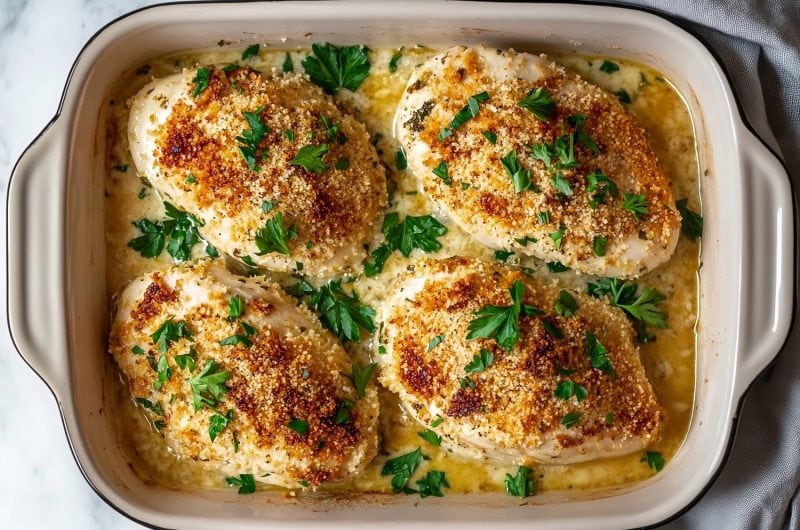
3. Bake. Space the breaded chicken breasts slightly apart on the baking sheet. Lightly drizzle the tops with olive oil, or spray them with cooking spray. Then, bake for 20 to 25 minutes or until cooked through.
4. Broil (optional). For an extra crispy finish, set the oven to broil for the last 1 to 2 minutes. Watch carefully to avoid burning.
5. Rest and serve. Let the chicken rest for 3 to 5 minutes after removing it from the oven. Serve whole or sliced alongside your favorite sides. Enjoy!
Tips for the Best Baked Panko Chicken
Check out these tips to ensure your chicken is *chef’s kiss* every time.
- Get it nice and dry. Always pat the chicken breasts dry with paper towels before adding the mayonnaise. This ensures the coating adheres well and bakes evenly.
- Be generous. Don’t skimp on the salt, pepper, or Parmesan in the panko mix. They’re key to a well-seasoned, flavorful crust.
- Don't skip the spray! This one is in the recipe steps, but it’s worth repeating. Lightly drizzle olive oil or use cooking spray on the panko-coated chicken. Doing so will guarantee the crust turns golden and crispy.
- Take a temp check. Un- or undercooked chicken is a dangerous thing! Use an instant-read thermometer to be sure it’s fully done before removing it from the oven. The reading should be 165 degrees. Overcooking the chicken will make it turn out dry.
- Keep a watchful eye. Broiling for the last 1 to 2 minutes will give it a beautifully golden, extra-crunchy exterior. However, it’s extremely easy to burn it during this step. Don’t leave the oven unattended. Watch it closely while broiling.
- Remember to rest. Let the chicken rest for 3 to 5 minutes after baking. This helps redistribute juices and keeps the meat tender.
Variations
You may also want to try these tasty variations to tweak the recipe.
- Get it nice and toasty. For extra crispiness and flavor, lightly toast the panko before coating the chicken. Toast it in a dry skillet for 2 to 3 minutes before adding the seasonings.
- Add flavor layers. Enhance the panko mixture with a pinch of cayenne for heat. Or add lemon zest for an extra depth of brightness and flavor.
- Jazz up the mayo. Mix in a bit of Dijon mustard before spreading the mayo on the chicken. It adds depths of tangy, delicious flavor to every bite.
- No Italian seasoning? Dried oregano works perfectly, of course. But if you have neither of those, try Cajun seasoning instead. It’ll just make the dish a bit spicier.
- Try tenders instead. You can easily coat and bake chicken tenders instead of breasts. They’re especially popular with kids.
What to Serve with Baked Panko Chicken
Make a complete meal out of this recipe by pairing it with one (or more) of these sides:
- Steamed veggies
- Creamed spinach
- Baked or mashed potatoes
- Glazed carrots
- Pasta
- Side salad
How to Store
Believe it or not, this baked panko chicken stores quite well. It may not fully retain its crispness, but it won’t get super soggy.
To Store: Store the chicken in an air-tight container in the fridge for up to 4 days.
To Freeze: Wrap individual pieces in plastic wrap followed by aluminum foil and freeze for up to 2-3 months.
To Reheat: Place the chicken in a preheated 400-degree oven for 12-15 minutes until heated through. (Increase to 21 to 23 minutes for frozen leftovers.) For best results, place them on a wire rack to allow air circulation for maximum crispiness. Or use an air fryer at 375 degrees for about 4 minutes to restore crispness.
Baked Panko Chicken
This easy baked panko chicken is such a special treat! It's juicy on the inside, crispy on the outside, and downright delicious!
4
servings15
minutes25
minutesIngredients
1 cup panko breadcrumbs
1/4 cup grated Parmesan cheese
1/2 teaspoon garlic powder
1/2 teaspoon onion powder
1 teaspoon dried oregano or Italian seasoning
1 teaspoon paprika (optional, for color and flavor)
1/2 teaspoon salt
1/4 teaspoon freshly ground black pepper
4 boneless, skinless chicken breasts (about 6 ounces each)
1/4 cup mayonnaise
2 tablespoons olive oil (or cooking spray, for crisping the panko)
Instructions
- Preheat the oven to 400 degrees Fahrenheit. Line a baking sheet with parchment paper or lightly grease it with cooking spray.
- In a shallow bowl or large plate, combine the panko, grated Parmesan, garlic, onion powder, oregano or Italian seasoning, paprika (if using), salt, and pepper. Stir to combine thoroughly.
- Pat the chicken breasts dry with paper towels. Spread a thin, even layer of mayonnaise over both sides of each chicken breast. Press each mayo-coated chicken breast firmly into the panko mixture, one at a time, to ensure an even coating. Make sure the breadcrumbs stick to all sides.
- Place the breaded chicken breasts on the prepared baking sheet. Leave a little space between each piece. To help the panko crisp up, lightly drizzle the tops with olive oil, or spray them with cooking spray.
- Transfer the baking sheet to the preheated oven. Bake for 20–25 minutes. Or until the panko coating is golden and crispy and the internal temperature is 165 degrees.
- (Optional) For an extra crispy finish, turn the oven to broil for the last 1–2 minutes. Watch carefully to avoid burning.
- Remove the chicken from the oven and let it rest for 3–5 minutes. Serve whole or sliced alongside favorite sides. Enjoy!
Notes
- Always pat the chicken dry before adding the mayo and panko mixture.
- Season liberally for the best flavor.
- Use a thermometer to ensure the chicken is thoroughly cooked.
- Toast the panko in a dry skillet for 1 to 2 minutes before adding the seasonings.


3 Comments
This is a great and delicious recipe for chicken. My family has asked fir it twice in 4 days.it is so easy and the ingredients are on your pantry. Next time I will try it on pork chops thanks for this change.
Followed exact recipe & it turned out delish , I will be making again but doubling recipe so there are leftovers .?
Used a pork loin roast turned out fantastic. Cooked the roast in the air fryer. Just took a little longer at 350 for 50 Minutes per the instructions on the pork loin roast. Served mashed potatoes gravy, and roasted corn.