Ready to score big at your next football party? This boilermaker chili is the perfect tailgate recipe!
This hearty dish combines ground beef, sausage, beans, tomatoes, bacon, and beer. It’s full of spices and brings the heat!

Boilermaker Chili
It has a spicy, savory, and sweet flavor profile. And it gets even better over time.
Enjoy this tailgate chili with cornbread or quesadillas, or sour cream and guacamole. It’s also delicious on its own.
It’s ideal for football parties, tailgates, or a comforting weeknight dinner.
The surprise ingredient is a splash of beer, which enhances the depth of the chili.
Topped with cheddar cheese and crunchy corn chips, boilermaker chili is nothing short of phenomenal.
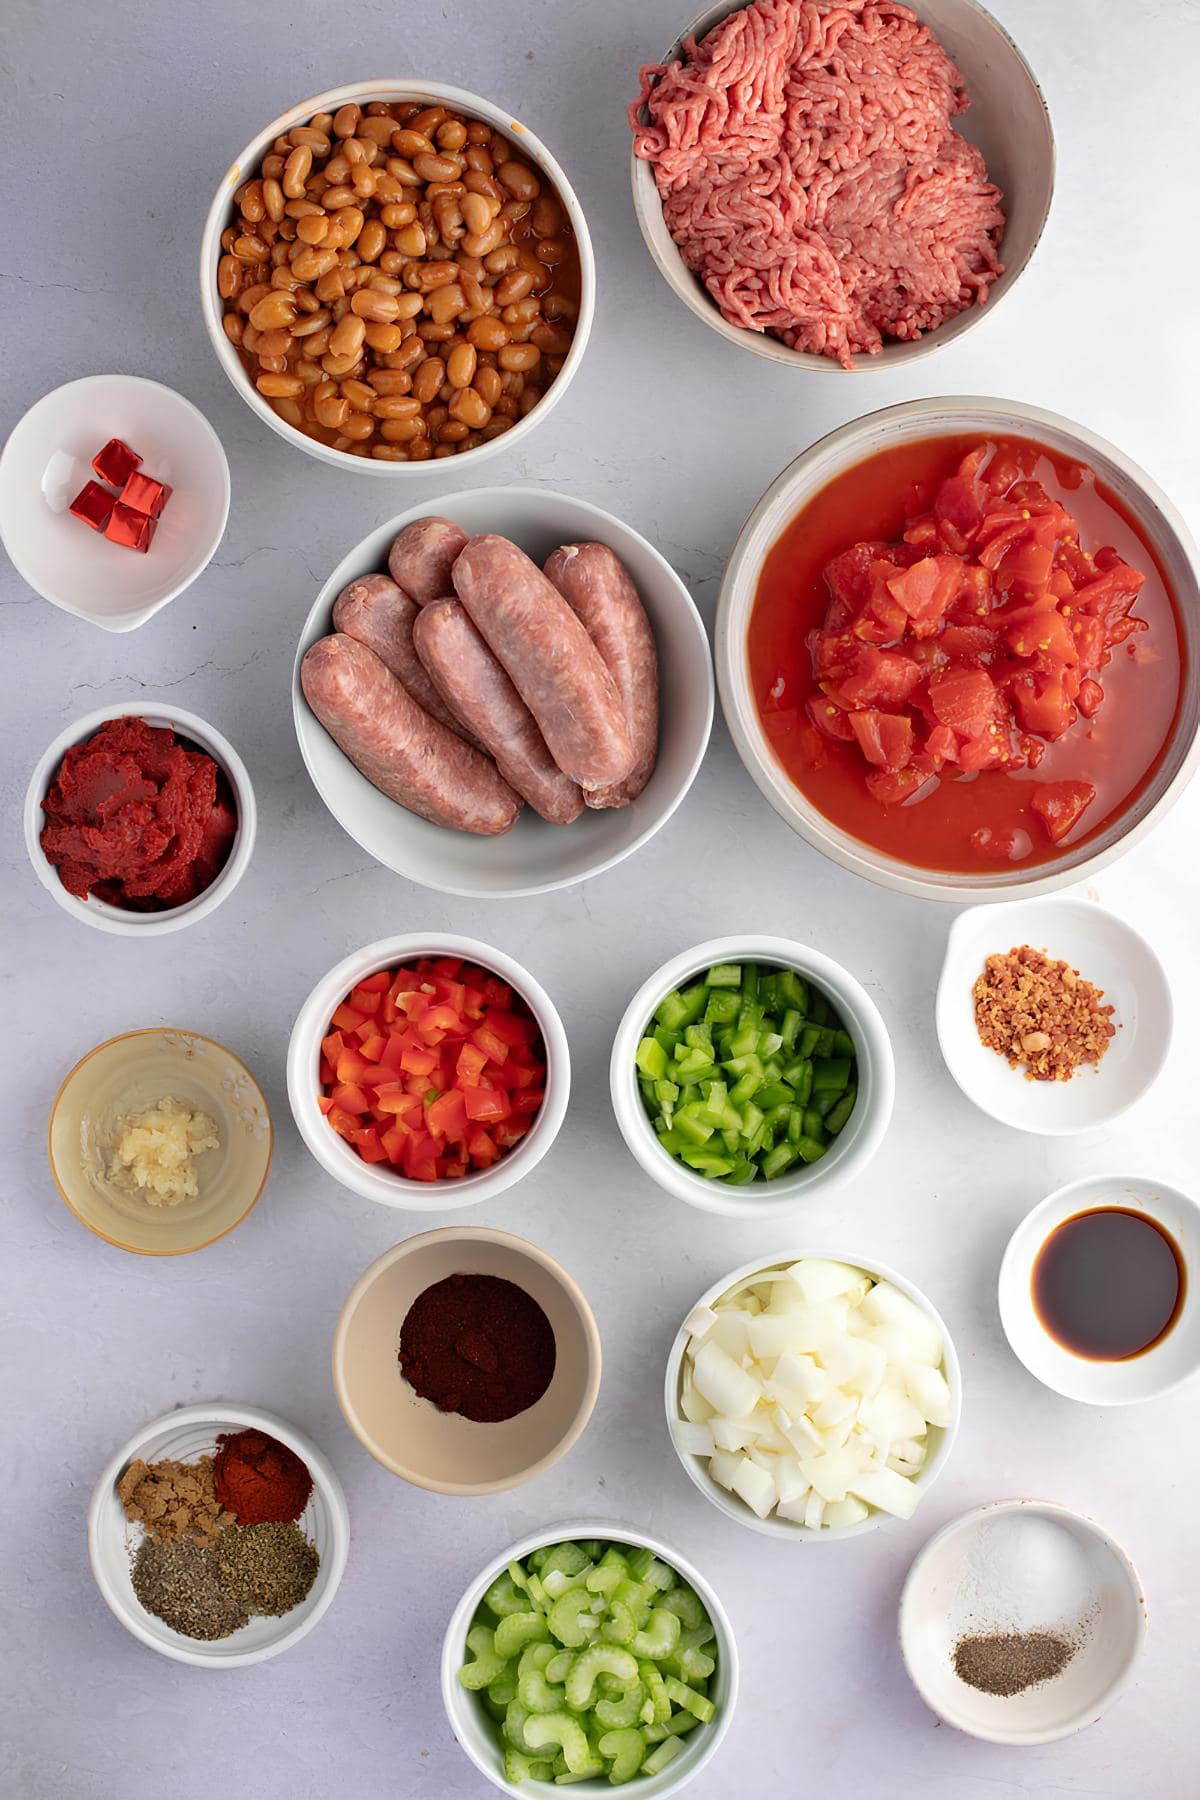
Ingredients
It’s a long list, I know. But if you look closely, it’s all just basic ingredients: beans, canned goods, vegetables, and spices. I’m pretty sure you have these all on hand!
- Ground Meat – Use a mix of ground chuck and bulk Italian sausage for a rich, meaty flavor.
- Beans – Any bean combo works here: kidney, black, pinto, navy, you name it. I use one can of regular and one in spicy sauce for flavor balance.
- Tomatoes – I use diced tomatoes with juice and tomato paste. This gives the chili that rich, thick tomato base.
- Vegetables – Use yellow onion, garlic, celery, red and green bell peppers, and green chili peppers. Chop them up roughly the right size for an easy bite.
- Bacon Bits – For that crunchy, smoky element.
- Beef Bouillon Cubes and Worcestershire Sauce – For added umami.
- Beer – Don’t worry; it won’t get you drunk. It’ll just lend its malty flavor to the chili.
- Chili Powder and Hot Sauce – This is one spicy chili! Add more or less to suit your tastes.
- Seasonings – Chili powder, dried oregano, ground cumin, dried basil, salt & pepper, cayenne pepper, and paprika.
- Sugar – The sweetness balances the heat and enhances the chili’s flavor even more.
- Corn Chips and Cheddar Cheese – For serving.
How to Make Boilermaker Chili
You won’t believe how easy it is to throw this chili together! Just follow these simple steps:
1. Brown the ground meat. Add the ground chuck and Italian sausage to a large pot over medium-high heat. Stir to break the meat apart and cook until it’s brown. Drain the excess grease.
2. Add all of the remaining ingredients. Pour the beans, tomatoes, vegetables, bacon, beer, sugar, spices, and seasonings. Stir well to combine.
3. Let your chili simmer. Once it’s boiling, cover the pot and let your chili simmer on low heat for at least 2 hours. Stir the chili regularly, scraping the bottom and sides to ensure even cooking.
The longer it simmers, the better the flavor. If you can, give the chili an extra 30 minutes on the stove!
4. Season more if needed. Taste the chili and season it with salt, pepper, and chili powder, if needed. If you want more hot sauce, spices, and seasonings, this is the time to add them.
5. Serve and enjoy. Ladle boilermaker chili into bowls and top it with corn chips and shredded cheddar cheese. A dollop of sour cream and guacamole is delicious, too.
Let’s eat!

Tips for the Best Chili
Cooking a large pot of boilermaker chili sure seems daunting. But it’s easier than you think! Stick to these tips, and you’ll be fine.
- Buy bulk Italian sausage. It doesn’t come in links and casings, so it breaks apart easily.
- Chop the veggies to the same size. This way, you can eat them all in one spoonful.
- Double your pleasure. Do this technique If you’re worried the seasonings will be too overwhelming. Add half of the seasonings first, then give it a taste. Season it again as needed right before it’s done cooking.
- Go easy on the Tabasco. Add less hot sauce if you don’t like your chili too spicy.
- Get stirring! Scrape the bottom and sides of the pot to keep the chili from burning. Add water or broth if needed.
- Take a Crockpot shortcut. Once the ground meats have browned, throw all the ingredients into a Crockpot. Cook it on low heat for 8 hours or overnight.
- Using dried beans? Let them soak in water overnight and boil them beforehand. If you add the soaked beans directly to the chili, cook it longer.
Variations
This chili is so much fun to customize! Try these tasty variations:
- Meat swap. Replace the ground beef and Italian sausage with ground turkey or venison.
- Chunk it up. Use cubed chuck or pork instead of ground meat for a chunkier chili.
- Switch up the spices and seasonings. You can throw in or omit whatever you like. Although, I find the mix in this recipe already perfect.
- Can’t have beer? Swap it out for beef broth or water for a gluten-free version.

Serving Suggestions
Serve your chili with sour cream, guacamole, chips, and shredded cheddar cheese. Nothing beats this classic combination.
Quesadillas, cornbread, buffalo wings, and loaded nachos are also tried and tested chili companions.
For beverages, consider ice-cold beer or a pitcher of margaritas.
Have leftover chili? Bake a potato and smother that chili on top.
How to Store & Freeze
Follow these steps to store your leftover chili:
To Store or Make Ahead: This boilermaker chili tastes even better the next day. I highly recommend you cook it the day before serving it!
To store it, allow the chili to come to room temperature. Store it in an air-tight container and refrigerate for up to 4 days.
To Freeze: Boilermaker chili freezes beautifully. Just transfer it to freezer-safe bags to keep them safe from freezer burn. Squeeze out as much excess air as you can before sealing the bags.
Label the bags accordingly and freeze them. It’ll keep well in the freezer for up to 6 months.
To Reheat: Let it thaw completely on the counter and reheat over medium-low until boiling.
