

Is your 6-inch springform pan is collecting dust at the back of the cupboard? Time to put it to use!
With this simple 6-inch cheesecake recipe, that old pan of yours will serve its purpose.
While I have nothing against regular cheesecake, to me, New York cheesecake is hands down, the best.
There’s no denying the decadence of this cake! It’s so good, it’ll make you cry. It sounds so cheesy, but it’s true!
You’re probably wondering, why just 6 inches? Why not make a full-sized, 9-inch cheesecake instead?
Don’t be fooled by its size. Just because it’s small doesn’t mean it’s forgettable.
New York cheesecakes are outrageously rich and dense, so one small slice is more than enough.
Drooling yet? I know I am! Let’s get started.
6-Inch Cheesecake Recipe
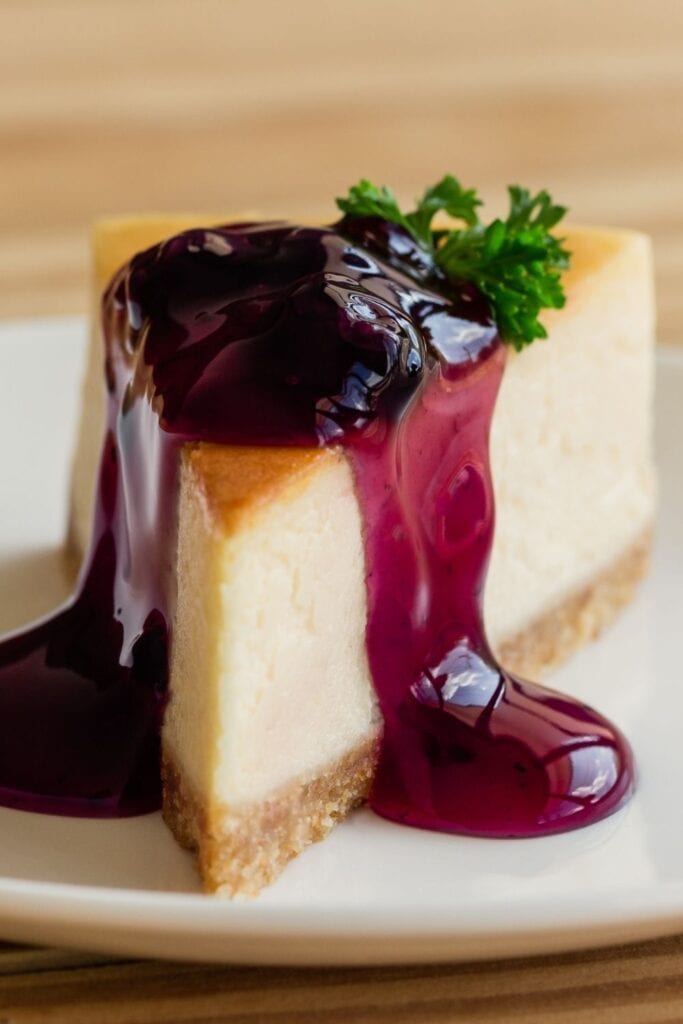
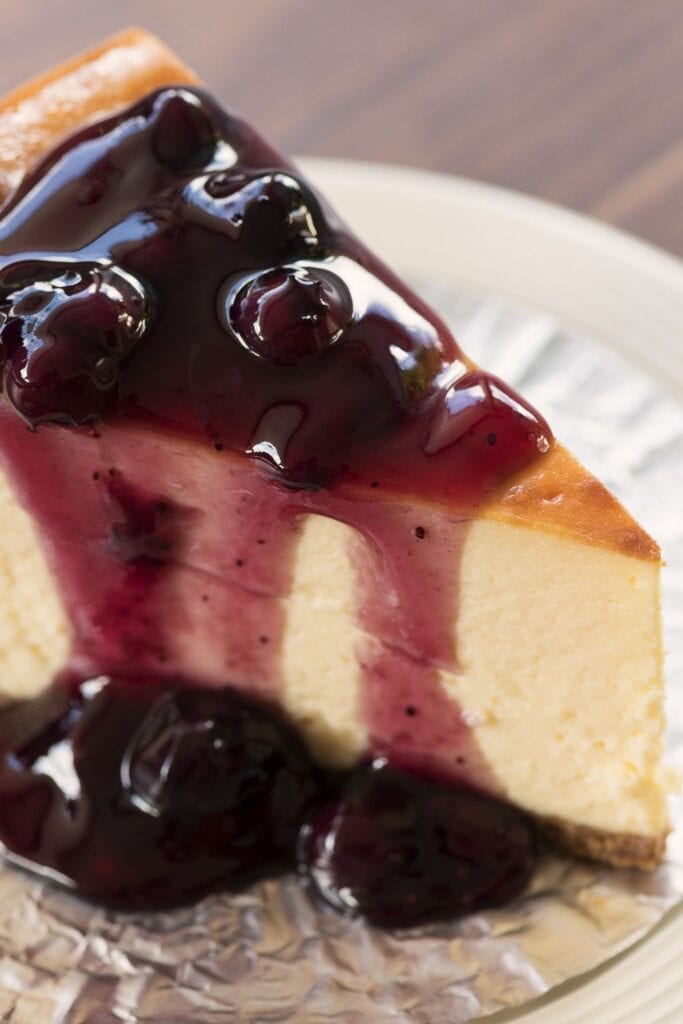
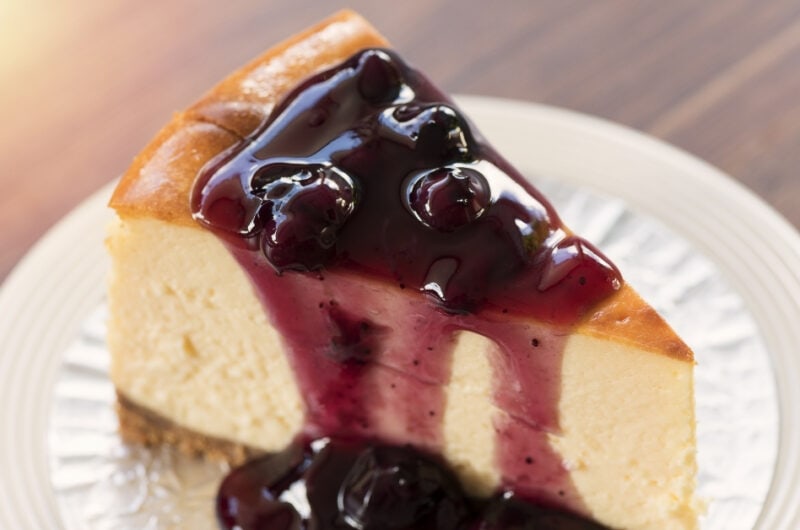
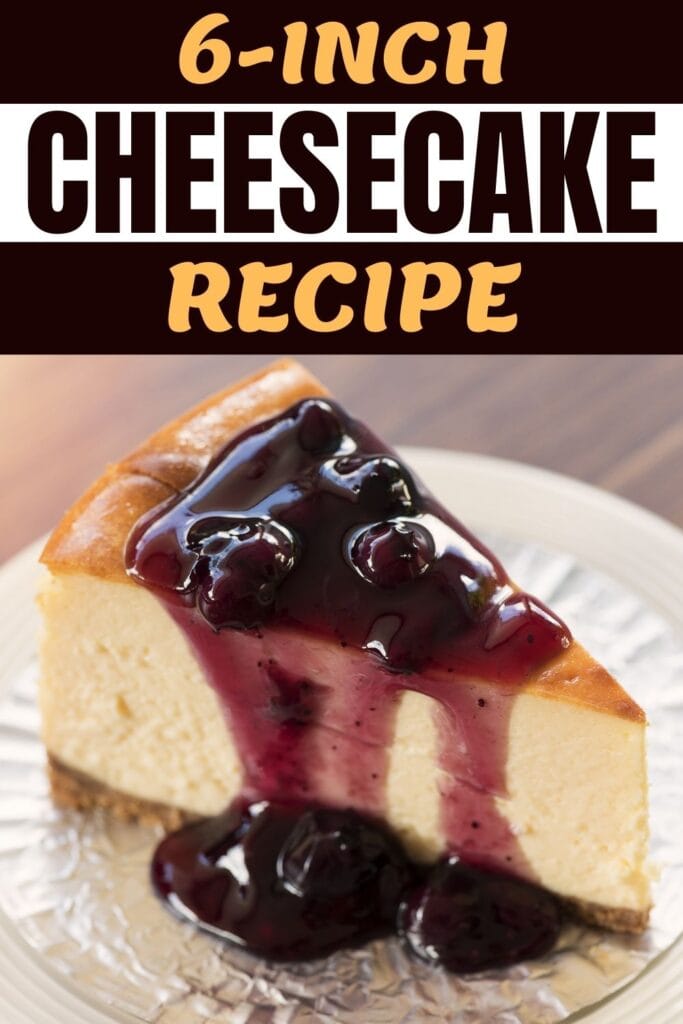
This 6-inch cheesecake recipe is ultra-thick, creamy, and melt-in-your-mouth delicious. I died and went to cheesecake heaven!
It’s rich and velvety with a buttery, crumbly graham cracker crust to boot. It’s everything you can ask for in a cheesecake.
Best of all, it’s a cinch to make. Cheesecake recipes can be intimidating, but this one isn’t. I promise!
I even have a handful of tips below to guarantee cheesecake success.
What Pan Is Best for This Cheesecake?
Unlike flour-based cakes, cheesecakes are very delicate, and thus can’t be inverted.
That said, you’ll need a special pan to bake it in.
That’s where a springform pan comes in. The fact that the sides are detachable makes it easy to remove the cake from the pan.
This recipe calls for a 6×3-inch springform pan. It has just the right size to hold in the batter so that it doesn’t overflow as it bakes.
Tips for the Best Cheesecake
How to Avoid Cracks
While cheesecakes are relatively easy to make, they’re prone to cracking.
Honestly though, even if this happens, your cheesecake will still taste amazing.
A cracked cheesecake isn’t the end of the world, but if you’re keen on achieving that smooth surface, here are a few handy tips:
- Do not overbeat the batter. Beating too much incorporates too much air into the batter, which will cause it to rise higher than it should. It might look pretty in the beginning, but as it cools, it will start to sink in the middle and form cracks on the surface.
That said, you’ll want to stop beating as soon as the ingredients are well-combined. I know it’s frustrating to see those lumps, but they’re really unavoidable.
- Do not open the oven door. You can do this towards the end of baking to test for doneness, but not early on. Opening the door causes hot air to escape, altering the oven’s temperature. Drastic changes in the temperature will cause cracking.
- Do not overbake the cake. If you’re worried that it’s still jiggly in the center, don’t! That’s what it’s supposed to look like. It will continue to cook as it sets.
Many recipes will also call for baking the cheesecake in a water bath.
That is, placing the pan in a bigger pan filled with water halfway.
While this recipe doesn’t call for that, you can certainly try it to ensure even baking.
Other Tips
- Use room temperature cream cheese and eggs so they’ll blend easier. Cold ingredients are harder to incorporate, and will most likely create lumps.
If you forgot to take them out of the fridge, that’s okay, it happens to me all the time!
Just submerge the eggs in hot water for several minutes.
For the cream cheese, just microwave it on low power at 10-second intervals until it’s at room temperature.
- The easiest way to test for doneness is to use a digital thermometer. It should read 150 degrees Fahrenheit.
If you don’t own one, jiggle the pan. The edges should be firm and brown, but the middle should still be slightly jiggly.
Serving Suggestions
This cheesecake recipe is like a blank canvas, and there are limitless ways to dress it up!
These toppings won’t only give your cheesecake more flavor and character but will also hide the cracks.
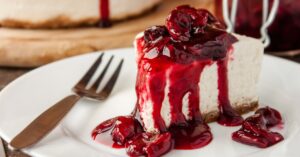
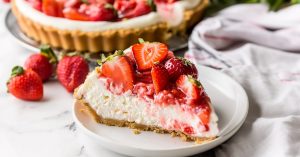
- Fresh fruits
- Fruit preserves
- Chocolate or caramel sauce
- Whipped cream
- Limoncello
- Crushed candy and cookies
How Many Will This 6-Inch Cheesecake Feed?
You’d think this tiny cake will only serve a couple, but it can feed more than that!
This small cake is big on richness and flavor, so it only takes a thin slice to satisfy your taste buds.
This cake lasts for about 3 days in my household.
What is the Difference Between a New York Cheesecake and Regular?
New York cheesecakes are known for their ridiculously dense consistency and rich flavor.
Unlike regular cheesecakes, this one’s so thick and creamy, it will stick to the roof of your mouth!
The secret to its texture is cream cheese – a lot of it. More eggs also contribute to its density.
Other Cheesecake Recipes to Try
Junior’s Cheesecake
Cheesecake Brownies
Philadelphia 3-Step Cheesecake
Philadelphia No-Bake Cheesecake
Mini-Cheesecake Bites
6-Inch Cheesecake Recipe
6
servings15
minutes35
minutes382
kcalIngredients
- For the Crust:
2/3 cup graham cracker crumbs
2 tablespoons granulated sugar
3 tablespoons unsalted butter, softened
- For the Cheesecake:
12 ounces cream cheese, room temperature
1/4 cup granulated sugar
2 large eggs, lightly beaten
1/2 teaspoon pure vanilla extract
2 teaspoons cornstarch
1/3 cup sour cream
Instructions
- Preheat the oven to 350 degrees Fahrenheit.
- For the crust, combine the graham cracker crumbs, 2 tablespoons of granulated sugar, and butter with a fork. Press the mixture firmly into the bottom and sides of a 6-inch springform pan. Bake the crust for 6 minutes. Set aside.
- For the cheesecake filling, beat together the cream cheese and sugar until light and fluffy. Beat in the eggs, vanilla, and cornstarch until combined. Stir in the sour cream until the batter is smooth and free of lumps.
- Pour the batter into the crust and bake at 350 degrees Fahrenheit for 35 minutes. Let the cake cool in the oven with the door slightly open for 3 hours.
- Refrigerate until ready to serve. Top with fresh strawberry slices. Enjoy!


Followed the directions, even with the uncertainty of not doing a water bath, and it came out perfect!!! No cracks and the taste was exactly how one would expect. 10/10 will make again!!
What is the baking time? 3 hrs 35 min or 35 Min – you list both
Hi Iain, the baking time is 35 minutes, and then you’ll want to let the cheesecake chill for 3 hours!
Looks Yummy! Love the size for small family. Will surely be doing this one.
Hi Jean, I hope you and your family enjoy it!
This is a PERFECT 6/7 inch cheesecake recipe. I have made the filling as written 2x and then I just made it in three variations (plain, espresso, and peppermint white chocolate) and they all came out amazing! I do use a different crust simply because I like a shortbread crust, but otherwise it’s a phenomenal recipe! Thank you!!!!
fellow runner and book reader here as well 😉
Hi Beth, you made my day, and I’m so happy to hear you loved the cheesecake! It’s one of my very favorite recipes! 🙂
I was a little afraid of trying to bake a cheesecake at a lower altitude and made with store bought cream cheese. This recipe worked so well and was so easy, I’ll be making cheese cakes often.
The reason I was making a cheesecake, is that a friend of mine has Celiac Disease and cannot have any gluten at all. I made the crust using toasted pecans and hazelnuts instead if graham cracker crumbs. My husband informed me that I need to use that crust all the time.
Hi Colleen!
So glad the recipe worked out for you.
And what a fun crust idea 🙂 I’ll have to try that next time!